(This article was originally published in “Games
International”, issue #5 and is reproduced here with the permission of Brian Walker,
the former GI editor)
Britannia
Graham Staplehurst gives one man’s angle on a popular
historical game that is already regarded as a classic.
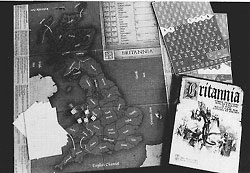
Britannia is a game for three to five players (but four is the most suitable) designed
by Lewis Pulsipher. It is based on the known history of Britain between 45AD and 1085AD,
but enables the players, together with a little help from the luck of the dice, to
recreate that history in their own manner.
Lew Pulsipher is well known for his scholarly devotion to history and, though an
American, evidently knows a good deal more about the origin of the ‘English’ and
other people of Britain than most people who live here (like me!). However, I’ll
leave the purely historical aspect of Britannia for now and describe the game in a little
more detail.
The game consists of a board depicting the island of Britain (including the Hebrides
and Orkneys) divided into 37 areas and surrounded by six seas. Lurking off the board are
the lands of Gaul, Scandinavia and Erin. Initially, the island is peaceful, with a
scattering of British Celtic tribes portrayed in confederations such as the Belgae, the
Welsh and the Brigantes. Suddenly, from Gaul, comes the fleet bearing four Roman legions
with their auxiliaries on the command of Emperor Claudius. Fifteen units land on the
southern shores of Britain…
The Destiny Of An Island
This is just the first of many invasions inflicted upon Britannia by successive
nations. Some are massive and sudden, like the Romans and Danes; some are slow and
insidious like the Irish. All affect the game to a greater or lesser degree as existing
inhabitants attempt to stave off the invaders or channel their lust for territory in
another direction. For this is a game of territory, and the trick of winning is holding
just enough to achieve your individual objectives. Stretch too far and you’re
vulnerable – pile your units up and watch them die from lack of supplies.
Each player controls four nations, a nation being a more or less coherent group of
people with a unified aim. The Belgae, for example (a quarter of the Blue faction),
represent the Celts of lowland England: the Trinovantes, Catuvellauni, Dobunni and Iceni
among others. The game notes delineate the aims of the nation in strict terms, awarding
victory points for achieving different aims. The Belgae must hold areas after the fourth
turn to score points, and also get points for destroying either Roman armies as they
advance north or Roman forts left behind. Meanwhile the Roman nation (the first of the
Purples, appropriately enough) gets points for invading all English, Welsh and southern
Scottish areas and for holding on to its forts, so the Belgae do well to make it through
the first turn in games I’ve played. Thus Blue is set against Purple and command of
territory crucial, for no matter how many battles you win, if you haven’t held enough
areas, you won’t win the game.
This aspect of the victory criteria is essential for balance and to ensure that
players must mix outright warfare with judicious diplomacy. The Brigantes, Welsh and
Picts can all choose to submit to the Romans rather than be wiped out, safe in the
knowledge that the collapse of Rome will call all the legions home after Turn Five,
leaving behind only the weakened civil population to defend against the waves of Germanic
invaders.
In addition to the simple equation of areas held = support and victory points, there
are two other basic rules. The first is that only one nation can occupy an area: if
another enters they must fight until one withdraws or is eliminated – even if the units
belong to different nations of the same player. The second is the way that combat is
dealt with. Each side rolls one die for each army present and kills an opposing army on a
5 or 6 – modified for terrain and special ‘enhanced’ armies such as cavalry and
Roman legions.
Thus far the game is simple – so what makes it exciting? The re-creation of the
history of the land we live in is a lively subject and one which continues to enthral me
after many games. It’s the eternal ‘What if?’ historians like to ask: what if
Harold was defeated at Stamford Bridge or won at Hastings? What if Arthur drove back the
Saxons for good? What if the Great Army of the Danes pressed its attacks on Wessex? All
these points are elegantly handled in the game through three mechanics (none of which
detract from its essential simplicity). There are the specially designed victory
objectives mentioned earlier; there are leaders to gather great armies and enhance their
fighting power; and there are special rules for particular situations.
The victory point objectives can be great motivators. Take the Welsh, for example.
They score 8 points for holding all of Wales (and this includes Devon and Cornwall) in
Turn Seven; they can also score a massive 6 points for taking York at any point in the
next two turns. Consequently, the Welsh always make a big effort to sack York and end up
dividing the Angles. But then what do they do with their army in York – send it home to
defend against menacing Irish and Saxon armies, or maintain it as a field army to keep
the nations in England from getting overly powerful? And how should the Angles plan – to
defend York heavily and deny the Welsh the points, at the risk of losing perhaps 30%-40%
of their population, or concentrate elsewhere and let the Welsh take it easily?
Leaders can be very useful. Allowing nations to stack up armies for invasions, giving
50% extra movement and adding one to the die roll in battle, they are scattered thinly
for the most part and must be used carefully, particularly by smaller nations. King
Arthur, for example, will lead the Romano-British against the Saxons, Angles and Jutes,
gaining points for every enemy killed. But if he leaves himself exposed and gets killed,
the victor wins 3 points for themselves. At the end of the game, 5 points are at stake
between Harold, William and Harald Hardrada the Norwegian for being King of England.
Finally there are the additional rules. These cover everything from raids, when armies
can attack and then return safely from whence they came, to the election of Bretwalda or
overlord of England before the strong Kings arose. Trying to remember all the rules,
together with all your own victory point objectives, and your opponents’, and
thinking ahead to where the next invader is going to appear all make for a game where
you’re never really sure what’s going to happen next.
An Anvil Of Blood And Terror
So, now you have an idea of how the game is played, let us progress to your first
game. How do you win? I hope that the general maxim given above will be a start, but
there are four different factions in the game all requiring a slightly different
approach. Here are some hints which might just help you do a bit better.
THE PURPLE FACTION
- Romans
- Romano-British
- Scots
- Dubliners
- Norwegians
The Romans have perhaps more decisions to make than any other nation in the game. They
get the most points-per-area for penetrating to the heart of Albion (that’s Scotland,
except the Scots haven’t got there yet) but this will generally mean they have to
by-pass Wales and it can also leave them with too few defences down south. Despite the
fact that Romans move further each turn than other armies, their mobility is not
unlimited and to get additional points when the legions withdraw the Roman player must
protect southern England, Cheshire and York.
If you plan on going north, you must reach York in the first turn while eliminating as
many Belgae as possible. Try to take out the Brigantes in March and Cheshire as well, and
defend the western flank against an early Welsh raid. Don’t despair if you lose two
or three armies early on through others’ lucky die rolls. An alternative strategy is
to go for Welsh submission, since getting all of Wales will net you 3 points anyway –
more than risking going against the Highlands in Scotland. Welsh mountains are a good
defensive base for the Romano-British to take over.
If you go north, this should weaken the Picts and assist your Scots somewhat,
especially if you can wear the Brigantes down to a token presence. It sometimes pays to
make a deal with the Welsh regarding the latter. The Scots’ invasion with King Fergus
must push the Picts back after their raiding. Skye is the hinge of Scotland since it
borders both western seas, but Dalriada remains the centre of the kingdom. If the Scots
look doomed through ill luck, use them to try to eliminate the Brigantes completely.
The second two Purple factions can also help each other. The Dubliners’ big
advantage is moving after the Norsemen, so they stand every chance of getting both York
and Cumbria on their big invasion turn. It is often advantageous for both Scots and
Dubliners to bide time at sea when small numbers of invaders are introduced, landing them
only in the major invasion. Obviously, empty spaces are often worth taking to get a
foothold and start to build population.
After their invasion, the Dubliners should attack Angles and Danes in the area to
weaken the north for Harald’s forces, and aim to retreat into Lindsey and Pennines.
They can emerge in the last turn to retake York and Cumbria while keeping out of
Harald’s way when he needs to score points. The Angles are a problem since they will
try to eliminate or weaken Harald at any cost, in order to assist Duke William’s
chances of becoming King.
The Norwegians should be able to score most of their initial invasion points with
Dubliner help. Try to push well south on the first stage of the invasion so that Harald
can retreat further north and stay out of others’ reach. His only real hope for King
is that Harold and William kill each other, but a small force in North Mercia sometimes
has a chance of catching one or other off guard.
Avoiding putting more than one man in areas the Dubliners want; there’s a good
chance he’ll be able to retreat out. However, the areas are worth holding to get
reinforcements. If you do plan to let the Dubliners take York, remember the
reinforcements can’t land south of it, so ensure your armies aren’t concentrated
in the north.
THE BLUE FACTION
- Belgae
- Picts
- Angles
- Normans
The Blue faction is hard to play well, but don’t despair! It can win, and does so
more often than you might imagine. It starts by watching the Belgae being annihilated by
merciless waves of Roman invaders. All you can do is pray to roll some sixes and slow the
Romans down. Always retreat immediately you get the opportunity, preferably to hiland
(Downlands or Lindsey). Then attack any undefended fort or, failing that and if you are
caught in open terrain, forts with single armies. Always attack the forts of greatest
worth to the Roman, even if this leaves you in a worse defensive position (as the Belgae,
you couldn’t have a worse defensive position). Just go for kill points.
The Picts however should do everything possible to survive as widely spread as
possible. Don’t retreat from Dunedin until you have to and build in the north, ready
to squeeze the Caledonians before they start to double up their armies in areas.
Don’t hold back against the Caledonians if you can put three or preferably four onto
one. Turns Four and Five are especially useful and you can often eliminate the
Caledonians by sending in every single piece to raid and leaving just one behind. The
Picts and Angles can often help each other across Dunedin/Lothian/Strathclyde. If the
Picts do get control of the islands, remember to garrison them later against the
Norsemen. Do remember, it’s better to stay alive and make a deal with the Brigantes
or Scots than to be reduced down to a miserable couple of units; and also ensure you get
the most points in the last turn.
The Angles have a hard time. Lacking a leader with which to invade, their only
advantage is moving last, and even this means they tend to have their breeding cut down
by others, especially Saxons. However, it is still possible to score lots of points and
survive, despite being assailed by Romano-British, Welsh, Saxons, Irish, Danes, Dubliners
and Norwegians. Try to hold the balance of power in England and deprive the Saxons of
Bretwalda and Kingship as often as possible. Strike at weak Saxon points to deprive him
of victory points as well, for example Essex in Turn Seven. Take any hiland areas as soon
as you get the chance and don’t risk big attacks except perhaps to take out Arthur
with an army or two -that’s four or five points’ worth.
Finally, the Angles have a good points-per-area score late in the game, so they are
worth preserving rather than throwing away. They can also help Duke William (the
traitors!).
The Normans get the chance to move and act last of all in the game. Be prepared to
face Saxons, Danes, perhaps even some Welsh or Irish in the west, all intent on murder.
It is absolutely essential to get maximum points from the first invasion turn and to
protect William, for reinforcements will be worthless without him alive. The best points
come from an east-side attack but except in very unusual circumstances you should always
endeavour to kill Harold as soon as you land. Don’t bother to spread out after Turn
15; stay compact and harder to attack. Encourage everyone else to harry the Norwegians!
Mix your cavalry and ordinary armies to give the latter best protection and leave William
behind at least one rank of defenders.
THE RED FACTION
- Brigantes
- Irish
- Saxons
- Norsemen
The Red faction is big, bad and thoroughly mean. At least, that’s my unbiased
opinion. To be honest, any of the factions can be played as ‘spoilers’ to some
extent; it’s just that often the Red faction seem to be better at it than others.
As enduring as the Picts (with luck) are the Brigantes. By the time the Roman reaches
the Brigantes’ real heartland of Galloway and Strathclyde, he should be struggling a
bit, and the Red player should certainly encourage the Roman to go for the big points in
Dunedin, Alban and Dalriada.
If necessary, submit to the Romans. Fighting it out is usually not worth it: although
you gain perhaps 6 points for luckily killing a couple of armies, it would be much better
to preserve your integrity and pick up more points later on. Try to submit with maximum
population (6 armies in three areas) and remember that you move after the Roman so when
he counts Limes on Turn Five, you can try to vacate point-scoring areas. With five or six
armies, you should be able to hold the heartland and progress from there, especially with
the early leaders. Do any deal to stay alive and help the Saxons and Norsemen later:
Saxons by voting for them in Bretwalda elections; Norsemen by clearing Cumbria.
The Irish have a hard time of it. As suggested for the Scots and Dubliners, don’t
always land armies the turn they arrive at sea. Wait until you have a couple to be more
use, unless you want to risk the odd Roman fort in Avalon or Hwicce, for example, or
occupy an empty area. With a few armies on the board and the Welsh busy elsewhere, a
useful attack is one focusing on Devon then Cornwall. Although harder to penetrate, they
also offer better long-term security and will be hard for the Welsh to retake. Even
better, it could well distract the Welsh from attacking Norsemen or Saxons elsewhere, and
strengthen your faction as a whole. An alternative Irish kingdom to aim for stretches
from Cumbria to Gwynedd; again this is quite hard for the Welsh to attack, however it is
more vulnerable to later attacks from Danes and Dubliners.
The Saxons are quite simply the biggest nation (potentially) on the board. Only the
Danes with 18 armies approach the Saxon total of 20, and the Danes are unlikely to grow
like the Saxons do. The initial Saxon advantage is the early invasion against a
relatively empty southern England, with Hengist as leader. This should enable you, with
luck, to score a good few points killing Romano-British as well as wiping out the Jutes
(this is highly recommended). Then spread out and maintain a few two-army stacks in the
midlands, gradually swelling in size -you should quickly get two, then three builds a
turn – and taking out Angles in the Midlands and East Anglia, pushing back stray Welsh
and even making room for the odd Irishman if it scores more points. Use boats to catch
the Angles off guard. If Hengist is unopposed in landing, an early foray to secure Devon
is also useful, but follow up in Cornwall sooner rather than later. With Irish and
Brigante help, the Red faction should make the Saxons Bretwalda and King more often than
not. Once you gain momentum, you will roll on until the Danes strike. The answer is to
secure your back (the West) so that you can fall back in good order and keep punching
back in any weak spot. Tell the Danes if they weaken you too much, it’ll be a
walkover for William later. Do deals on non-aggression to get Bretwalda votes. Most of
all, bulk up your front line to make it sufficiently unattractive to attackers, even if
you don’t want to attack anywhere yourself.
At the end of the game comes the hardest part – defending against Duke William and
Harald. With any luck, the Angles and Danes should be Harald’s main opponents and may
well prevent him from reaching Harold. Keep Harold as well defended as possible, such as
with the maximum four armies in hiland, and scatter troops around to give you the best
chance of survival and a retributive strike against the Norman invaders.
The Norsemen present a task of flowing where it is easiest. The initial strike must be
against Hebrides and Orkneys and holding them in Turn 13 for the best points opportunity.
If you can end up with the ideal of two or three armies in Hebrides after Turn 12, these
can join with the fresh invaders next turn to go for Skye and a solid base for reaching
all of Britain’s west coast; otherwise get points in Cumbria and annoy the Welsh or
Dubliners, whoever looks the stronger. Don’t be too worried about getting every last
half point for visiting – the Norse are one example of where the armies are best used
preventing others from reaching juicy objectives, such as the Picts on the last turn with
their three 3-point areas.
THE BLACK FACTION
- Welsh
- Caledonians
- Jutes
- Danes
At first glimpse, you might be forgiven for thinking you’d been dealt a dud hand.
The Caledonians can only get six armies on the board and stand fair to be wiped out by
Picts and Norsemen, but this seems an easy life compared with the Jutes’ five armies
and not even hilands to defend them.
The Caledonians have little to do except sit there and try to resist the inevitable.
Just try to exist; honey the Pict with kind words and hope you get a build soon. As for
the Jutes, their best chance for points lie in destroying Roman forts and stealing Kent
on Turn Four. If Kent is defended by a Roman army and fort, go for any open Roman fort
you can reach and raid it, then try for another on Turn Five with all units. If possible,
delay landing the final Jute until after Hengist’s invasion; that way you might just
get Kent or somewhere adjacent on Turn Seven. Remember, if you land in a coastal space
you can probably reach Kent by boats later, so stay out of the way of the Saxons.
The Welsh are more complicated and offer a good possibility for long term strategy. As
with the Brigantes, submission to the Romans is, in the final analysis, better than being
smashed to (practically) nothing. Don’t let that stop you taking any chance to raid
Cheshire, York or Essex, should the chance arise: by building your first armies in Powys
and Clwyd this is often easy to accomplish. When the Romans withdraw, Romano-British
forays may leave areas to York open. Seize these early (especially Pennines) to make it
easier to get your 6 points in Turn Eight or Nine.
Your main opponents are the Red faction, so ruthlessly quash any Irish settlers and
take the opportunity to nibble at the Saxon kingdom and slow its expansion. Devon and
Gwent are worth defending. In the mid game, occupying one or two English areas can make
all the difference in Bretwalda elections. However, the main concentration must be on
maintaining the integrity of Welsh territory and reaping maximum victory points every
three turns.
Finally, the Danes also call for careful consideration. In the initial raid, look for
open areas you won’t have to fight over and be careful to preserve maximum numbers of
units for the Turn 12 invasion. Raid Angles or Saxons depending on who holds the stronger
hand and then follow this up with a good invasion (at least 16 points worth). Try to end
the invasion concentrated either north or south of York – if north, aim to eliminate the
Angles entirely – so that you can hold a sensible kingdom.
Use the Welsh to soften opponents and take the odd area so the Danes get a chance to
be King, but don’t let them get in the way of scoring points during the invasion.
Later hang on as well as possible and press the advantage wherever you can. You should
make deals with the Saxons and Angles if necessary at the end of the game in order to
stand off the Normans and Norwegians wherever possible.
Step Back Into Those Dark Ages
One of the attractions of Britannia is that it does not exactly simulate the history
of Britain. After all, this would be very tedious and unrewarding, and we would all know
who was going to win. (Actually, portraying history with the game is impossible in places
– for example, Harold cannot defeat Harald Hardrada at Stamford Bridge (in York) and then
reach William in Sussex next turn.) However, the game must of necessity simplify things
somewhat and leave out some rather interesting bits of British history.
Generally speaking, the only units in the game are armies, and only armies are deemed
to control areas. There are no civil populations to hold an area peaceably (although a
leader can control an area on his own) and thus every part of the realm must be
garrisoned – and this is not an accurate reflection of the settlement of Britain other
than in Roman and late Saxon times. Additionally, it means that the Normans, with their
relatively small band of men, cannot win control of the land by placing a few men in
command over a subject population.
Additionally, a dimension of historical realism is lost by the amalgamation of many
peoples into different nations. The many tribes constituting the Belgae, for example,
were belligerent towards each other – often more than the Romans, and some actively
submitted to the Romans (whom they knew from Julius Caesar’s invasion and withdrawal
ninety years earlier) and attacked their ‘fellows’. The Welsh were related Celtic
tribes: Ordovices, Silures and Deceangli for example, who were led by the fleeing Belgae
leader and hero Caractacus (or Caradoc) in defiance of the Romans.
Throughout the rest of history, nations were split by internal strife on a regular
basis as successions were disputed and lesser nobles tried to seize power. There were
also rebellions by peoples who had been subjugated and effectively ‘wiped out’
but who nevertheless regained a national identity and rose up. The first example of this
was Boudicca and the Iceni who had been semi-Romanised; they took up arms when greedy
administrators raped their lands and daughters and drove a path of destruction to
Colchester, St Albans and beyond before being utterly defeated by Suetonius.
There are a few historical inaccuracies which are easy to correct. Two of these
concern the provision of boats – a very useful commodity in the game. I would certainly
allow the Saxons boats under Alfred, who was the constructor of the first English navy
(one might even think about rules for naval combat).
I would also give boats to the Norwegians in Turn 16, enabling them to land forces
further south than York. Turn 16 could be further enlivened by the addition of a Danish
leader King Swein (also with boats and a few boatloads of troops) who raided the east
coast of Britain and, assisted by Hereward the Wake, laid up in the Wash during 1070-1. I
am also tempted to add other leaders, such as Caractacus, Boudicca, Hereward, other Welsh
and Scottish princes down to Macbeth and so on, but this side of the game is more
dangerous to tamper with, as one might upset the game’s innate balance.
There are some nations I feel have been treated a little harshly – the Jutes for
instance, unable ever to score any points except for areas in the south-east of England
when, given the opportunity, they might have settled in any convenient spot and survived
with a greater cultural identity. I believe there is also room for more rules covering
submission, a Scottish King and so on.
The Wider World
Britannia is a good game, destined to become a popular favourite with boardgamers and
wargamers alike. However, as a games designer, I’m not content to let it stop there,
and neither are other busy inventors I know.
Already existing as a prototype are Britannia variants covering the whole of Europe,
from Persia to Britain (a six player, 36-faction game taking about 12 hours to play) and
also a Middle-earth variant of my own design. This latter has some 20 factions and a
rather longer time span than Britannia – it starts with the war of the Elves and Sauron
in the Second Age and ends with the War of the Ring over 5000 years later!
In addition I have devised some alternative historical scenarios to add to the
original game. These start with the Huns under Attila reversing their defeat by the
Franks at Chalons and sending a raid against England. The Huns are followed by a possible
resurgence in Roman fortunes, then later by Arabs spurred on by victories in France and
Magyars raiding beyond their battles in the Low Countries. Finally there are ex-Danish
Vikings who can choose either to settle in France and become the Normans, or land early
in England – but this will indubitably let in the Franks, now French, under Philip
I…
I also have plans for introducing some fantasy elements to the game, with Merlin,
giants, dragons, faeries, goblins and all the other traditions rife across so many parts
of the country that to leave them out would do serious injustice to the tale of Britain
that Britannia tries to tell. But in the meantime, I hope you enjoy playing Britannia,
one of the best new games for a long time. There are thrills enough in just getting to
grips with a game where hidden danger or success can be revealed with every new turn,
every surprise move, and every roll of the dice.
A Final Note
The first edition rules published by Gibsons were atrocious. Most of the ambiguities
were cleared up in the second edition, though there are still some anomalies.
A copy of the second edition rules can be obtained by sending an SAE to Gibsons.
Avalon Hill, who licensed the game from Gibsons for the American market, corrected all
the errors in their set of rules.
If you’re using the second edition rules you may find some eventualities which are
not covered, or which seem confusing. As with any game, these are not difficult to come
to agreement over after careful assessment of all applicable rules. There are some
suggestions in this article which may seem contrary to the rules, and the latter should
be always be taken as relevant to your games, until or unless you agree otherwise.
Unfortunately, the author cannot let well alone and will always tamper with things…