|
||||||||||||
|
Session Report for Glory III – Antietam
The Full Battle Scenario
by Moritz Eggert
As there are no detailed session reports for this interesting “little” game, I’ve
decided to do a detailed write-up of a full (solitaire) play-through of the long Antietam
scenario.
I will use the historical McClellan rules and the “Story Board Replay”, but not the
additional IX Corps hinderment (seems too harsh to me). This should give both sides a shot at
victory.
The Antietam battle poses an interesting problem for both sides. The Union army has masses of
units but can barely deploy them in an aggressive way because of the limitations of AM activation.
The Confederate Army is well organized and can react quickly, but lacks the force of reacting to
the Union push if it ever happens in full force.
This is a turn-by-turn description with some pictures.
0545
The Union selects Hooker as their first AM, along with 2 artillery AM.2 Hooker chits are placed
in the cup (note: the Confederates always put 2 Jackson, 2 Stuart cavalry and 2 Longstreet chits
into the cup, so I will only mention that here).
Union strategy: Well, it’s pretty obvious that the game system forces them to use the
big push against the well defended northern front of the Rebels, while the rest of the army sits
idly across the Antietam Creek and twiddles thumbs. I plan to hit as a hard as I can, hitting the
weakly defended hill at hex 1917 as my first target. I will try to swing around the enemy line
there and then hit hard in the middle, while Williams rushes up to reinforce the Union line.
Confederate Strategy: Of course rushing to protect the bridges and fords is first
priority here. I will also try to bring the not unformidable but mostly short-firing Rebel
artillery into good positions to shoot at the Union should they try to cross. Of course I know that
is not going to happen any soon. Defending the north will be touch-and-go, it is obvious that I
have to react to the successes of the Union and keep a stable front.
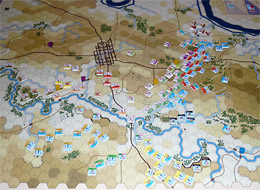
What happened:
Drawing the 2 Hooker chits practically after each other enabled the Union to close the gap to
the Northern front quickly, which will make it more difficult for the Rebels as full battle contact
was established early on. JA Walker Brigade (Lawton) was the first casualty. The attack on the weak
Confederate left flank defended by the cavalry units was successful, but the Confederates decided
to withdraw instead of counterattacking, so no breakthrough was achieved. The Rebels decided to
launch a counterattack under DH Hill – not with any real intent to exploit but to make it more
difficult for the Union.
Some artillery was fired, but with little effect. The Rebels manage to blockade all bridges and
fords, as was to be expected. Both sides manage to bring artillery to advantageous high positions
with hopes of more effective combined fire. The single Munford Brigade (Stuart) rushes along
Harper’s Ferry Road to join its comrades under attack in the north.
Casualties:
Confederates: JA Walker (Lawton) Infantry
0630
The Union wins initiative and selects 2 Hooker and 1 Mansfield AM +2 artillery AM
Union strategy: We will try to again utilize the full force of Hooker’s men with the
hope of breaking through the Confederate lines somehow. Mansfield will come closer to the action
with his XII corps. Not very imaginative, but it might just work.
Confederate strategy: Something has to be done about the endangered Stuart’s cavalry
to my left flank, which will force me to shift my forces a little to the left. I’ve brought my
artillery in position now, so I will give the Union some explosive action. Also defending the 3007
bridge with just independent Evans (a “1” strength unit) was perhaps a bad idea, so I
will reinforce that.
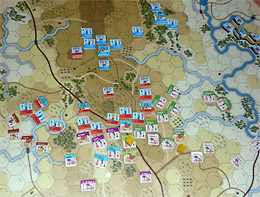
What happened:
The dice were hot for the Confederate artillery, which really spelled doom for the Union
offense, which is basically forced to a halt. No major objectives were reached b the Union this
turn, instead they lost 2 artillery and 2 infantry brigades. Also the hopes of overrunning
Stuart’s cavalry have been trashed; instead disaster is looming at the Union’s right flank
offensive!
This is going to be more difficult than originally thought for the Union, especially with all
the Confederate reinforcements rushing up to strengthen their buddies’ lines. The Rebels have
had no losses to speak about this turn, so they’re fine and dandy.
Casualties:
Union: 2 I brigades, 1 I artillery, 1 IX artillery
Confederates: 1 Stuart cavalry
Recovered: JA Walker Infantry (Confederate)
0715
The Confederates win initiative and select Stuarts Cavalry AM The Union gains no new AM’s
The Union selects 1 Mansfield and 2 Pleasanton AM (+2 Hays artillery)
Union strategy: Something has to be done -there will be no advance with I brigade this
turn, so we have to bring in new units. The Confederates right flank is weakly defended, so I hope
to be able to strike quickly and gain ground with 2 Pleasanton AM’s, if I’m lucky I might
also be able to take out one of those pesky artilleries, helped by the proximity of Mansfield’s
units.
Confederate strategy: Of course the opportunity to get another of Hooker’s infantry
brigades is there, so I will of course choose Stuart as my first man of action. Apart of that I
will do what I did best last turn – harass the Union lines with my new found artillery advantage
and bring up those reinforcements where they’re needed.
What happened:
Another ineffective turn for the Union. The killer bombardment of the Rebels continues, leaving
the Union in doubt about the effectiveness of their artillery advantage. Even though Pleasanton
could exploit his attack twice in a row the result was basically nil, as Mansfield could only move
after the Confederate units had retreated orderly to no effect. Stuart’s cavalry attack was a
disaster for the Rebels, though, and left most of his units disordered. If Mansfield moves first
next turn this could be disastrous.
Casualties:
Union: 2 I brigades permanently killed, 1 I artillery and 1 I brigade withdrawn
Confederates: 1 Stuart cavalry permanently killed, 1 Jackson brigade withdrawn
Recovered: 1 IX artillery, 1 I artillery (Union)
0800
The Union doesn’t gain a new AM.
The Confederates win initiative and select Stuart as their first AM again (trying to bring those
cavalry into safety before Mansfield strikes).
Seeing this, the Union decides to bring yet another corps into play, putting the Sumner AM
together with Mansfield and Pleasanton cavalry AM into the cup.
Union strategy: Even though I have little hope of capturing the bridge at 3007 I might at
least bring some more artillery up to the front and prevent those Confederate reinforcements from
going where they might possible hurt. Apart of that I’ll have to play it by ear – there is no
real good opportunity to strike on the map except one single exposed brigade at the
Confederates’ left flank.
Confederate strategy: The last turn went relatively well, with those new reinforcements I
might even try some kind of counterattack, although I will certainly not try to cross the Antietam
river!
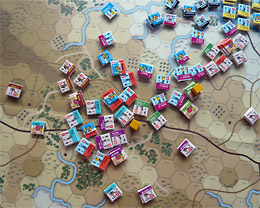
What happened:
And here we go with yet another glorious turn for the rebels. The Confederate artillery again
creates many casualties in the Union lines. Sumner’s attack on the 3007 bridge failed (of
course) and the AM might have better been used elsewhere. No advances where made anywhere for the
Union, which is desperately in need of some luck (or some more AM’s).
Casualties:
Union: 1 I and 1 XII brigade withdrawn, 1 brigade permanently killed.
Confederates: 1 Jackson brigade and 1 Stuart cavalry withdrawn.
Recovered: 1 I artillery (Union), 1 Jackson brigade (Confederates).
0845
The Union doesn’t gain a new AM.
The Union wins initiative and selects Pleasanton’s cavalry as an action marker (some damage
can be done there, as DH Hill’s brigades have advanced far. Into the cup come Franklin and
Mansfield along with the Hays artillery.
Union strategy: Franklin seems a must, his artillery is desperately needed. I will move
him along the Antietam river to at least threaten the fords. My only hope is to build up a unified
front and just keep on attacking at low odds. At some point I just have to break through!
Confederate Strategy: I have probably advanced too far with DH Hill’s men, which
might cost me a unit or so. But I don’t feel in danger anywhere on the map, really, and so far
the recovery dice have been kind to me, so there are no losses to speak of.
What happened:
I’d love to report Union successes, but apart of bringing VI corps up to the fray nothing
spectacular happened except some botched attacks leaving many exposed disrupted units to be picked
off by Confederate artillery. The confederate lines hold like a stone wall.
Casualties:
Union: 1 I brigade, 1 XII brigade, 1 IX artillery withdrawn, 1 XII brigade permanently
killed.
Confederates: 1 Jackson brigade withdrawn.
Recovered: 1 Jackson brigade and 1 Stuart cavalry (Confederate).
0930
The Union doesn’t gain a new AM.
The Confederates get the initiative and selects Jackson as starting AM.
The Union selects Franklin, Burnside and Porter.
Union strategy: The Northern offensive pretty much has last all it’s steam. My only
hope is now to bring my fresh reinforcements to where they hurt the rebels the most. Perhaps I get
lucky, but my hopes are down.
Confederate strategy: I still feel very much in control – I will try attack the many
disrupted units at the Northern front and do as much damage as possible.
What happened:
The Union are in dire straits now – their right flank has all but disintegrated by fierce
attacks from Stuart’s cavalry and the possibility of a huge Confederate offensive is actually
there. Most of the turn was spent slowly moving Union troops south along the river and they’re
not even close to the enemy yet. The Confederate artillery is a killer in this game!
Casualties:
Union: 4 Mansfield infantry brigades, 2 Pleasanton cavalry, 1 Mansfield brigade permanently
killed.
Confederates: 1 Jackson brigade.
Recovered: 1 Jackson Brigade (Confederates) 1 Burnside artillery, 1 Hooker brigade (Union).
1015
Even though it’s not yet noon the Union is already quite battle wary. But with a sudden jolt
of energy, McClellan decides to commit new forces to attack the bridges – the Union gets a 4th
AM!
The Rebels win initiative though, and the newly rallied Stuart’s cavalry is sitting in a
very damaging position to gobble up the exposed right flank of the Union.
The Union selects Porter, Burnside, Sumner and Franklin AM’s, along with 2 artillery
AM’s.
Union strategy: Mansfield’s XII corps has taken so much damage that there is little
hope in ever rallying it, so activating it makes little sense. Instead we will bring the 3 still
strong East corps to the bridges and fords to attack position, while Franklin will try to save
what’s left of the completely botched Northern attack.
Confederate strategy: The Northern Union front is so weak and exposed that it actually
makes sense to attack it full strength, at least for this round. If I’m really lucky I can be
so devastating that part of my forces positioned there can be moved to defend Sharpsburg when
necessary, even though my defensive positions there are still pretty safe for now.
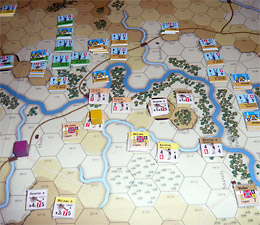
What happened:
The Union offensive turned out to have no effect, but at least now their forces are able to
attack again and again at some neuralgic spots. Die rolls were awful again for the Union, it seems
like they could storm the bridges forever and ever. The Confederates seem to dominate the
battlefield more and more.
Casualties:
Union: 2 Mansfield brigades, 1 Burnside brigade, 1 Porter artillery withdrawn, 3 Mansfield
brigades and 1 Pleasanton cavalry permanently eliminated.
Confederates: 1 Longstreet brigade.
Recovered: 1 Jackson brigade (Confederates), 1 Mansfield brigade and 1 Pleasanton cavalry
(Union).
1100
The Union stays at 4 AM. The Union wins initiative and selects Franklin AM, and puts another
Franklin, Burnside, Porter ands 2 Hays artillery AM into the cup.
Union strategy: My best chance seems to activate Franklin’s strong corps twice with
the slight hope of capturing the terrain behind bridge 3007 so as to make it easier for Sumner, who
is at a stalemate there. Porter and Burnside will simply attack the bridges and fords again, as
best as they can. What else can they do?
Confederate strategy: What can I say – The Union will look slightly silly once Franklin
is in a corner and my forces come up the hill behind him!
What happened:
Wow, wow, wow. A turn in which a lot happened very suddenly. The sheer doggedness of the Union
FINALLY pays off. The Union tactic to activate Franklin twice was a full success as his last
activation was the last of the turn, enabling him to take the important sunken road hex 2711
without danger of retaliation. There was also, lo and behold, a breakthrough at Myer’s Ford
(the game system makes it easier to attack major river fords – for some reason they are more
difficult to defend than small stream fords, probably because they are wider). There was also a
record of 5 withdrawn Confederate units, for the first time the Union is ahead in damage for a
turn. If the Union goes first next round it might spell disaster for the Rebels, who were standing
so proud until now. The Rebels have managed to get Stuart’s cavalry behind the Union lines and
send one single unit to threaten the Union bridge at 1904, so they also pose some threat.
Casualties:
Union: 1 Mansfield brigade, 1 Franklin brigade, 1 Hooker brigade withdrawn, 2 Mansfield
artillery overrun, 1 Bunrside brigade permanently eliminated.
Confederates: 4 Jackson brigades, 1 Longstreet artillery withdrawn.
Recovered: 2 Mansfield brigades, 1 Porter artillery (Union), 1 Longstreet brigade
(Confederates).
1145
Lo and behold – the Union not only gets another AM, it also wins the initiative. This might be a
decisive turn for the Union.
The “bridgehead” at 4613 has to be exploited before the Rebels can retaliate. So the
Union selects Burnside as the starting AM. Into the cup go another Burnside, 2 Franklins and 1
Sumner, along with 2 Hays artilleries.
Union strategy: Get in there as fast as possible with as many as possible.
Confederate strategy: Somehow prevent this….
What happened:
The game now really picks up pace after some slow rounds. The Union plans mostly paid off this
turn, IX Division achieved a major breakthrough at Myer’s Ford, and also Sumner managed to get
across 3007 bridge as well. Some suicidal attacks on the undefended artillery of the Confederates
did a lot of damage at the cost of many disruptions. The Rebels managed to cause some damage to the
still exposed right flank of the Union, but now that their back lines are threatened they can’t
really dare to exploit it any further. In fact the next round will probably see a huge retreat by
the Confederates to protect Sharpsburg and the entrance of the upcoming reserves at 5020.
The northern front situation looks really complicated now, with facing all over the place and
units constantly attacking each other’s back in the fray, but that’s how it probably would
be in real life.
Casualties:
Union: 2 Mansfield, 1 Hooker, 1 Franklin, 1 Porter brigade withdrawn, 2 Hooker artillery
withdrawn, 1 Mansfield brigade and 2 Hooker artillery permanently destroyed.
Confederates: 4 Longstreet brigades and 1 Stuart cavalry withdrawn, 3 Jackson brigades, 3
Jackson artillery and 1 Longstreet artillery permanently destroyed.
Recovered: 1 Hooker and 1 Franklin brigade (Union), 1 Jackson brigade and 1 Longstreet artillery
(Confederates).
1230
Disaster strikes and the Union actually LOSES an AM (back to 4). At least they win initiative,
selecting Sumner as first AM, then putting 2 Burnsides and one Franklin into the cup.
Union strategy: Exploiting the stormed bridge with the still strong Sumner at 3007 seems
to be first priority as that part of the Confederate line is now the most weakly defended. I have
basically given up Hooker and Franklin, which now serve as cannon fodder – as long as the keep the
Rebels busy I don’t care about them that much (Remark: How cruel wargames think in such
situations – would we be the same if we were commanding real men?).
Confederates: Regardless of how much damage I still could do to the Union front which is
a complete mess I think I should now bring my forces together in a circle around Sharpsburg.
Strangely enough my strong points (that give the Union a higher shot at AM marker increase) are
still in my hands, and I will be able to keep it that way this round, I think. Most importantly I
have to avoid getting as much damage as I did last round, the Union can afford it, I can’t.
What happened:
The Rebels are mostly withdrawing, but managed to annoy the Union here and there. Stuart’s
cavalry is racing back from the left flank to defend Sharpsburg. Jackson’s brigades try to
retreat slowly in an orderly fashion. Longstreet is mostly busy defending the South and
Boteler’s ford.
Sumner managed a good breakthrough (overrunning 2 artillery brigades on the way) and is amassing
his forces at bridge 3007. Franklin held the line and puts on some pressure. Burnside’s
breakthrough wasn’t as successful as hoped; there is
little hope of delaying Jackson’s reinforcements.
The Union is doing more damage each turn now, which will make it difficult for the Rebs.
Casualties:
Union: 1 Franklin brigade, 1 Porter artillery withdrawn.
Confederates: Evans brigade, 1 Walke brigade withdrawn, 2 Longstreet brigades and 2 Longstreet
artillery permanently destroyed.
Recovered: 2 Mansfield, 1 Hooker, 1 Franklin brigade, Sharpshooters, 2 Hooker artillery (in a
bout of luck the Union managed to rally all forces lost last round), 1 Stuart cavalry, 2 Lonstreet
brigades.
1315
The Union doesn’t gain a new AM and the Confederates get the initiative. The Union puts 2
Sumner and 2 Burnside + 2 Hays artillery into the cup.
Union strategy: Exploiting the two “bridgeheads” (Sumner and Burnside) is top
priority, we will keep swarms of men pounding on the Rebels!
Confederate strategy: If I’m lucky I can bring Stuart’s cavalry “home”
before Sumner comes to close to Sharpsburg. Sumner is my only worry right now, the other lines hold
well for now.
What happened:
A surprisingly bloodless round, because the Confederates are mostly on the defense. Sumner’s
and Burnside’s pushes didn’t work particularly well because the Rebels could use most of
their markers before the Union. Still, the reinforcements could be delayed next round if Burnside
goes first. Stuart’s cavalry has managed to reach Sharpsburg city limits and will probably
change into infantry to defend it. Porter is standing motionlessly before the middle bridge.
Casualties:
Union: 1 Porter artillery permanently destroyed.
Confederates: 3 Longstreet brigades withdrawn.
Recovered: 1 Franklin brigade (Union), 1 Evans and 1 Longstreet brigade (Confederates).
1400
The Union gets back to 5 AM again! No one wins initiative. The Union selects 2 Burnside, 1
Franklin and 2 Sumner as AM’s.
Union strategy: Push the Rebels where it hurts them the most: in the middle. Sumner! And
Franklin has recovered most of his troops by now, so it doesn’t hurt to try to rally them. And
I just hope my moves come before the Confederates this turn.
Confederate Strategy: Withdrawal on all sides, I guess. It’s a race against time, and
without the held bridges my lines suddenly become very thin!
What happened:
Again this was a far from decisive turn for both sides. Stuart’s cavalry has raced back to
protect Sharpsburg dismounted, but took some betting from misfired artillery and Sumner’s
attacks. Sumner has pushed forward heavily, and is still at nearly optimum strength with no losses.
Burnside wasn’t successful in preventing the AP Hill reinforcements, but has managed to keep a
steady attack line going, forcing the Confederates to commit heavily. The middle of the Confederate
lines is weakly defended and seems the most likely place where the Union will strike again. On the
plus side for the Confederates no +1AM roll strongpoints have yet been taken by the Union, so the
activation markers are still at risk if the Union rolls a “0”.
Casualties:
Union: Rest of Doubleday command was completely destroyed (all withdrawn).
Confederates: 1 Longstreet artillery, 3 Longstreet brigades permanently destroyed.
1445
No AM is gained or lost for the Union. The Confederates win initiative and select Longstreet as
first AM. The Union puts 2 Hays artillery, 2 Sumner, 2 Burnside and one Franklin AM into the
cup.
Union strategy: Push with Sumner, hold with Burnside.
Confederate Strategy: Break Burnside, keep Sumner at bay.
What happened:
This might have been the decision for the Union. An extremely bloody turn had the Rebels
frantically scramble to Sharpsburg while taking a heavy beating through Sumner’s relentless
forces. As AP Hill had to be withdrawn to defend Sharpsburg, the essentially weak Burnside division
could wreak havoc at the back lines. And the middle bridge has been taken, which means that all
three bridges are now owned by the Union. Porter is just waiting to bring his fresh and eager units
into the fray as well.
This was also a record casualty turn for the Rebels – forces they won’t be able to
recuperate. It seems impossible to survive the next 5 turns with these diminished forces.
Casualties:
Union: 2 Sumner, 2 Burnside brigades withdrawn, 1 Franklin brigade permanently destroyed.
Confederates: Anderson command completely destroyed, 3 reserve artillery, 1 Jackson brigade, 1
independent brigade permanently destroyed, 3 Longstreet, 1 Jackson brigade, 3 Stuart cavalry
withdrawn.
Recovered: 1 Hooker, 1 Franklin, 1 Porter brigade (Union), 1 Longstreet artillery, 1 Jackson
brigade (Confederates).
1530
The Union gets a new AM (conquering the entrance to the sunken road helped). Nobody wins
initiative, and the Union puts 2 Burnside, 2 Sumner,1 Franklin, 1 Porter and 2 Hays artillery AM
into the cup.
Union strategy: Attack on all sides -victory is near!
Confederate Strategy: Pray.
What happened:
A turn not as disastrous for the Confederates as feared. Many botched attacks by a too careless
Union result in many disrupted units, and Sumner’s yellow juggernaut has finally reached its
nadir. Still, Porter’s fist attack was successful and now he is entering the fray full
strength. Burnside has pretty much disintegrated, the Rebels hope to vanquish his forces and use
the brigades somewhere else.
The Union now owns the maximum +3 spaces for the AM increase roll.
Casualties:
Union: 2 Sumner, 1 Burnside, 1 Franklin brigade permanently destroyed, 2 Sumner and 3 Burnside
brigades withdrawn.
Confederates: 2 Longstreet artillery, 1 Stuart cavalry, 1 Jackson, 2 Longstreet brigades
permanently destroyed, 2 Longstreet, 1 Jackson brigade withdrawn.
Recovered: 1Burnside brigade (Union), 2 Stuart cavalry and 1 Longstreet brigade
(Confederates).
1615
No new action markers for the Union. The Union wins initiative and selects a Porter AM. Another
Porter, 1 Burnside, 1 Sumner, 1 Hooker (haven’t used him for ages!) and 1 Franklin AM come into
the cup, along with the usual 2 Hays artillery AM’s.
Union strategy: Victory is not as close as I hoped, but my new plan is to swing Hooker
around the back of the Confederate lines and cause more trouble. Porter seems my best bet for the
main attack drive this round.
Confederate Strategy: Sharpsburg is now heavily defended, but I don’t really have any
backup contingencies for my exposed outer lines. Right now I wish for no new AM’s for the Union
and a less than major victory at the end o the game. I don’t think I can manage more right
now.
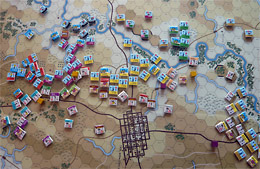
What happened:
A Confederate nightmare come true – the Union now has a wide, unified front that is threatening
to engulf Sharpsburg. And the defensive lines are dwindling – this turn DR. Jones command is gone,
and many more commands are close to extinction. This is the endgame now, if things go bad the
Rebels might be completely eradicated!
Casualties:
Union: 1 Porter brigade withdrawn, 1 Sumner brigade permanently eliminated.
Confederates: DR Jones command permanently eliminated, 4 Jackson artillery permanently
eliminated, 2 Longstreet and 1 Stuart cavalry brigade withdrawn.
Note to self: once the enemy approaches separate your combined artillery and stack them with
infantry to protect them! Even a disrupted infantry can permanently kill infantry…
Recovered: nothing.
1700
Oh well, another AM for the Union (now 7, one more than the Confederates). The Confederates win
initiative though and start with Longstret.
The Union selects 2 Porter, 1 Burnside, 2 Franklin and 2 Sumner AM’s.
Union strategy: Automatic victory can probably not be achieved anymore, as the distance
to the back roads of the Confederates is still too big. Right now I have 11 VP, I just need one
more to achieve a major victory, so I feel safe.
Confederate strategy: Declining the last VP to the Union will be difficult, but defending
Sharpsburg should be possible for a little more time.
What happened:
A relatively bloodless round, but the Union gained a lot of ground. Sumner has recovered a
little and is pounding at the center again. The Rebels can do little but patch the holes in their
lines, as attacking is too risky. The end is nigh, I think…
Casualties:
Union: 1 Porter brigade permanently destroyed, 1 Porter and 1 Burnside brigade withdrawn.
Confederates: 1 Longstreet brigade and 1 Stuart Cavalry permanently destroyed, 1 Stuart Cav. And
1 Jackson brigade withdrawn.
Recovered: 2 Longstreet brigades (Confederates).
1745
The Union doesn’t gain a new AM. The Confederates win initiative and select Longstreet. The
Union selects against 2 Porter, 1 Burnside, 2 Franklin and 2 Sumner AM’s.
Union strategy: Keep doing what I’m doing.
Confederate strategy: Keep doing what I’m doing.
What happened:
The turn whizzes by with the Rebels not able to do much and the Union causing lots of damage –
without conquering the decisive space though that will bring major victory. But that will happen
next turn.
Casualties:
Union: 1 Porter and 1 Burnside brigade permanently destroyed, 1 Porter and 1 Burnside brigade
withdrawn.
Confederates: 2 Jackson and 2 Longstreet arty permanently destroyed, 5 Jackson brigades
withdrawn, 1 Stuart cavalry withdrawn.
Recovered: 1 Stuart cavalry.
1830
The final turn of the game and the Union gets another AM and also win initiative, selecting
Porter. They will put 2 Porter, 2 Burnside, 2 Franklin and 2 Sumner Ams into the cup, and also 2
Hays artillery (the last two turns were spent bringing the Hays arty to the front, which meant they
had to be moved under Porter’s command).
Union/Confederate Strategy: Nuff said.
What happened:
The Union proves too much for the weakened defenses of Sharpsburg – after they conquer half of
the city the Confederate high command decides to spare lives and give up completely. The end came
quick, but the losses for the Union were not small. With 16 VP’s it is more than a major
victory, though – all three bridges over the Antietam creek were conquered, the canal blocked and
Sharpsburg fell under Union control. McClellan couldn’t have hoped for more success and will
live on as one of the great commanders of his day – in hindsight his withholding of important
commands during the battle will be seen as the sparing of lives and good caution. He has become a
hero.
Final thoughts
When I started playing the game I liked it more then when I ended it. All in all Antietam is a
difficult battle to simulate in an enjoyable way. The restrictions for the Union make for a very
frustrating beginning of the game. The rules are slightly underexaggerating when they say that the
“Union player has to be satisfied with small gains” at the beginning of the scenario. You
can tell by my frustrated comments that the first turns were very boring for the Union side, as
they basically achieve nothing until they conquer one of the bridges or fords. Once they do so it
becomes boring for the Confederate player, as he doesn’t stand a chance against the Union
onslaught. My game showed that many turns go by until something happens, but once it does it favors
the Union, who can always throw pieces into the fray.
There are also not a lot of strategic options. The Confederates’ best strategy is to play
very carefully and not risk any units in attacks. As long as the Union cannot attack in full force
this works perfectly, but is also slightly boring.
If there is an exciting “race for victory” at the end of the game depends very much on
when exactly the Union comes over one of the bridges, but once they do the Confederates can do
little but retreat slowly and hope for the best, which is also frustrating.
This means that a game won by the Confederates mostly means a boring game for the Union player
(he will not have achieved much) and a game won by the Union is boring for the Confederates.
I’m simplifying slightly, but this is my feeling.
Also, Antietam takes the Glory system to its limit regarding counter density. I feel that the
system is interesting and rewarding, but more apt for simulating smaller battles. Once you got a
big unified front attacking is usually too risky and little stuff happens, in smaller battles the
maneuvering becomes more important, and this is where facing and attacking from behind really
become important factors.
Of course this is realistic, but drawing AM’s for forces that basically pile in very fiddly
stacks in different orientations becomes very tiresome, especially as you activate command after
command (not once did I use the combined command option in this game, it always seemed too risky.
Actually the non-combined command activation gave a strong force the advantage as it can advance in
waves instead of using one single all-out attack).
The immense amount of artillery firing over varying terrain with difficult to spot LOS was also
tiresome, as most of the time the artillery doesn’t actually hit anything. Again: realistic,
but not so much fun when you have endless artillery counters to check and roll for on both sides,
most of them only hitting something on very high rolls.
The recovery rules became very annoying after a while, as some units with high morale (like the
Sharpshooters of the Union) become practically invincible and regenerate several times. Artillery
is the worst offender here – it rarely makes sense to deploy artillery against artillery, as
withdrawn artillery will simply regenerate quickly (average disrupted morale is 7, which gives you
a 80% chance of regenerating it), and most of the time in the same space where you killed it! Also
a realistic idea, but it can’t be realistic that units can be disrupted again and again and not
suffer from it. Also it seems strange that only units of activated commands recover (even though it
makes the game more playable), even if units don’t get orders they could theoretically recover
by not doing anything.
The leader system also has some fiddliness involved – if you play carefully your leader will
almost always be positioned in a way to command all your units. I had only very few instances where
suddenly the leader was cut off, but even then the units that were out of command where in a ZOC,
which meant that they could still fight and do stuff. The leader counters are small and fiddly and
tend to obstruct spaces, I wonder if they couldn’t have been left away and replaced with some
kind of simple rule, as they don’t really have any effect on individual battles anyway.
Gripes aside – I enjoy the “Glory” system basically, I just would recommend using more
small-scale scenarios, like for example the “small” Antietam scenarios. And regarding
playability, “Across 5 Aprils” is perhaps the quicker and more accessible game, even
though it also has some quirks.