Junta

Junta

Junta

Publisher: ASS

Author: Vincent Tsao (original design); Ben Grossman / Eric Goldberg (revised
rules)

Tested: German edition, 1986

Tester: Walter Sorger

Scenario: A Republica of Los Bananas somewhere in the world. The players
represent political powers within a state and try by hook or by crook to divert the main
part of the public budget to their own private Swiss bank account.

The Game: The game board shows the important political quarters of a modern
capital (presidential palace, parliament, police districts, barracks, embassies, central
bank etc.). The game takes 9 to 11 rounds, in each round cash is put into circulation.
When the whole stock of money is exhausted the game is over. Winner is the player with
the highest amount of money in his bank account.

One player is El Presidente, an office in which he is elected democratically. The
president assigns the remaining 6 positions (Ministry of Internal Security, Air Force,
Navy or one of 3 Generals) to the other players. He is free in his decision, each player
gets at least one and at most two offices.

This demonstrates the first partiality of the president. The president assigns the
positions not uniformly among the players, but prefers those, who seem to be loyal; those
player with which he attempts to feather his nest.

His “feathers” are the randomly drawn 8 to 24 million Pesos Foreign Aid,
which form the public budget. The president distributes this money amongst all the
players in an absolutely arbitrary manner. He may keep all the cash for his own or he may
give all or part of it to one or several other players. This demonstrates the second
partiality of the president and is called his budget proposal. It is voted on, and of
course the hurt players vote against it. If the budget passes, it is divided up amongst
the fortunate players. If it fails, the Minister can force it through with gun power.

Such a proceeding does not make friends. But Junta is not a game for friends.
Everybody plays at his own bill. Alliances are concluded for short-dated aims only, and
they last only so long as no other profitable goals are found. These may be an
assassination attempt against a rich ally or a coup attempt against the governing
junta.

Any player may initiate an assassination attempt against one other player. This
happens by ordering an assassin to a specific location (bank, head quarter, home, lover,
night club) to kill the denominated office person. The assassination attempt is
successful, if the wanted person really moves to the chosen location. In this case the
agent gets all the cash on hand of the victim.

A coup attempt may be initiated by any player. Before the coup starts each player must
declare whether he chooses the rebel or the loyalist faction. Thereupon is a little war
game, consisting of 6 turns, in which each side struggles to gain control over the
majority of the 5 ‘key’ areas of the capital. After the appropriate number of
turns the coup is terminated and the result is counted.

If the coup is successful, the declared rebels vote on a new El Presidente. If the
coup fails, the governing junta remains in power. The winning side can execute one
person. An executed victim looses all his collected political influence and the president
gets the cash in his hand.

The money the players get during the game doesn’t count for the winning balance at
the end of the game. To determine the winner, only the money on the Swiss bank account is
evaluated. And how do you manage to it get there? In going to the bank and crediting your
cash to your Swiss account. This sounds quite simple, but it isn’t. In political
turbulent times the bank is closed or takes lunch hour and is inoperable for your
transaction. Additionally the assassins lie in ambush in the bank, and there is no more
lucrative target than a partner with much cash.

Playing time: 3 hours, plus rules explanation

Similar games: Republic of Rome, Kreml, Risiko

Westpark Gamer’s Opinion: As preparation for a junta session the game
instructions give the advice to write 100 times “Junta is only a game”. This a
very useful advice because Junta is really only a game. A good game – for good players,
permitted for players over 18 years (like love). It is an ingenious transformation of the
political intrigues in a Republica of Los Bananas into a game scenery. You need sense of
humour (and esprit) to enjoy the immorality and anarchy of this outlined society. Your
companion in storming the president’s palace immediately points to you to be executed
after his election for president, if your are worth to be inherited. Such is life.

The mechanisms of the game are mature and well proportioned, even if fortune (the
president) may distribute the wealth of the state very inequitably. The player, who
obviously was favoured by fortune is immediately a target of the envy. He is closer to
the brink of death than the harmless ‘have-not’, who may gain sudden richness by
committing an assassination or a rebellion.

And how do you win this game? Peter tried it as president with psychical pressure,
with terror against everybody – and often he was successful. Moritz trusted in the
Minister of the Internal Security; in this position he may commit one additional
assassination attempt per round. I don’t know (exactly) which are the principles of a
winning strategy. I dream of a great coup de main, a screened waiting for the
opportunity, where my turn is the last and I can assassinate a rich play mate, who just
assassinated a rich mate … . And this of course in the bank, where I can immediately
move all my booty to my Swiss account, before I have no chance to do this against the
joined gang in the next round. For this I must be able to determine the turn order. And
for this I have to be president and nominate the player left to me as Minister of the
Internal Security …

Walter’s Rating: 9 (out of 10), because of the ingenious mapping of a junta
democracy.

Westpark Gamers Rating: 8.8

Links to further information: Bruno Faidutti’s “Junta” Review
Funagain web page about “Junta”
Luding Link to “Junta”

Junta

Junta

Hersteller: ASS

Autor: Vincent Tsao (ursprünglicher Entwurf); Ben Grossman / Eric Goldberg
(Weiterentwicklung)

Getestet: Deutsche ASS Ausgabe, 1986

Tester: Walter Sorger

Szenario: Eine Bananenrepublik irgendwo auf der Welt. Die Spieler
repräsentieren politische Gruppierungen innerhalb des Landes und versuchen auf Biegen
oder Brechen den größten Teil des Staatshaushaltes auf Ihre Seite bzw. auf ein privates
Konto im Ausland zu bringen.

Das Spiel: Das Spielbrett zeigt die politisch wichtigsten Quartiere einer
modernen Hauptstadt (Präsidentenpalast, Abgeordneten-Kammer, Polizei-Reviere, Kasernen,
Botschaften, Zentralbank, Millionärs- und Elendsviertel u.ä.). Das Spiel verläuft in 9
bis 11 Spielrunden ab, in denen jeweils Geld in Umlauf gebracht wird. Ist der gesamte
Vorrat an Spielgeld ausgegeben, so endet das Spiel. Sieger ist derjenige, der das meiste
Geld auf sein Schweizer Konto gebracht hat.

Ein Spieler ist Präsident, ein Amt, in das er in der Regel demokratisch gewählt wurde.
Der Präsident vergibt die übrigen 6 Regierungsämter (Minister für innere Sicherheit,
Kommandeur der Luftwaffe, Admiral der Marine und 3 Generalsposten) an die anderen
Mitspieler. Er tut dies in freier Entscheidung, wobei jeder Spieler mindestens ein Amt
und höchstens zwei Ämter bekommen kann. Hier zeigt sich die erste Vorliebe des
Präsidenten: Er verteilt die Ämter nämlich nicht gleichmäßig auf alle Spieler, sondern er
bevorzugt diejenigen, die ihm treu zu sein versprechen und mit denen er in der nun
folgenden Junta-Phase sein Schäfchen ins Trocken bringen will.

Sein “Schäfchen” sind die zufällig gezogenen 8 bis 24 Millionen Pesos
Staatshaushalt die der Präsident als “Entwicklungshilfe” einstreicht. Dieses
Geld verteilt der Präsident absolut willkürlich an die Mitspieler. Hier sind der
Verteilung keinerlei Grenzen vorgegeben. Der Präsident kann alles ausnahmslos für sich
behalten; er kann aber auch alles oder einen Teil davon an einen oder an mehrere Spieler
weitergeben. Die Aufteilung des Etats an die Spieler zeigt die zweite Vorliebe des
Präsidenten und nennt sich “Staatshaushalt vorschlagen.” Natürlich sind immer
ein paar Spieler gegen die vorgeschlagene Verteilung, aber wenn die Mehrheit der Spieler
dafür ist, dann ist der Staatshaushalt angenommen. Falls aber eine Mehrheit gegen die
vorgeschlagene Verteilung ist, so kann der Minister des Inneren den Haushalt mit Gewalt
durchsetzen.

Ein solches Vorgehen schafft natürlich keine Freunde. Aber Junta ist auch kein Spiel
unter Freunden. Jeder spielt für sich. Allianzen werden nur für kurzfristige Ziele
eingegangen und halten nur solange, bis sich lohnendere Ziele auftun. Das kann z.B. ein
Attentat gegen einen reichen Verbündeten oder ein Putschversuch gegen die regierende
Junta sein.

Ein Attentat kann jeder Spieler kann innerhalb der “Terror-Phase” einer
Spielrunde auf einen anderen Spieler ausüben. Dies geschieht durch die Ankündigung:
“Ich schicke einen Attentäter zum Ort X (Bank, Hauptquartier, Zuhause, Freundin,
Nachtclub), um ein Attentat auf den Spieler Y durchzuführen.” Das Attentat ist
erfolgreich, wenn der betroffene Spieler sich tatsächlich an dem angekündigten Ort des
Attentats aufhält. In diesem Fall bekommt der Beauftragende des Attentats das Bargeld des
Opfers.

Ein Putsch ist ein Aufstand gegen den Präsidenten-Clan und kann von jedem Spieler
ausgelöst werden. Ist der Putsch initiiert, dann entscheidet sich jeder Spieler, auf
welcher Seite er in den Kampf zieht: ob er sich den Aufständischen anschließt oder ob er
regierungstreu bleibt. Anschließend führen die Truppen der einzelnen Regierungsämter
(eigentlich sind es alles Kriegsämter) die Putsch-Phasen durch, bei denen es darum geht,
die Mehrheit der Schlüsselpositionen in der Hauptstadt zu erobern. Gekämpft wird durch
Würfeln. Bei jeder geworfenen 6 wird eine gegnerische Truppeneinheit entfernt.

Siegen die Aufständischen, so ist der Präsident abgesetzt und die Rebellen wählen
unter sich einen neuen Präsidenten. Siegt die Präsidentenseite so bleibt alles beim
alten. Nach jedem Putsch kann die siegreiche Seite einen Spieler der Gegenseite
erschießen lassen (Natürlich wird nicht der Spieler erschossen, sondern der Amtsträger
den er repräsentiert. Bei der nächsten Runde sind alle Spieler bzw. Amtsträger wieder
munter und fidel.) Ein “erschossener” Spieler verliert seinen gesamten
angesammelten politischen Einfluss. Sein Geld erhält der Präsident.

Alles Geld, das die Spieler im Laufe der Zeit bekommen, ist zunächst mal nur Bargeld.
Es zählt zur Siegesabrechnung am Ende des Spieles nicht mit. Zum Sieg zählt nur das Geld
auf dem Schweizer Konto. Und wie kommt das Geld auf dieses Konto? Indem man es zur Bank
bringt. Das klingt zunächst ganz einfach. Ist es aber nicht. In politisch unsicheren
Zeiten ist die Bank geschlossen oder hat “Mittagsruhe” und nimmt keine
Einzahlungen entgegen. Weiterhin lauern in der Bank die Attentäter, und es gibt kein
begehrteres Opfer als ein Mitspieler mit viel Bargeld.

Spieldauer: 3 Stunden, zuzüglich Regelerklärung

Ähnliche Spiele: Republic of Rome, Kreml, Risiko

Kommentar der Westpark Gamers: Als Vorbereitung auf ein Junta-Spiel gibt die
Spielanleitung den Tip ‘Schreiben Sie 100 mal “Junta ist nur ein Spiel” auf
ein Blatt Papier.’ Dies ist ein sehr nützlicher Tip, denn Junta ist wirklich nur ein
Spiel. Ein gutes Spiel – für gute Spieler, freigeben ab 18 Jahre (wie die Liebe!). Es ist
eine geistreiche Umsetzung der politischen Winkelzüge in einer Bananenrepublik auf eine
Spiel-Szenerie. Man braucht Humor (und Esprit), um die absolute Moral- und
Gesetzlosigkeit der skizzierten Gesellschaft zu goutieren. Derjenige, der gerade noch im
Schulterschluss mit Dir den Präsidenten-Palast erstürmt hat, stellt Dich gleich im
Anschluss daran vor ein Erschießungskommando, um Dich zu beerben. So ist das Leben.

Die Spielmechanismen sind ausgereift und ausgewogen, so ungleich das Schicksal (der
Präsident) auch die Güter des Staates verteilen mag. Wer offensichtlich gut bedacht
worden ist, zieht sogleich die Neider auf sich und steht näher an der Schwelle des Todes
als der Habenichts, der über ein Attentat oder einen Putsch zu plötzlichem Reichtum kommt
und diesen womöglich auch noch unangefochten zur Bank bringen kann.

Und wie gewinnt man dieses Spiel? Peter versucht es als Präsident durch psychischen
Druck, durch Terror nach allen Seiten – und ist damit oft erfolgreich. Moritz glaubt an
den Minister der Inneren Sicherheit, als der er einmal pro Runde ein zusätzliches
Attentat versuchen kann. Ich weiß nicht (sicher), welche Prinzipien zur Siegstrategie
gehören. Aber ich träume von dem ganz großen Coup, d.h. von dem bedeckten Abwarten auf
die Gelegenheit, wo ich als letzter und harmloser Mitspieler ein Attentat auf denjenigen
ausübe, der seinerseits gerade ein erfolgreiches Attentat auf einen reichen Mitspieler
durchgeführt hat, der auch gerade … . Und dies alles natürlich auf der Bank, wo ich
meine Beute sofort einzahlen kann, bevor ich in der nächsten Runde gegen die gesamte
Meute keine Chance mehr hätte. Dazu muss ich die Spieler-Reihenfolge genau vor Augen
haben. Und dafür sollte ich Präsident sein und den Spieler links von mir zum Minister des
Inneren ernennen …

Walters Bewertung: 9 (von 10), wegen der geistreichen Abbildung einer
Junta-Demokratie.

Westpark Gesamtbewertung: 8.8

Weiterführenden Informationen: Bruno Faidutti’s “Junta” Review
Funagain-Seite mit Spieler-Kommentaren über “Junta”
Luding Link zu “Junta”

Cartagena

cartagena

Cartagena

Publisher: Winning Moves

Author: Leo Colovini

Tester: Aaron Haag

The Game: This game is inspired by the escape of pirates from the fortress of
Cartagena in 1672. Each player controls a group of six prisoners which need to be led
through an underground tunnel to the waiting boat. Movement of the pirates is achieved by
playing cards from the player’s hand. Each player starts with a set of 6 randomly
dealt cards. The tunnel (prepared by randomly laying six large tiles at the beginning of
the game thereby offering a large variety of tunnel layouts) is marked with 6 different
symbols with each symbol appearing 6 times (once per tile) throughout the tunnel. A card
played carries one of these symbols and the player moves one of his/her pawns to the next
unoccupied symbol in the tunnel. If there are no vacant symbols left on the way to the
boat the pawn is moved on the boat. The first player whose 6 pirates have successfully
escaped to the boat wins the game.

A players has one to three moves per turn with a move being either playing a card and
moving a pirate forward or moving a pirate back into the direction of the start position
to a symbol occupied by one or two other pirates. In the latter case the player collects
one or two new cards (depending on the number of pirates on the symbol moved to).

The game offers to variants: one where all cards (hand cards and draw pile) are
concealed and another one where the hand cards and the next 12 draw cards are face up for
a more tactical game.

Playing Time: The game can easily be explained in 5 minutes and played in 30 to
45 minutes.

Similar Games: Ausbrecher AG (Ravensburger)

Westpark Gamer’s Opinion: We played the more tactical “Tortuga”
variant with face up cards. The first problem we encountered was that it is not possible
to plan ones move ahead. Each player has to wait for his/her turn before figuring out the
best possible move. Luckily, we have no players in our group who want to find their
“perfect move” by contemplating their position for minutes on end. This is
certainly a problem with the Tortuga variant because of the many unconcealed cards. The
tactical decisions are limited to grabbing the more important symbol cards from the open
cards layout and to avoid moving backward to a symbol occupied by one pawn only (because
you will get only one new card but open a possibility for another player to collect 2
cards by moving backward to the symbol you just drew to). We felt that a third variant
where the player’s hands are concealed but the draw cards are face up would not limit
the “tactical” decisions but at the same time reduce the turn time of each
player.

Aaron’s Rating: 3 (out of 10)

Westpark Gamers’ Rating: 4.0

Links to further information: Luding “Cartagena” reference page
Funagain page with player reviews of Cartagena

VICEROYS (mit COLOMBUS, Expansion Set)

VICEROYS (mit COLOMBUS, Expansion Set)

Viceroys

Hersteller: Task Force Games

Autor: Marc McLaughlin

Getestet: Englische Ausgabe, 1. Auflage, 1986

Tester: Moritz Eggert

Szenario: : Nach der Renaissance stürzen sich die verschiedenen europäischen
Mächte (bis zu 7 im Grundspiel, mit “Columbus” bis zu 8) auf den Rest der Welt,
um diesen möglichst effizient zu versklaven, missionieren und auszubeuten – eine
realistische Darstellung der menschlichen Geschichte also…

Jedes der Länder hat andere Startbedingungen und Spezialfähigkeiten. So ist zum
Beispiel Portugal sehr gut in der Erforschung von unbekannten Erdteilen (man denke an
Vasco da Gama) und England verfügt über eine überlegene Flotte; Spanien kann Galleonen
verwenden, und China baut fleissig an der grossen Mauer.

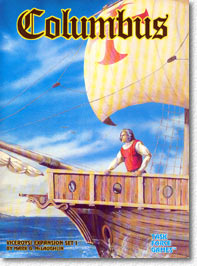
Columbus ExpansionGespielt wird auf einer authentischen und alten
niederländischen Karte, die mit einem Gitternetz überzogen wurde (das ist zwar ein
schöner “touch”, aber leider ist die Druckqualität der Karte relativ schlecht,
und da es im Spiel wichtig ist, was “Land” und was nur “Wasser” ist,
kann man sich auf endlose Diskussionen über kleine, kaum zu erkennende Inselchen gefasst
machen). Das Spiel hat 3 verschiedene Ausgangsmöglichkeiten, über die am Anfang
entschieden wird: Eine beliebige Spieldauer (“um 12 Uhr ist Schluss”), eine
“sudden death”-Methode (ab einer bestimmten Runde kann das Spiel per Würfelwurf
jederzeit enden) und eine feste Spieldauer (10 Runden). Bevor angefangen wird, sollten
die Teilnehmer viel Sitzfleisch mitbringen – die Regeln haben es in sich, und sind über
ein dickes, kleinbedrucktes und über 50 Seiten langes Regelwerk verteilt. Die
Zugreihenfolge ist jeweils zufällig bestimmt, und wird jede Runde neu gezogen. Man kann
mit seinen Schiffen unbekannte Länder erforschen, Kolonien errichten, Krieg gegen
Eingeborene führen, etc. Alle Aktionen ergeben potentiell Siegespunkte, die erst am
Schluss des Spiels berechnet werden. Eine lustige (aber leider unpraktikable) Idee ist
es, die verschiedenen Spielaufgaben (Verwaltung des Geldes, Verteilung der Karten, etc.)
mittels richtiger “Ämter” an die Spieler zu verteilen, wofür diese in Spielgeld
auf höchst unterschiedliche und oft umständliche Art entlohnt werden.

Wer am Schluss am meisten Siegpunkte hat, gewinnt. Im Regelheft gibt es ausserdem noch
ausgedehnte Solitärszenarien und Varianten für 2 und mehr Spieler, deren
Siegesbedingungen jeweils unterschiedlich sind.

Das Spiel: Nun, wir haben es hier mit einem “Monsterspiel” zu tun. Es
gibt viele, viele kleine Counter, die sich auf dem viel zu kleinen Spielplan türmen und
ständig umfallen. Es gibt viele Regeln, und dann noch viele Subregeln, und dann noch
Subregeln zu den Subregeln. Das Spiel dauert laaaaaaang. Dagegen ist grundsätzlich nichts
einzuwenden, aber die Thematik hätte auch zum Teil simpler umgesetzt werden können, ohne
den Spielspaß zu verringern. Hinzu kommt, daß manche Nationen wie Russland oder China
hoffnungslos benachteiligt wirken. Ihre Armeen sind schlechter, UND sie betreiben
praktisch keine Seefahrt (und das ist fast der einzige Weg, Punkte zu machen!). Das
Expansion Set “Columbus” fügt wieder Erwarten nicht etwa Columbus, sondern
China und noch mehr Zusatzregeln ein.

Spieldauer: Erklärung MINDESTENS eine Stunde, bei Anfängern noch viel mehr.
Spieldauer ca. 15 Minuten pro Spieler pro Runde (siehe oben).

Ähnliche Spiele: “Age of Exploration” (sehr ähnlich, aber noch
glücksbetonter und mit Konzentration auf den Entdeckeraspekt), “New World”
(Konzentration auf Amerika, nicht uninteressant und weniger komplex),
“Conquistador” (mehr ein traditionelles Wargame) und “Spanish Main”
(vom 1830-Altmeister Francis Tresham – ein Beispiel wie die Thematik äußerst elegant und
spielbar umgesetzt werden kann – leider nur für 4 Spieler).

Kommentar der Westpark Gamers: Bei den “
Münchener Spuiratzn

fanden sich die “usual suspects” ein, insgesamt 7 wirklich erfahrene Spieler,
die vor keinen Regelschwierigkeiten zurückschrecken. Dennoch schafften wir in über 5
Stunden gerade mal 3 Runden des Spiels. In diesen 3 Runden passierte zwar
zugegebenermaßen recht viel, aber die Wartezeiten der einzelnen Spieler waren zum Teil
übermäßig lang. Und das, obwohl wirklich keiner sich blöd anstellte! Viel Zeit wurde für
die Ausübung der “Ämter” verwendet. So erhält zum Beispiel ein Spieler
jedesmal, wenn Eingeborene (aber nur unter bestimmten Umständen, siehe Regel xy/344
Subparagraph 398) angetroffen werden, 1 Krone (die Währung des Spiels), was jedesmal den
Spielfluss unterbricht. Ein anderer wiederum bekommt beim Schlichten von Regeldisputen
Geld von den Disputanten (was mich, der dieses Amt innehatte, natürlich verleitete,
ständig solche Regelkonflikte zu erzeugen!). All dies ist zwar ganz nett, aber einfach
hypertroph für ein Spiel, das eh schon komplex ist. Wenn man dann bedenkt, daß jeder
Würfelwurf (und bei dem Spiel wird sehr viel gewürfelt, wobei schlechte und gute Würfe
oft allein spielentscheidend sind) erst anhand dutzender Modifikationen (“+2 für
Subregel 5.678/A”, etc.) berechnet wird, kann man sich denken, daß der Spielfluss
eher stockend ist. Auch mit Experten, die das Spiel schon mehrmals gespielt haben, sollte
man also eine Viertelstunde Spieldauer pro Spieler und pro Runde ansetzen (das heißt,
wenn man die volle Länge von 10 Runden spielen will, würde man 17 ½ Stunden ansetzen
müssen). Nun: “Advanced Civilization” kann eventuell auch so lange dauern, aber
letzteres ist ein äußerst befriedigendes strategisches Spiel mit wenig Glückselementen.
Was ich damit sagen will: Für ein Spiel, in dem Glück eine so große Rolle spielt, ist die
Spieldauer zu lang. Und ein Wargame ist es auch nicht, denn dafür ist das taktische
Element zu gering, Denn selbst ein aussichtsloser und dummer Angriff kann durch nur ein
bißchen Glück und entsprechende Ereigniskarten gewonnen worden…

Trotzdem waren sich alle einig, daß das Spiel einiges Potential als Simluation besitzt
(wenn es auch keine realistische und vor allem nicht historische Simulation ist) und
eventuell in geringerer Spielerzahl, vielleicht sogar mit 2 Spielern, mehr Spaß machen
kann. Wer viel Zeit hat, kann die Solitärvariante probieren, in der beliebig viele Gegner
auf ziemlich komplexe Weise simuliert werden. Ich habe das mal angespielt, und es war
nicht ohne Reiz, allerdings fast noch zäher als mit Mitspielern…

Moritz’ Bewertung: 5 von 10

Westpark momentane Bewertung: 4.6

Weiterführende Informationen: Web-Grognards
(hier handelt es sich um eine englische Beschreibung/Kritik des Spiels, die wesentlich
positiver als unsere ausfällt)

GI-Interview with Wolfgang Kramer

(This article was originally published in “Games International”, issue #13 and is reproduced here with the permission of Brian Walker, the former GI editor)

THE GI INTERVIEW

Wolfgang Kramer

There can be few more commercially successful games designers in the world today than Wolfgang Kramer. His Auf Achse alone has sold over half a million to date, while others such as Nikki Lauder’s Formel Eins, and Wildlife Adventure remain firm favourites with games players of all ages and preferences. Wolfgang took time out at the recent Essen Games to discuss how he puts it all together.

When did you first become interested in games?

It started when I was a child. My grandma used to play with me; she always used to let me win, so I developed quite a positive feeling about games. When I reached my teens I started buying all the games I could find, though this was in the fifties so there wasn’t really much around, just variations of Monopoly and Scrabble. I then started to change some of the games I bought. My friends preferred the ‘new’ versions and suggested I make some games of my own. At that time I didn’t think I was able to, though the idea stayed with me. A few years later I started to study commercial science. In my free time I started to develop ideas for my first game. I’ve always liked race games, but I didn’t want one where you just roll the die and move, so I had to develop a new movement system. I wrote down about twenty possibilities.

Was this how Tempo was born?

Yes, but not straight away, though Tempo was my first published game, in 1974 I think. Tempo was an abstract game using a card based movement system. It took me about a year to refine it to the state where it could be published.

A few years later I modified it and it became Formel Eins. The motor racing theme is not so important. The system is adaptable to virtually any form of racing.

I remember you telling me once that your design approach is system first, theme later.

Yes, that’s mostly true, though in the case of Wildlife Adventure the theme came first.

What about Auf Achse?

Again the theme came first, because this was a promotional game originally, which was specially commissioned by a road haulage company.

What is your favourite out of all the games you have designed?

I like Around The World in Eighty Days a lot, and Formel Eins. Although it has sold very well, Auf Achse is not really one of my favourites, likewise Undercover (Heimlich & Co) though they are my games so I stand behind them (laughs).

What have you got coming out next year (’90)?

One of my old games, Coup, is being published by F X Schmid this year with a new theme: it will be called Holiday. There will be a card game from Ravensburger, which I co-authored, called Cash, and also Terra Indium, an abstract game which I did for Kosmos.

The press verdict on this year’s (’89) releases was not good. The feeling was that the games were getting too simple.

Yes, I understand what you mean. Ravensburger, MB, Parker, they all want simple games. I think Ravensburger are changing, though. They want to do one or two games with a higher level which will not be so commercial.

Do you play other people’s games?

Oh yes. I like Sid Sackson’s games very much, and Alex Randolph’s. When I’m not playing or working on my own games, I teach games.

How’s that?

There is a school in my town which, like most schools, teaches lots of subjects. I am the games teacher for four evenings a year, anyway.

Do you mean teaching people to design games?

No, how to play games.

What sort of games do you use as an example?

Quite a variety, really. Hol’s Der GeierCafe InternationalPlaybossHare and Tortoise.

What kind of age group do you teach?

Just adults. I’m also in a local games clubs where we play all the new games.

You seem very thorough and professional in your approach.

Yes, it’s very important for me to see what is happening in the market, and also how the public react. I come here to Essen, I go to the Nürnberg Fair. I must know what companies are publishing, and also what the trend for the future is. Also I like to try and understand why certain games get published and others don’t. I visit shops and talk to the people who sell games. In the bigger shops I organise promotional visits. I explain my own games to the customers. Some shops have special ‘games days’ where they have special teachers to explain the games to the public. Like with my visits, there is no money involved but they are valuable promotional exercises.

There seems to be a strong games culture in Germany.

Yes, but only in the last three or four years. In the seventies there was really nothing.

How important was Essen in this evolution?

There were several factors. The ‘Game of the Year’ was an important step. Also, people have more spare time now. TV too has produced a big counter reaction. Watching television is now considered very passive. With games, people come together and interact. The press picked up on this and now devote quite a lot of space to writing about games.

What are your favourite games, apart from your own?

I like to play AcquireHare and TortoiseFocusSharkAmazing Labyrinth, chess too. I played 1830 just recently – quite complex but very, very good. I play all sorts of games.

And long may you continue to do so.

Wolfgang Kramer was talking to Brian Walker.

A Bed of Steel

Strategy in 1830

By Alan Applebaum

The 1830 game system is one of the finest multiplayer systems around. As Edward Fahrmeier noted in his article “All Aboard” (Vol. 23, No. 6 of The GENERAL), it is possible for players to recover from a bad start; yet it is difficult to “gang-up” on the leader and reduce the game to a wild scramble with an arbitrary winner. Moreover, it is as close to a game of pure skill as a multi-player game can get, especially if all the players are competent so that their actions are reasonably predictable. Careful long-term planning is usually rewarded, while errors are mercilessly punished. Best of all, unlike CIVILIZATION or DIPLOMACY, the game is self-balancing because the cleverly-designed private company auction forces players to pay more for the most desirable private companies. Avalon Hill is to be congratulated for improving the already excellent 1829 (1830’s forerunner) system by increasing player interaction while simultaneously reducing playing time to a comfortable evening.

“Alliances” can be useful in 1830, but diplomacy should not play a major role. Because play is sequential rather than simultaneous, one member of an alliance will usually have an opportunity to betray another without fear of retaliation. Furthermore, most alliances typically benefit one member much more than the other, and that inequality will be fairly obvious. For these reasons, alliances are generally not a large factor in the strategy, beyond the point of two players tacitly or explicitly cooperating to develop a particular section of the mapboard.

Like Mr. Fahrmeier, I too think the game divided into three phases; but I define each of them slightly differently. The “opening” is the time before the sale of the first “4” train; the primary features of this phase are the development of the players’ stock portfolios and the struggle for control of the most desirable railroad corporations. In the second phase (or “middle” game), the primary focus is on the second stage of corporation start-ups and the acquisition of “permanent” trains. (I include the “4” train purchases here since the decision whether to purchase a “4” train usually determines when a railroad will acquire a permanent train and what kind it will get.) This second is the phase in which several railroads will be running for capital rather than for dividends, and one or more players may face bankruptcy. In the end game, which begins when all railroads have a permanent train, players turn their attention to maximizing their railroads’ runs while impeding opponents by selling stock in their railroads, placing tokens to block routes, or looting and dumping jointly owned corporations. Many games are so close that one corporation’s gain or loss of one row or column on the stock chart can determine the winner.

In this article, I will discuss each phase of the game separately. In the course of the discussion I will try to review and comment on the ideas expressed by Messers. Shelley and Fahrmeier in their articles in the 1830 feature issue of The GENERAL.

The Opening

The first task facing the players is to bid for the private companies. In general, I agree with the comments of both Fahrmeier and Shelley. The Baltimore & Ohio (B&O) provides the presidency of a good railroad corporation, but because it does not generate recurring revenue and may not be sold to a railroad corporation, it is not worth much more than its face value. The Camden & Amboy (C&A) is unquestionably the most valued private company in relation to its base price, often selling for more than $200. The fewer the players in the game, the more the C&A is worth, for in a three- or four-player game purchase of the C&A will not prevent its owner from becoming president of a corporation in the first stock round. I generally don’t show much interest in the other private companies, but will buy any of them at face value. The Delaware & Hudson (D&H) is probably worth a bit more than its face value of $70, but our experience has been that most attempts to use its special power of “teleportation” to hex F16 end in failure (more on this later). I believe Mr. Fahrmeier is incorrect in stating that the Mohawk & Hudson (M&H) cannot be sold to a corporation; the option to exchange it for a share of New York Central (NYC) or sell it to a corporation makes it worth more than $110, but it is still a poor cousin of the C&A. While I am no fan of the Canadian Pacific (CP) in general, it is poor strategy to run this railroad early in the game without possession of the Champlain & St. Lawrence (C&StL).

In a game of fewer than six players, therefore, if not buying the C&A, a player should not spend so much on the private companies that he cannot start a corporation on the first round. This means you need $402 , or $335 if you can start the Pennsylvania Railroad (PRR) because of the free share which accompanies the C&A. In a five-player game, you may buy a private company if you are sure that you will have enough cash by the third stock round to start a company.

These calculations may seem cumbersome at first, but are necessary for good play of 1830; if at any point in the game you find yourself or your railroad just a few dollars short of taking an important action, you are in trouble and it’s probably your fault. The only time this type of analysis really fails is if someone unexpectedly sells shares ahead of you that you were planning to dump, thus lowering the price. (This brings me to rules beef #1: I think all player and railroad holdings should be public. Since all transactions are public, keeping cash holdings secret simply rewards the players with better memories and slows down the game by requiring players to recap long sequences to figure out how much money a player or a corporation may have. Public disclosure also allows the players to catch each other if they – accidentally, of course – make an error in a transaction with the bank. With full disclosure, analysis and psychology, rather than memory, become the paramount virtues – a benefit, in my view.)

In conclusion, the only private company worth getting really excited about owning is the C&A; the others should not fetch more than $10 above face value. Buying a private company also affects the turn order, of course, and can cost you the chance to start the corporation of your choice.

After all the private companies have been sold, the next decision facing a player is whether or not to attempt to become president of a railroad. When we first began playing 1830, only two or three corporations would “float” (begin operating) on the first stock round. When the presidents of those first two or three consistently won most of the games, we realized that it is usually better to start a poorly capitalized railroad than none at all. There are several reasons for this.

Becoming a minority stockholder in someone else’s corporation benefits the president a lot more than it does you. You help drive the stock market token upward on the chart (if all shares are in player’s hands); you reduce the number of shares the president must buy to float the railroad; and you give the president the option of dumping the railroad whenever the priority card is favorably placed for him. Even if you sell your minority petition after three or four operating rounds, the president doesn’t greatly mind. You have temporarily driven the stock price down, but this is offset by the creation of bank pool shares which can be used to increase the railroad’s treasury without running for capital. Alternatively, the president (or other players) may purchase the shares from the bank pool at a discount which is unavailable to you (since you cannot sell and buy the same type of shares in the same stock round).

Another major reason to start your own company rather than help someone else do so is that it gives you an opportunity to sell your private companies. Typically, the players who do well in a game have sold their private companies into their own corporations at a handsome profit and then managed to rescue the corporation they “looted” by various stratagems we will discuss later. Those who play an “honest game”, operating their railroads to maximize the railroad’s success rather than their own, will find themselves falling behind, especially in games with fewer than five players.

Third, starting a railroad in the first stock round reduces the number of non-productive operating rounds for you. If you invest in a minority position in a corporation at the beginning of the game, the shares will not produce revenue on the first operating round simply because the railroad does not have a train. If, a few stock rounds later, you sell your minority holding and start your own company, you will not get revenue from your six new shares on the next OR for the same reason. You would have been better off starting a railroad of your own at the beginning, even at a lower price. Even if you must capitalize an extra time in the middle game because of the low railroad treasury, you are still better off than if you had started with minority positions planning to begin your own railroad later.

Finally, starting a railroad early gives you a head start on track development, as well as rightward movement of your corporation’s token on the stuck chart. Early in the game, the revenue generated by a share of stock is more important than its share price, so a $76 or $71 railroad is as good as a $100 one. In some ways, it is better, because a lower starting price enables you to invest in more shares of stock as well as allowing you to profit from upward and rightward movement on the stock chart. It is hardly ever worth waiting an extra stock round simply to start your first railroad at a higher price.

The only time it is really attractive to be a minority shareholder early in the game is if all the outstanding shares will be bought so that the token will moved up a row on the stock chart each round. If you sell at the right moment, you will have a handsome profit since the shares will have appreciated significantly in price in addition to generating revenue each operating round. If you miss-guess the president’s intentions, however, you may be trapped in a no-win situation. He will either begin running for capital, shutting off your income and driving the stock price lower, or will loot the railroad and dump it onto you.

Buying the presidency without enough money to float the railroad is even worse than taking a minority position. It is true that some other players may not be able to start a railroad of their own and will have to buy a minority position in some railroad. If you can’t buy enough shares to float alone, you are at their mercy. If they invest in a different railroad, you are stuck with dead shares. Probably one president will be bailed out in this situation – usually the B&O because of its high potential early revenue – but a second hardly ever will be (except in a six-player game perhaps). Once one non-president buys a minority position, later-playing non-presidents will tend to buy the same stock to benefit from the row rise on the stock chart and to avoid helping any other corporations float. If you buy only the president’s certificate and then wait to see what the other players will do before committing yourself further, you won’t be as badly burned if no one helps you out. But you may lose the chance to buy all the shares you want. Moreover, you will end up buying stock after everyone else is done and thus place the priority deal card to your immediate left, ensuring that you will buy last in the next stock round. In summary, unless starting the B&O (or there are no “live” shares to buy), don’t even consider starting a railroad with insufficient funds to float it unless the other players have previously shown a tendency toward generosity. The only exception, of course, is in a six-player game, where no railroad other than the PRR can be started by a single player in any case.

Once you decide to start a railroad, you must choose which one to start. The predominant view among my circle of players is that the PRR is far and away the best choice for an early start. The PRR/C&A combination is extremely powerful; players who hold these seem to win more than their share of our games (unless the C&A auction soared far over the $200 level). Even if the PRR and C&A are in different hands, we find that the C&A is quickly sold by its owner into another corporation so he can start a second new corporation early. If this does happen, hex H18 is freed quickly and the PRR runs for excellent revenue. Even if H18 is tied up, the PRR and B&O presidents can cooperate to generate fairly good runs between H16 and Baltimore. Only the very first PRR dividend (usually $3 per share) will be substandard.

Not only does the PRR have excellent access to the lucrative Baltimore-New York corridor, but it is unique among the companies in that: 1) it only requires the President to purchase five shares to begin operation; and 2) it does not need to build any bridges or tunnels to achieve an optimal run with a “5” or “6” train. This means that it needs to run for capital fewer times than other railroads, and can so be started at a lower price, enabling its owner to invest in more shares of stock. In fact, it is not unrealistic to construct a budget for the PRR that requires no capitalization at all:

“2” train – $ 80
“3” train – $180
“5” train – $450
H16 token – $ 40
total – $750

Thus the PRR can be started as low as $76 per share (an initial investment of only $380 for the president) and still have an excellent chance to become the highest-valued stock by the end of the game. If the B&O is started early and its president cooperates (as is in his interest to do), the PRR can expect to run for up to $200 with a “2” and “3” train in the early game (I15-H14-H16 and I15-I17-H16-H18) and eventually have a permanent run for a “5” train of $270 (New York-H18-H16-H10-Chicago).

Of course, this is the ideal scenario. It requires that the C&A owner and the B&O president do not go out of their way to impede the PRR’s development, and that the PRR gets an opportunity to buy a “5” train. Nonetheless, the prospect of ending the game with six shares worth $350 each and generating $27 each per operating round usually makes the PRR the first choice for being floated. An added incentive, of course, is that the PRR has four station tokens.

The best other early-start railroad is the B&O. As owner of the B&O private company, I always start with the B&O if possible, even at a low price. While the B&O is generally required to construct bridges (J14 and I17), the huge revenue it can generate early in the game gives its president a big boost. This high revenue is necessary for the B&O president to keep pace with other players who will sell their private companies to their own railroads. Fortunately, the B&O has by far the best potential runs of any corporation during the early operating rounds. A sample development will show this: on the first operating round, the B&O plays J14 and buys three “2” trains. On the second round, if green tiles are available, it upgrades J14, builds a station there and runs for $170; if green tiles are not yet available, it plays a straight track in I17, builds a station in J14 and runs for $140. This latter course burns an alarming $440 from the treasury, but one or two runs for capital at $250 or so (after a “3” train has been bought at the earliest opportunity) will restore the treasury to within purchase price of a permanent train. The B&O tends to dominate the game if other players buy into it during the opening stage; if they don’t, and bring out the “4” trains early starting their own railroads – thus killing the “2” trains – the B&O is still an above-average investment.

Some players prefer to keep the B&O railroad dormant and collect their $30 private company revenue each round, but that appears to be a losing decision. The following chart shows an ordinary sequence, with the consequences for Player A who starts the B&O railroad at first opportunity and for Player B who doesn’t. The figures refer to the accumulated cash generated by the private company or the two shares of B&O stock that it brings.


 Operating Round  Player A  Player B
 1  $30 $30
 2(run for $140)  $ 58  $ 60
 3 (run for $210)  $100  $ 90
 4 (run for $250)  $150  $120

Even if the “3” trains are delayed or if the “2” trains disappear after the fourth operating round (and the B&O’s run reduced to $110 or $120), the amount of cash generated by the two active shares in Player A’s hand will not fall far below that generated by an active B&O private company. Add in Player A’s increasing stock value, the benefits of corporation ownership, and the head start the B&O will get in track development, and the clear advantage lies with Player A’s strategy. The player starting the B&O late will likely find himself shut out of H16 (and probably New York as well); the B&O will have lost its geographical advantage. On the other hand, allowing another player to take control of the B&O sacrifices the value of the presidency for which you have paid a premium. The fact that two expensive shares of stock are tied up far outweighs the short-term revenue gain (if any) provided by the private company.

The only variation of the “B&O Delay” which appears viable is to pass during the first stock round, until either all other players have spent all their money or someone has bought B&O stock or started the Chesapeake & Ohio (C&O). If neither of the latter two events occur, it is reasonably safe to delay floating the B&O because your control of the B&O corporation and hex H16 are not immediately threatened. Another factor to consider is whether you expect the PRR president to work with or against the B&O. If the PRR president wants to be nasty and the B&O should be delayed three or four operating rounds before starting, the B&O may be permanently prevented from getting a decent run. On the other hand, a cooperative PRR president can do much of the B&O’s early track development for you.

After the PRR and the B&O, the next “tier” of starting railroads consists of the abovementioned C&O, and the New York, New Haven and Hartford (NYNH). The Erie is out of the question, of course.

The New York Central (NYC) runs too poorly with “2” trains and yellow tiles only; the Boston & Maine (B&M) is just a poor cousin of the NYNH; and the Canadian Pacific (CPR) has too little potential.

The C&O is a railroad full of promise. Unfortunately, it rarely delivers on that promise. Like the PRR, it has no immediate need to waste money on bridges or tunnels; but unlike the PRR, it will always be shut out of the Baltimore-New York corridor unless the B&O is not started early. I have seen very few games in which H16 was not occupied by a PRR and B&O token at the earliest possible opportunity. Moreover, the C&O has one less token than the PRR.

There are at least three basic strategies which can be employed by the C&O president. If the B&O is not started early, the obvious choice is to sprint for hex H16. This option includes buying only one “2” train and playing tiles on G7, H8 and H10. Unfortunately, even if the B&O is started a round or two late, you can still lose this race. The decision to follow this path depends upon how committed you think the B&O president is to keeping the corporation dormant. Even if the race to H16 is lost, playing tile #2 on G7 prevents its use on G17 (where it has unique value in developing highly profitable runs for the B&O, PRR, NYNH and/or NYC).

The C&O’s second strategy is the high-spending, high early-revenue course similar to that suggested for the B&O above. Build a sharp curve in G5 toward F4 during the first operating round. Then build a bridge in F4 and buy a second train during the next operating round. On the third and fourth, build two F4-Chicago runs by upgrading F4 with tile #15 (when available), placing a token in F4 and building a sharp curve in E3. On the fourth operating round, if the green tiles are available, you will be running for at least $170 with a “2” and a “3” train. On the next round, you can play another sharp curve in G3 and boost the run to $240 if you have two “2s” and a “3”. Unfortunately, this is pretty slow development in comparison with others, and costs $420 from the treasury. It is unlikely that the other players will allow you to run for $200+ more than once before buying a “4” train and spoiling your fun. Your long-term development prospects are now fairly poor as you will never reach the East Coast; expect to survive with a permanent run of $230 or less. Your permanent run can be slightly improved by developing E5, but this costs an additional $80 and damages your short-term prospects as you will probably wish to play tile #14 rather than #15 on hex F4 to reach E5 (reducing your access to Chicago).

The third feasible strategy for C&O is that of the “D&H teleportation”. On operating round #1, play a tile in G7 so that, should green tiles be available on the next round, you can play at F16 and still have a run. On the first operating round possible, buy the D&H with the C&O and spend $120 to place a tile at F16. The tile can be pointed either EW or NW-SE. Eventually you hope to establish a “4” train run of New York-F18-F16-G17-New York (worth $210) or a “5” train run extending to H18 (worth $260). This is a very nice set up, but takes a long time to establish; other nearby railroads may interfere with your plans, and your runs will be poor until New York is upgraded. If you are forced to do this yourself, you will have spent $495 (at least – $80 + $180 + $35 minimum + $80 + $120). If you also decide to buy a “4” train, you will get some great runs but will likely use them for capital since, even if you started the C&O at $100 per share, you will have but $215 left in its treasury. If you opt not to buy the “4”, then you will have gained little from the D&H play. Your “3” train could run for $130 from Cleveland to Chicago, the same as F16-G17-New York when fully developed. But you can manage a “5” train run of $250 out west at less expense (Chicago-E5-F4-H4-Gulf). The play in hex F16 does help the NYNH and NYC however, so if you own one of those corporations or expect to, you may have more to gain than this.

The NYNH president also has several viable options. The short-term strategy is to build toward Boston and purchase two “2” trains and a “3” train, placing a token in F22 and quickly running New York-F20, F21-F22 and F22-F24-Boston (for $140 with yellow tiles or $200 for green). This will involve a bridge on F22 ($80), bridge in New York ($80), token in F22 ($40), two “2” trains ($160) and a “3” train ($180) – or about $540. Your best “3” run will probably be New York-F20-F22 for $100, so to stay within one round of a “5” train you must start the railroad at $90 per share. The permanent NYNH run will likely be confined to New York – Boston ($190 when fully developed), so a “5” train is all you can use. One advantage of this is that your play in hex F20 seriously impairs the development of the NYC, especially if all the sharp curves are in play so that it cannot establish a run with only two tile lays.

A longer-term strategy for the NYNH is to play tile #69 toward Albany, eventually hoping to cooperate with the NYC and establish a coast-to-coast route. Your hope is that the NYC president will pick up the tab for upgrading New York, while the NYNH plays its station in E19 or perhaps F16. The NYNH thus lays out only $300 for a “2” train, a “3” train and a token in Albany in the early going, and can afford a “4” later with a view towards acquiring a diesel. The best version of this strategy is for the NYNH president to acquire the NYC also, of course, but this will usually demand bankrupting the NYNH by selling it private companies. Otherwise, another player will surely grab the NYC first as it will have a head start on track development.

The NYC itself is an endless source of fascination in our gaming group. Its four tokens and proximity to New York make it extremely attractive as a long-term investment, but it tends to run very poorly early in the game. Its initial run is only $30, and it cannot conveniently run a second train until several green tiles have been played. When the “3” trains are available, it is the overwhelming favorite among players starting a railroad at that time, and is devastating to control in combination with one of its neighbors.

Obviously, the Erie cannot be started at the beginning of the game because it cannot even build track in its home hex until the green tiles are in play. When the green tiles do appear, prospects will be limited because there are only two “OO” tiles in the game (one of which invariably appears on H18 at the first opportunity). Thus, early development for the Erie consists only of a gentle curve into Rochester and a connection to Albany, for a lackluster run of $90. This railroad is therefore viable only as a second corporation, probably for the owner of a nearby line such as the NYC which can aid its progress. The Erie’s sole advantage is its ability to monopolize the high-scoring cities in the Buffalo-Toronto area (because the OO upgrade tiles allow a single token to block passage through the hex). Thus, once the brown tiles are available, the Erie becomes pretty reasonable – especially if nearby track has been also developed.

The B&M has all the disadvantages of the NYNH, with none of the advantages. It is not guaranteed passage through New York, so it will often have to expend its only token there. Unless a tunnel is cut in D22, the B&M cannot reach Albany early enough to avoid being blocked there. If tile #56 is played on F20 and/or the NYNH plays its token in E19, the B&M’s dim prospects become dismal.

Many players feel the CP an attractive railroad to start at the beginning of the game. As a potential D&H “teleporter”, it is superior to the C&O simply because it has more tokens and its initial run between B16 and A19 is worth $60. If a player can contrive to hold both the C&StL and the D&H, the CP becomes very attractive; but this is extremely difficult to do because they are sold consecutively on the first stock round.

With the C&StL alone, the CP can run well in the early going: on operating round #1, place a sharp curve in B18 connecting A17 and buy two “2” trains; on #2, play B16 and put a token there, running the trains for $90, and buy a “3” train if available; on #3 (assuming the green tiles are available), buy the C&StL, play a sharp curve in B20 or upgrade B16 and run for $160; in the fourth round, upgrade B18 with tile #18 and run for $190. Unfortunately, this is probably your last run with the “2” trains, and now you will run for only $80 with a “3”. You have spent some $480 to reach this point. Thus, unless the CP started at $90 or $100 a share, you are more than one turn of capitalization away from a “5” train and will run many rounds with your “3” train. A “4”, even if you could afford it, is wasted because you don’t have the rail net to take full advantage of two trains. The only decent prospects for track development lie towards Toronto; but building there costs money and the Erie president will certainly thank you just before buying a token to freeze out the CP. Other than the Erie, no other railroad is likely to help the CP’s track development much once Albany is occupied.

Building the CP towards Albany, however, is even more futile. It requires the laying of at least two bridges (because the C&StL tile cannot be played right away), so you need to play B18 toward A16 to guarantee a run on the CP’s second operating round. The chance of reaching Albany before two of the three other nearby railroads occupy it with tokens is slight. In my view, then, the best early alternative for the CP (and the only one with a chance for profitable success) is the F16 play with the D&H. It is far better not to start the CP until the green tiles are sure to be available, however. Otherwise, you will be forced to spend $80 extra to establish a run through B18 in addition to your “2” train costs and the $120 for F16.

In summary, the CP is only the sixth-best railroad to start early in the game (bettering only the isolated B&M and the Erie). Late in the game, it proves even worse, since it is the only railroad on the map likely to gain no benefit whatsoever from track construction by the others. In our games, the CP is often either the last railroad started-or it is never begun at all.

Now that you have some idea of which railroad to start, what do you do with the rest of your money? If you have played the first stock round correctly, you shouldn’t have much left. It almost always pays to start your railroad at the highest price you can afford, planning to extract any extra cash it has by selling your private companies to it. By the third or fourth operating rounds, however, you should be ready to decide whether to start a second corporation or invest in an already existing line. Starting a second railroad is usually preferable, unless all the remaining corporations have very poor prospects because of unfavorable track construction by early existing lines. The second railroad not only allows you to hold an extra share within your limit of certificates, but also to cooperate with your primary railroad in track construction and station building. And, most importantly, a second one allows you to control the timing of your train purchases and to distribute cash efficiently between the two. It also avoids the necessity to invest in another player’s railroad (which may be looted and dumped upon you) in order to reach your certificate limit.

Ideally your second railroad should be started at $100 per share. This is not so much because it needs more cash to operate (it actually needs less, especially if the “4” trains are already available); rather the extra cash is needed to transfer to your older corporation so it doesn’t have to run for capital as much. Too, a high-priced second railroad has a fighting chance to reach the “high-rent” section of the stock chart, while a low-priced one doesn’t.

In many cases, unfortunately, the player seeking to start a second railroad cannot conveniently raise $600 alone, and must give up on it or start it at a lower share-price. If the older railroad has enough money to get a permanent train with but one capitalization round, the second can be started at a low price because no cash needs to be shifted. In most cases, however, the second round of railroad starts will involve those players who have sold private companies to their first for large amounts; such first companies usually need some help at this stage. Paradoxically, if your first railroad is in really terrible shape, you can raise the cash to start your second by selling all but the president’s certificate. No one else will want to take on the railway from you if it is broke. On the next turn of operating rounds, the railroad may get cash from the shares in the bank pool without being forced to run for capital. If, by selling your shares, you now have enough money to start a second company at $100 per share, you should be able to bail out the first if necessary.

If a really attractive railroad company is available to be started, you don’t have enough money to “float” it until the next stock round, and you think another player yet to purchase during this stock round will grab it, you could buy the president’s share only (or even one additional share) and set the price at $67. Other players will realize that if they take control from you, you are quite liable to sell your two or three shares and drive the market token down two or three rows on the chart making it a rather unattractive investment. The two or three shares are deadwood in your hand, of course. You have to weigh carefully whether you have more profitable short-term purchases and whether you are willing to run the railroad at $67 per share later. This is one of the few situations where it is quite proper to buy shares that are not certain to be “live” during the next operating round. Unless it’s a six-player game, I would assume that no one will throw me a lifeline if I should purchase only four or five shares of a new company.

In the event that you are unable or unwilling to become president of a second railroad, you will usually have a choice of a number in which to become the second-leading shareholder. The obvious considerations are the track development potential of the railroad, the state of its treasury, the skill of its president, and the state of other railroads owned by that president. The most attractive minority position is one in a railroad with good potential, lots of money, run by a capable player who has no other railroads and no unsold private companies. Other things being equal, I tend to choose one owned by the player nearest my immediate left. This has two advantages. First, the president cannot loot the railroad and stick you with the presidency unless he has the priority card himself. Second, if he has fewer than five shares, you may get a chance to take the railroad away from him if the other outstanding shares are sold piecemeal by the other players, allowing you to pick them up before the president can.

Keep in mind that owning more than one share of any railroad that you are not president of is always a risky proposition if the president has a way of looting it. If the person does loot it and makes you the president, he might not win – but you definitely won’t! Controlling your share or more than your share of corporations removes this risk for the entire game. In a six-player game, you can survive nicely with one railroad as you can own six shares of it and one share of six others, for a total of 11 certificates (your limit). In a five-player game, the winner will almost always come from among the two or three who have two railroads. In a four-player game, you can do quite well as president of only two corporations if you hold six shares of each and can obtain one share of each of the six others (for a total of l6 certificates). With three players, the player with only two railroads is usually the loser (unless both are very good).

One factor which will color your strategy is the tendency of the other players towards what I call a “fast” or a “slow” game. A “fast” game is one in which four or five railroads are started early and the train inventory is run through quickly; in a “slow” game, the “3” trains may not emerge for five or six rounds. In a fast game, the “2” trains will not last long, so it is unwise to invest in too many of them. Except for the B&O (and possibly the C&O), no railroad can profitably use three “2” trains. Several railroads in a fast game will require their presidents to bail them out from cash in hand, so it doesn’t pay to use a long-term strategy. A bankruptcy is fairly likely, especially in a five- or six-player game.

[Rules beef #2 (my only serious one): the rules covering bankruptcy are terrible! If a bankruptcy occurs, the winner is the richest player at that moment. All long-term planning is useless; the result of the hours spent playing is completely arbitrary. Why not just put all the bankrupt player’s stock (including his presidencies) into the bank pool and send him home early? I have seen games in which one player intentionally saves another from bankruptcy simply because the first was not winning at the time, even though the aid given would not otherwise have been in his best interest. I have even played in games in which players doing poorly were unsporting enough to intentionally bankrupt themselves, so spoiling the game for everyone. This rule requires some revision in future editions.]

In looking at a “fast” game, the basic principle is to go against the grain – do the opposite of what most of the other players are doing. If you expect a fast game, you should play conservatively to protect your railroads from having their trains stripped away before the treasury is rebuilt. You aim to force others to deplete their capital by buying short-lived, temporary trains.

On the other hand, in a “slow” game, in which players are reluctant to buy multiple trains and/or start new railroads, you should play aggressively, buying multiple “2” and “3” trains, running for dividends every chance and building an early cash lead. If your railroads reach a precarious strait, you should have ample warning if the others decide to bring about your downfall by suddenly speeding through the train deck and killing your “3” trains since not many competing railroads will be in play. If the game develops slowly enough, you may not even mind paying for a permanent train out of pocket; you will be more than compensated by your early cash and high stock prices.

Always buy that “3” train at the first opportunity. A railroad without a “3” train will lose a run when the “4” trains appear (unless you were lucky enough to buy the first “4”). As the “3” trains last through the next seven to 11 bought, they get a lot of use. Don’t buy two “3” trains, however, unless you can definitely sell one to a second railroad, or you expect a very slow game. Once a “5” is bought, the limit on trains is two and you cannot buy a “5” or “6” yourself until the first “6” train is bought by some other player (thus killing your “3” trains and forcing you to lose a run).

Although it seems counter to one’s instincts, it is better to capitalize on your large early runs (the operating round or two immediately preceding the disappearance of the “2” trains) rather than your small ones later. It is important to run for capital as infrequently as possible to avoid damaging the stock price, since each capitalization costs you two columns on the stock chart. Do capitalize for $200 or more, unless the extra dividends in your hand would enable you to start an additional railroad on the next round which would otherwise be started by a competitor. If, on the other hand, you are but one ”3″ run away from having $450 in the company treasury, you can afford to wait and capitalize on the smaller “3” later when the “5” trains are available. And be careful not to capitalize if this will shift the operating order so that you lose any opportunity to run with your “2” trains! If you have a choice, try to capitalize at the last possible moment. This not only enables you to invest your dividends earlier, but also maintains your position in the operating order, possibly gaining you that extra run with your “2” or “3” trains before they disappear.

As in real life, it is better in 1830 to have money sooner than later, because you can immediately reinvest early cash and make some additional profits. Therefore, it is almost always good policy to spend company treasury money early rather than later for bridges, tunnels, trains and tokens to improve your run – even if this seriously depletes the reserves. Later you can start a second railroad at a high price and bail out the first if you have accumulated enough cash in your hand to do so. There are a limited number of good railroads to own, and a one-round delay in accumulating the required cash to start one will often be fatal – so get there as quickly as you can. Once you have captured control of the railroads you want, you can ease up on the accelerator and save for some permanent trains.

Looting and then dumping a railroad early in the game is not as clever an idea as it may seem, unless most of the railroad’s treasury ends up in the looter’s hands. This is usually done by selling private companies to the railroad in question for the maximum amount possible and buying trains, bridges, and such to completely empty its treasury, then taking advantage of the favorable position of the priority card to sell enough shares into the bank pool to make another player the president. However, not only does this fail to benefit the looter substantially, but it really doesn’t injure the new president particularly either.

The looter will generate enough cash to start one or even two new railroads at a high price. Unfortunately for him, however, at least one of those will be very undesirable (possibly both). The railroads with the best potential (including, perhaps, the one just looted) will already be owned by others. Secondly, the new railroad(s) will start back in the red rectangle of the stock chart, making them unlikely to reach a high stock price by the end of the game. Third, the looter’s new railroad(s) will not run on the next operating round (because they have no train), costing the looter a turn of revenue. Finally, single shares of the looted railroad may be picked up at a bargain price by other players.

If the looted railroad is in really terrible shape, the new president will have some anxious moments, but will usually be able to recover before having to pay substantial amounts out of his own pocket. The game mechanisms provide for this in several respects. The looted railroad can collect revenue, not only from the private companies now owned, but also from any shares of its stock which remain in the bank pool during the operating rounds. Thus it can rebuild its treasury without running for capital, and its stock price will recover quickly. Other players besides the new president may be reluctant to buy the shares out of the bank, fearing that this would force the new president to capitalize. And the looted railroad may be able to sell its surplus trains to another railroad owned by the new president, thus benefiting both. And, if it retains those “extra” trains it bought, it will run for high revenue (at least temporarily). The new president will eventually be grateful to you for acquisition of a railroad with a good stock price and well-developed track. Alternatively, he may turn the railroad into a “feeder line”, driving its stock price into the colored zone of the chart.

Note that in criticizing this “loot and dump” tactic, I refer to the plunder of a player’s only railroad early in the game. Looting a second railroad corporation in the middle or late stage is much more profitable for the perpetrator and more damaging to the victim.

Another destructive tactic is “churning” – the buying and selling of large numbers of shares in railroads owned by others in order to lower the stock price. If two or three players cooperate, they can lower the stock market token to the very bottom of the chart. It is even more effective if one additional player remains uninvolved to buy up the now-cheap shares so that the railroad will not get any benefit from having shares in the bank pool. If done fairly (that is, equally to everyone), this tactic will not have much effect on the game except to reduce the importance of the early starting railroads. Our local group tends to avoid this tactic as it is time-consuming, and either unimportant or unfair in the long run. In a cut-throat game, however, it can be very effective when the victim cannot retaliate.

The Middle Game

After six or seven railroad corporations have been “floated”, the most critical phase of the game begins. Players strive to reach their share limit at a time when many of them will be short of cash because they hold many shares in railroads running for capital. Railroad presidents jockey for position to insure that their railroads can smoothly acquire a permanent train. Crucial tiles and tokens will be placed, determining which railroads will have profitable runs and which will not. In short, the game is usually won or lost in the middle game.

Near the start of this stage, the question of railroad ownership will be pretty much settled (unless a “loot and dump” entrepreneur arises). The cash-rich players will try to acquire at least two railroads, and possibly even three. Those with more railroads will, however, find that their shares have a lower average price than the holdings of other players, and they may be in danger of paying out of their pocket for a permanent train. If one railroad is deemed so inferior that no one will start it, only 63 certificates will be available; so some players may not be able to reach their certificate limit in a four-, five- or six-player game.

Four strategic questions face players in the middle game: 1) start a second railroad or invest in established ones; 2) run for capital or dividends; 3) buy a “4” train; 4) aim for a “5” or “6” train, or a diesel? We’ve touched upon the first question in the discussion above. The last three are intimately connected, as the following discussion will show.

In general, one should not run for capital for any of the following purposes: to get a better permanent train, to build a bridge or tunnel, to place a token, to buy a second permanent train (unless it’s for a second railroad you own), to move the stock token leftward into the yellow zone. Capitalizing costs you a lot of money. If your stock is one of the higher-priced ones, the two columns you lose may cost you $5O per share at the end of the game; added to the lost dividends, that’s $400 to $500 lost per operating round if you hold six shares. Even worse, the immediate dividends you forego may prevent you from buying stock on the next round, adding to that loss. On the other hand, do capitalize when your run is at least $200 and there is no other way to obtain a permanent train without spending at least $300 from your own cash reserve.

Experience shows that you should almost always buy the first permanent train available; saving for a diesel is rarely a good investment. As Mr. Fahrmeier indicated in his article, the game will usually last only six – nine operating rounds after the first diesel purchase. For example, if the diesel allows your railroad to run for $400 while a “5” train would run for $230, you gain $17 per share per operating round if you own a diesel. If you have six shares, your gain is therefore $102 per round. After seven rounds, you have gained $714. Therefore, if you capitalized more than once to get the diesel rather than the “5” train, you were a loser – because the two extra capitalizations have cost you $800-$1000. Moreover, unless you have the opportunity to buy the first diesel, you will have no trains after another railroad buys one and so will lose an additional run. Note also that other players may cut down your eventual big diesel run by placing tokens, reducing your ability to recover your investment.

In deciding whether or not to go for a diesel train, you should consider the fact that in order to get a diesel, you need to buy a “4” train. Without a “4”, you will have no trains after the first “6” is bought-so you will have to buy the remaining “6” train. If the second “6” is gone, you will be forced to buy a diesel (with a lot of your own money). “4” trains cost $300 and have a notoriously short life span. Many a “4” train has not provided its railroad with a single dollar of revenue, as a diesel is bought before the railroad runs again! Moreover, many railroads do not get much benefit out of the “4” train: with only green tiles in play, the rail net is too limited to allow both their “3” and “4” trains to run fully. Worst of all, owning a “3” and a “4” will put your corporation at its limit for trains as soon as a “5” is bought. Therefore, unless you happen to have $450 in your treasury and have a chance to run at the exact moment the first “5” train is available, your railroad cannot get a “5” without help from a second railroad. In fact, it will probably not get a “6” either, since only one “6” (at most) will be left in the bank when your “3” disappears, leaving room for the second train. With both a “3” and a “4”, your timing must be perfect to get a “5” or a “6” train. Thus, if you buy a “4” train, you are committed to buying a diesel unless a second railroad can help by buying the permanent train and selling it to the first railroad. Unless you are the first corporation to build your treasury to $800 with a “4” train, you must either run for capital an unacceptable number of times or pay a substantial amount out of pocket (after losing a run to boot).

As a consequence of these grim facts, you should buy a “4” train only in certain specific situations. If other owners are profiting more than you from the operation of “2” trains, buying a “4” will put them out of business. If it is the first train a railroad is buying, then, assuming you have any choice at all, you can afford a “4” because the railroad will still have enough money for at least a “5” (unless it started at less than $76 a share). If it is a “slow” game and you envision that there will be a long delay before a “5” train is bought, buy it quickly, enabling you to get four or five runs with your “4”. If you have enough cash in the railroad fund and good enough track to ensure you reach $800 first, invest in a “4”. And if you have two railroads, one of them will need a “4” since it is unlikely that you will be able to get a “5” or “6” with each of your railroads. Remember that your railroad can be the first to accumulate $800 in its treasury and still not be able to trade the “4” for a diesel if no “6” has yet been bought before it is your turn, leaving you with no train. If the second “6” is gone, you will not only lose a run (getting no revenue and losing another two columns on the stock chart), but will also have to pony up $300 in spite of your “conservative” play. Never buy the last remaining “4” train (we dub it the “Poisoned Four”) unless the railroad can also buy a “5” or your second railroad runs soon after and will be able to buy one or two “5” trains. If you do decide to buy a “4”, at least buy it at first opportunity; nothing is worse than dithering and finally buying one when it will only run once before vanishing.

Of course, even if you don’t buy a “4”, you can still come to grief if all the “5” and “6” trains disappear before you have a chance to purchase any. The $450 (or $630) you saved in the corporation coffers so carefully will leave you to dish out $470 to $650 from your pocket for a diesel. It would seem, then, that whichever route you take is risky, and that you have little control over what kind of train you get and how much you pay for it out of personal funds. This is quite true … if you own only one railroad.

With two railroads under control, the situation is a lot more stable and predictable. Naturally, each railroad has one “3” train by this time (not two – you don’t want to be prevented from buying a “5” by the train limit and then lose a run when the first “6” is bought). One of your railroads (not both) buys a “4” train at first opportunity. Now you have the desired flexibility. You can shift the money and the open slot for a train around to your best advantage, positioning yourself to get a “5” or “6” with one railroad and a “6” or “D” with the other. If, on top of this, you can get the diesel without losing a run and get it to the railroad with the better route, you are probably a game winner. Don’t try to switch permanent trains after both are bought, however; this is very expensive.

This phase of the game can involve some tricky maneuvering. Players will often spend the stock round preceding the critical set of operating rounds attempting to manipulate the stock prices of the various railroads so their own will be able to buy a “5” and avoid the “Poisoned Four”. One of the best situations is to start a railroad for $90 or $100 per share at a time when it can purchase two “5” trains on its first operating round. This solves the problem of a permanent train for both its owner’s corporations (since one of the “5” trains can be sold to the older for a nominal sum). Starting the new railroad just to buy the “Poisoned Four” can also be a good move, so long as one or both your other railroads will be positioned to buy a “5”. Losing revenue by capitalizing several times is not good, but losing a run entirely because you have no train is even worse. If you get through this phase of the game without losing a run or paying out of your pocket, you will almost certainly be a contender (even if your railroads have poor runs).

Occasionally, however, it can be a good tactic to purposely deprive one of your railroads of all its trains. Suppose the situation is this: you own two railroads, one of which has a “4” train or better (the “good” railroad) and one which has only a “3”. The railroad with the “3” cannot accumulate enough money in its treasury to buy a “5” even if it runs for capital once, but you know that it will run first when a “5” or “6” is available. You can help this railroad by having the good one buy the “3” from it on its turn. Then, when the bad railroad runs, it can buy the permanent train with the help of your personal funds. This avoids having the poor railroad capitalize, and then either capitalize again or be trainless during the following operating round. You gain two columns on the stock chart at the cost of the $50 or $100 you would have raised for the railroad by capitalizing with the “3” train – usually a good bargain.

My local group has discovered an extremely cruel but effective tactic to punish poorly-run railroads (and, by the way, prevent the tactic just discussed). The perpetrator owns a railroad with a “3” and a “4”, and this railroad now has the opportunity to buy the first “5” train. It does so, and now must turn a train in to the bank to meet the new train limit. Instead of turning in the “3” (as one would ordinarily expect), it turns in the “4”! The victim’s railroad has only a “3” and not enough in the treasury to buy a “4”, “5” or “6”. After the first “6” is bought, the victim’s railroad has no train. Even if the second “6” is available, the victim’s railroad may not buy it; instead it must buy the least expensive train available-namely, that “4” the perpetrator turned in to the bank. The next time around, the first diesel has almost certainly been bought, so the victim is trainless again.

In conclusion, your goal in the middle game is to acquire permanent trains for all your corporations without losing runs for lack of trains, or paying heavily out of pocket, or running for capital multiple times. Achieving these goals will usually involve owning at least two railroads (unless you are willing to trust to fate). You must always plan to acquire a “5” or “6” train with at least one of your railroads. Do not feel unhappy if you wind up with no diesels; they fail to pay off as often as not. In but one specific situation is it wise to capitalize an extra round to grab a diesel: your railroad has only a “4” train, one “6” remains in the bank, the railroad has between $630 and $799 in its treasury and would have over $800 if you run for capital on the current operating round. Now you face a simple decision between running for dividends and buying a “6”, or capitalizing and buying a diesel. Normally it would be worth the effort to capitalize and buy a diesel, especially if it slows other players who need their “4” trains. This situation is an exception, however. In the majority of cases, one should accept the cheapest permanent train available.

The End Game

The last stage begins when all active railroad corporations have a permanent train. In the end game, play focuses on tile and token play on the board rather than on stock transactions. Typically, all players will have reached their stock certificate limit around the beginning of this phase. Stock transactions are now focused upon damaging the value of competitors’ portfolios and acquiring shares of such companies as may be in the colored zones on the chart. If a railroad remains inactive, at least one player will be faced with a decision as to whether to float it.

Several decisions arise in the end game: Should a railroad with a permanent train but empty treasury run for capital in order to obtain funds for bridges, tunnels or tokens? Should a player sell shares of a competitor’s railroad to lower its value? Should a railroad token be placed so as to damage another’s run? Should a railroad be looted and dumped? At this stage in the game, each player’s reactions can be predicted with such a fair degree of certainty that one can calculate whether any of the above actions will gain or lose ground. Unfortunately, it will often take more time to perform these calculations than the other players will permit you, so some general guidelines are in order.

It is rarely profitable to run for capital in the end game. If one is certain that by building a particular tunnel or bridge the railroad can improve its run substantially (at least by $15 per share), it may be worth considering. The lower the railroad’s stock price, the less costly it is to capitalize (because the two lost columns make less of a difference to the price when the token is near the left or bottom of the chart). Remember also that if a really big profit is in the offing, other players may conspire to deprive you of the tiles you need to complete your projected run.

The question of whether to attempt to reduce a competitor’s stock price by selling your shares usually arises on the very last stock round of the game. While it is extremely time-consuming to attempt to calculate precisely whether the game will end after the ensuing three operating rounds, a rule of thumb is that in the late game $30 per operating round will be removed from the bank for each share of stock in play. If all 80 shares are in play, about $7200 will be removed from the bank on three operating rounds. In rare circumstances, someone will be able to delay the end of the game by building unnecessary bridges and tunnels (or even by going to the extreme of purchasing an extra diesel). But selling shares in other companies should be directed at the players you believe are doing the best, since selling any high-priced stock will cost you money. You must be sure it will hurt your competitor more than it hurts you. If you can sell only one share, and the stock is already at the top of the chart, your move is futile since someone else will simply buy the share causing the token to rise back to its original row.

The question of token placement is more one of psychology than tactics. It is pretty easy to determine whether a token play hurts or helps you. But if you plan on playing with the same group again in the future, you might consider that a surprisingly large number of gamers view aggressive token play as bordering on the unethical. I personally prefer a “cut-throat” type of game in which each player is committed to furthering his own self interest by harming the positions of others, but some disagree with me. If you think that the player you damage by your placement of a token will take seven-fold revenge in future games, that is a factor to consider.

The end game presents the classic loot-and-dump opportunity described by Mr. Fahrmeier. The situation is such that during an operating round, you own two railroads, each with a permanent train. The railroad with the lower stock price has at least $1 remaining in its treasury. The priority card is located so that on the next stock round, you will play before a player to whom you can pass control of your more expensive railroad. On the third operating round of the current set, your cheap railroad buys the permanent train from the other, leaving that railroad with a depleted treasury and no train. On the subsequent stock round, you sell enough shares of the expensive railroad to transfer the presidency to your victim. He will have to come up with almost the full $1100 for a new diesel on the following operating round. This play costs you some profits, but you can make some or all of it back in dividends because your remaining railroad now has two permanent trains. If there is other stock left to buy, your total income per round may actually increase. And you are now protected from the same ploy by someone else because you have an “extra” permanent train should a railroad be dumped on you.

This tactic is so effective, in fact, that the threat of it tends to dominate play in the later stages of our games. Players will maneuver to avoid owning two or more shares of another railroad unless that president is to their immediate left (so the minority holder cannot be victimized). The best antidote, of course, is to be president of enough railroads that you can complete your portfolio without owning more than one share of any other.

Players occasionally find it profitable to operate what has been called a “feeder line” – a railroad with very low stock price which capitalizes often so that its market value remains in the colored zone of the stock chart. The advantages of this are that the shares do not count against their owner’s certificate limit and that the extra treasury money accumulated can be used to assist the track development of his other nearby railroads or place tokens so as to injure close competitors. In order for this situation to be profitable, however, other players must have contributed to driving down the stock price. It is a losing strategy to capitalize a railroad five or six times simply to drive down the stock. What you gain by creating larger runs, you lose in early revenue and in stock appreciation of the feeder line. Too, the ability to exceed your share limit only benefits you for the one or two operating rounds out of three that you can run for dividends. And, by the time you get the feeder line’s price into the yellow zone, there may well be other worthwhile shares to buy. Thus, I believe one can be pushed into a successful feeder-line strategy by the actions of others, but cannot set out to create such an opportunity; it’s simply too costly.

Conclusion

1830 is one of a very small number of multi-player games which are almost pure tests of skill. Unlike DIPLOMACY and its brethren, however, 1830 is unique in that one’s fate is somewhat less dependent upon the actions of other players if one so chooses. The game lends itself so well to analysis, in fact, that it suffers from the same problem as chess unless a time limit is set, the game can drag on far too long to be enjoyable. I think the game is best enjoyed if each player is practiced enough so that only three or four important decisions will require extensive thought and calculation. Our local gaming group plays a very sophisticated game, but usually completes a match (no bankruptcies) in three to four hours. This is a comfortable evening’s entertainment.

This article is intended to provide the beginner with some examples of the issues he must think about when making these crucial decisions. Profound hex-by-hex, dollar-by-dollar analysis of a large number of specific situations is beyond my scope, but I will be glad to respond to future discussion or criticism of the points raised here in future issues of The GENERAL.

(this article first appeared in issue #6 volume #26 of Avalon Hill’s “GENERAL”. It is reproduced here with the permission of the author)
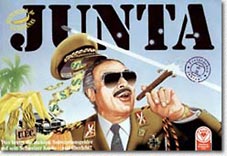
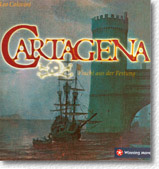
Birth of A Dynasty

DESIGNER’S NOTES

Birth of a dynasty

Derek Carver explains the design of his game of competing dynasties, published by Games Workshop as Blood Royale.

Blood Royale box

Ideas for new games present themselves in a variety of ways. Sometimes, though rarely, as complete games, sometimes as a system devised, perhaps, with playing cards or counters, around which a theme is subsequently developed, and sometimes as a scenario which has the potential of being made the subject of a good game.

If Blood Royal (in common with many people, I prefer to drop that final mysterious ‘E’) came into any of the categories it was the third one.

In my earlier game – Warrior Knights -I was enthusiastic about the idea of games during the course of which the players ‘assembled’ and used their skills to vote on issues which would greatly affect subsequent play. Although such an idea had great appeal for me it wasn’t sufficient for a game in itself and a much wider game had to be developed around this core concept. Much the same thing happened in Blood Royal.

Unlike many gamers, I would not call myself a history buff, but I do enjoy reading history, and I had also been an avid watcher of the TV series The Plantagenets, having visited many of the locations as a result of my fascination with this period. The history of the Middle Ages illustrates that not everything was achieved purely by conquest (although military might was a great bargaining factor in one’s favour). Prolonged campaigning was not easy. There was considerable diplomacy, often sealed by a marriage contract. Here, I felt, was the substance for a game. I wanted to make a game where each player was a monarch who would produce children, marry them off to the family’s advantage, secure trade routes and wage war. Each player was Henry II, if you like.

SURVIVAL CHANCES

From the start I decided the only realistic way forward would be to include an element of role-playing in the game. I therefore gave each ‘character’ a character sheet in the true role-playing tradition. The die-rolls recorded on this sheet determined 1) how healthy the character was, 2) how strong in battle or diplomatic cunning, and 3) how attractive to the populace. The first was an indication of survival chances – especially important to the women who, it was hoped, would produce a number of children, hopefully some strong males. The second is self explanatory, women being able to confer their qualities on their husbands. The third quality reflected the character’s general popularity. A popular king could roam Europe with less fear of rebellion breaking out at home and an attractive princess was always to be hope for.

This all meant that the characters in the game also had to die from time to time so instead of being only Henry n, the English player, for example, would have to represent the more abstract concept of the entire dynasty, and this gave the game its original name – Dynasties. Thus, the game differed from normal role-playing in that instead of players being their character they would in this game control many characters, all different.

Each player starts the game with a king, a queen, and two children, all of specified age. Dice rolls are made to determine the sex of each child and rolls are also made to determine the three characteristics of each member of the family. Each is given a character sheet recording year of birth and so on, and the players also have to choose their dynastic name and names for each of the characters. This meant that from the start the game was peopled by seemingly real and quite different characters (‘different’ because of their individual qualities). The only unreal thing about it is that at the start each player controls families all of the same age, but this situation doesn’t last for long.

FEWER CHILDREN

Play is in five year segments, starting with 1300. A survival die roll has to be made for each character every five years. Their survival chances vary, of course, according to age, childbirth, and fitness (the original die roll 1) mentioned above).

One of the many changes that took place during the early days was the reduction in the number of small children that were around. Originally more children were born, but quite a few died before they reached the age of 15, which is the age they are of any interest to us in terms of the game. So in order not to make die rolls and fill out character sheets for children that didn’t survive to 15 the system was adjusted. Fewer children were born, but those that were born were guaranteed to survive to 15. We ended up with the same number of young adults but saved a lot of time and paper in the process.

So this was the core idea. The early problem was what to do with the idea. We couldn’t sit around the entire evening manipulating these royal families; we had to do something with them.

The first problem was that history did not have a four to six player game in mind, each with more or less equal chances. While England hasn’t changed much geographically speaking, the rest of Europe has, and there was no Germany and no Italy as such. Unlike Warrior Knights where I felt the correct answer was to create a fictitious country, with Blood Royal I knew I could only maintain the historical ‘feel’ I was aiming for if I set my game firmly in medieval Europe, so I had to create Kingdoms of Germany and Italy, and also give each country in the game the same number of provinces. This doesn’t seem to have bothered people as much as I thought it would (although I don’t know what German and Italian players think about it!). But even with my cavalier attitude to history and geography there was no way in which I could
easily bring in a sixth power, so I restricted the game to a maximum of five.

So – I had already departed from history, but the general feeling in the game was all right.

THRASH AND BASH

What next? I didn’t want it to be a thrash and bash wargame. I decided I wanted it to be centred on the securing of trade and trade routes plus income from taxes. The latter was pretty simple – I allowed players to collect taxes from each province they owned with the option of double taxing. The latter increased the chances of the highly taxed provinces going into rebellion – a calculated risk, in other words, which is a concept that always appeals to me and about which more anon.

For the trading I hit upon an idea which I must confess to being rather pleased with and which could, in itself, have been the core idea for another game. Wanting it kept simple, I devised a system of three basic commodities (what they are called is unimportant – let’s call them A B and C). Each country had to acquire these commodities and transport them to their capital to be ‘cashed in’. But they could cash them in only in sets of three (ABC). In the full five player game there are only three of each type around the board, which means there are not enough for each player to have a set each time. Also no single country produces one of each (they might produce two As and a C, for example). This means that in order to secure the missing item(s) players had either to trade, secure them by contract (about which more later), or capture the province in which a desired ‘missing’ item is produced.

Additionally there are around the board two somewhat more luxurious commodities – two Ds and one E. If, instead of trading in a set of just ABC, you can acquire ABC and D you get much more for them, and if to this you add the true luxury item E you get considerably more. On their own the Ds and the E are worth nothing; they have to supplement the basic set. These commodities are placed on the board in their producing province at the beginning of each five year period unless there is a specific occurrence that prevents this.

ROYAL FAMILY

This trading aspect of the game hasn’t changed since the early days. It worked well and provided the framework I needed. We now had a royal family that had to ensure its own continuation and it needed to obtain commodities. It also needed income. If it had some strong royal males plus a strong army it could go out and capture the producing provinces by force. In the same way it could wage combat in order to secure its trade routes. If necessary a country could build a string of castles. A castle means it doesn’t matter what happens to the province in which it is located: goods can still be transported through that otherwise enemy province, the castle ensuring safe passage for troops and trade goods. But warfare was an uncertain business. Kings especially could not normally safely leave their capital to indulge in prolonged foreign wars. If they were generally popular and were doing well it was easier but if they were not too high in the popularity stakes and also weren’t being too successful in their campaigning there was always the possibility of domestic unrest looming over them. And if they don’t at once rush back to quell it rebellion had a nasty habit of spreading.

So securing what they want by other means became important and here another major aspect of the game comes into play – the royal marriage. For each player it is essential to ensure the continuation of his dynasty. If he doesn’t do so control could go to another player who can trace his monarch’s ancestry back.

Also an unmarried king cannot produce princes to lead his armies. So wives are in demand – especially beautiful and healthy ones. (Even so, there are a lot of desperate marriages between pretty nasty boys and somewhat sickly girls, I might add!) Most marriages also seal a ‘Marriage Contract’ and if, for example, you are seeking a girl to marry the King’s eldest son you can put your demands pretty high, because the player controlling the potential future queen’s family stands to gain quite a bit financially when she ascends the throne. These all-important contracts can concern non-aggression, military support, money, trade rights, trade routes, land, or a mixture of the lot. They have to be carefully worded because their terms become binding for as long as both parties to the marriage survive. Players are not allowed to break the terms of a marriage contract: they would have to arrange the death of one of the parties first.

QUILL TO PARCHMENT

So crucial is the clever negotiation of these contracts that they presented one of the early problems in the game. A new player could be totally at the mercy of an old hand who easily tied him up into a contract that he subsequently came to realise he could well have done without. (France is always best played by such a persuasive player.) This is why a change was made so that at the start of the game the children are too young to be married at once. This at least gives an inexperienced player time to see what it’s all about before he puts quill to parchment.

One of the features of the game is that during each five year turn each player has to announce to the rest of the players what has happened to his dynasty – who has died, who has been born and the description of a child, and so on. The death of a king or queen is, of course, a major event and the records are searched to establish the next in line in those rare cases where it is not immediately obvious. It is even possible for a player’s kingdom to pass to another player who has the only direct heir, but this is rare. Legitimate claimants to the throne can be passed over, but from then on they provide a nuisance factor in the game that other players can exploit.

There were a few other aspects that were slowly modified during the early days (or years) but that was the game in essence.

As it stood it presented one important problem as I saw it, although it wasn’t one that seemed to worry many of the groups that came to know it and made copies. To obtain the full feeling of this continuing and developing dynasty it was essentially an ongoing game. During the course of a three hour game the most one could expect is that the king or queen (or both) might die and the next in line ascend the throne but it wouldn’t go much farther than that. The true essence of the game, though, was the continuation of the family and its ramifications as it married into other dynasties and produced children. This meant that it either had to be played for a long time or it was best played as an ongoing game by the same group (the winner each session being the player who had best improved on his starting position). This is the way it was often played. Chronicles were kept and huge family trees maintained. It has been turned into a play by mail game in Austria and there they publish the appropriate dynastic announcements with proper obituaries on the death of an important Royal Personage. This is what the whole
thing is about.

HISTORICAL EVENTS

Blood Royale

So this was how the game stood when Games Workshop came on the scene. They had recently done an excellent job with my Warrior Knights and I was happy to let them have Dynasties as it was then called. They knew the game and were attracted to the idea of incorporating role-playing features into a traditional boardgame.

The first thing they decided to change was the name. They were rather frightened to use Dynasties because of the popular TV series. At the first meeting I tossed in Blood Royal as an alternative title, which was finally adopted but with an additional ‘E’. I have noticed that continental players, obviously disliking the mixture of languages, refuse to acknowledge this final E.

Unfortunately we then started to run into a bit of trouble and our good relations took a temporary downturn. Warrior Knights had been published precisely as I invented it. Well, that is not 100% correct – a few changes were made to assist production but not only were they all made by me or with my approval, but I also felt they were improvements. The GW developer for Warrior Knights was Albie Fiore, who had also worked on my Dr Who (one of GW’s first boardgames) and he subsequently worked on my Whirlwind (FASA). By this time he had left Games Workshop and the in house developer of Blood Royal was somebody different, and he wanted to expand the game and introduce more historical events. Although my contract allowed me to veto any changes to the original I had respect for the enthusiasm and undoubted abilities of the developer, even though I feared the additions would lengthen an already long game. But the big problem was that in the main the proposed additions (and they were all ‘additions’ as opposed to changes) were not the sort of rules I would have invented. Not that they were bad in themselves, they simply reflected the sort of game the developer would have invented and not the sort of game I like.

Let me give an example to illustrate the different approaches. Games Workshop wanted to introduce a series of historical events in the form of chance cards. These were to be events that often affected (usually adversely) one player. Of course, they were not as crude as ‘Go to Jail’, but you know what I mean. They also mirrored historical events. While I was not totally against the idea of these events I wanted them to have considerably more interest and add to the fun of the game. I also wanted them to be different from the sort of thing people are used to. My feelings are that historical events happen because a certain regime either takes a certain action (one out of a number of possibilities) at a certain time, or decides to take no action at all. If at a particular moment a contrary decision had been made the course of history would have been changed in some way. What we see as history, therefore, is the result of one decision out of a number of possible decisions taken at the time and in my game we were living in the time.

INTELLIGENCE REPORT

So, to get back to the game, I suggested that firstly, we should try to restrict events so that they affect all players, and secondly, that the event should be in the form of an intelligence report listing what could happen in, say, two to three turns:
i) if no action was taken,
ii) the chances of averting this occurrence if more money was directed into the area (money that might be in short supply),
iii) the chances of suppressing the event by stationing troops in the area, and so on. The ‘chances’ would be expressed in terms of die roll odds.

After all, these are the sort of questions a ruler would have to ask at the time and he would decide on the action to take in the light of the replies, the odds of success, and the effect on his exchequer, stability, and so on. So in game terms it would mean that the player would do what he thought most expedient and possible and he would have to await the outcome. At the same time other players who have no love for him (and no contract preventing intervention) could, possibly, lessen his chances of success by taking certain actions themselves.
The developer saw my point but sadly our minds didn’t run along the same lines. Certain modifications were made, but generally speaking I thought the event cards at the end of the day didn’t really reflect the original thinking I was aiming for. I preferred to offer the game as I invented it and leave it to enthusiasts to extend it as they wished as a result of play and the preferences of their own group.

As it was clear that we were thinking quite differently and time was being consumed it was finally agreed to publish the game in my basic form with the new rules being included as ‘Optionals’ to be used or discarded by the purchaser as he or she wished. In this way I was able to give Game Workshop carte blanche with these additions, without further reference back to me. It is pertinent to add at this stage that it is rare for publishers to agree to allow an inventor to veto any changes. He normally has no control whatsoever over the product that finally arrives on the shelves, which might be quite unlike his original. An amazing situation when you come to think about it.

FOREIGN PRINCES

The solution reached was quite satisfactory. As far as the production was concerned they made a truly superb job of it. I must admit that I took exception to the box cover, which didn’t reflect the feel of the game at all, and it was rather sad that GW scored an own goal by deciding to suggest names for foreign princes and princesses – presumably for the benefit of players whose knowledge was limited in this regard- and getting them wrong! But these are peripherals. No inventor could be anything but delighted with the quality of the product offered, right down to such often overlooked details as the magnificent presentation of the rules, which excellently carried through the historical feel of the game. These are the qualities that show Games Workshop at their best, and they deserve every compliment.

In its basic form Blood Royal presents a system that is ideal for building on and I know a number of groups have developed additional rules bringing in the power of the Church, rules that have qualities that appeal to their particular group and have stood the test of playing over a period, being slowly refined in the process. This is excellent and what I hoped would happen.

While one must be pleased in one respect, it is also a pity that Blood Royal appeared just before GW made the decision to turn exclusively to the fantasy games with which they are normally associated and which (as a result of their White Dwarf readership) had been far more profitable for them than their ventures into non-fantasy and comic strip themes. Having made this decision it reflects greatly to their credit that they pushed ahead with Blood Royal in the quality that they did, it being no small investment.

(This article was originally published in “Games International”, issue #13 and is reproduced here with the permission of Brian Walker, the former GI editor)

CIVILIZING INFLUENCES

Strategy Seminar

Steve Jones dons his toga and provides a comprehensive guide to the great game of aspiring cultures.

CIVILIZING INFLUENCES

In purely abstract game terms, Civilization is a steeplechase race game; I shall elaborate upon this theme as the article develops. Looked at in this light, the game may seem quite ordinary. What elevates it to a classic is a combination of two things: the subject matter (or the ‘chrome’ aspect of the game), and the wonderfully balanced and rich structure of the rules. The latter moulds the game into one with elevated player interaction in ways which are complex, subtle and shifting, and yet are always under the players’ collective control. In my opinion, Civilization is quite simply the best multi-player board game ever invented.

The subject matter of the game is an attractive and evocative one. It concerns the growth and development of the ancient civilisations around the shores of the Mediterranean Sea, and in the Middle East.

Each player starts off in control of a nomadic Stone Age tribe which then proceeds to develop a highly advanced classical civilisation over the course of millennia. The object of the game could not be simpler: it is to gain a state of overall advancement, involving cultural, economic and political factors, faster than anyone else. Although this makes the game into a race, it is vitally important to realise that it is one conducted on several different levels.

It is also important to realise that it is a game which megalomaniacs always lose. War is available as an instrument of policy, but the game is so structured as to make it into a blunt and relatively inefficient one. The more efficient means available to combat your opponents are, to a greater or lesser extent, subtle, hidden, indirect, sophisticated, and ‘civilised’.

THE KNOWN WORLD

The game consists of a map board, an Archaeological Succession Table (AST),
eleven sets of trade cards, sixteen sets of civilization cards and seven sets (nine in
the Avalon Hill version) of faction counters. The map board consists of three leaves
(West, Central and East) depicting a region stretching from Sardinia in the west to the
head of the Persian Gulf in the east, and from the upper Nile Valley in the south to the
southern Ukraine in the north. Hartland have recently released an expansion kit
containing a fourth leaf (WXB) which extends the map westwards to take in Iberia.

The map is divided into land and sea zones in much the same way as Diplomacy
and Risk. The sea zones are subdivided into two types: coastal and open. The land
zones each have a population carrying capacity indicated by a number. Some of the land
zones also contain natural city sites. The map features, in addition, four flood plains
and three volcanoes; there is a fifth flood plain on the WXB extension leaf.

The faction counters each consist of fifty six tokens, nine cities and four ships. One
token is used as a marker on the AST, and the remainder may be used to represent either
population on the board or money in the player’s treasury. Depending upon the number
of players in the game, the players are limited to a specific number of tokens each. This
last is a deliberate design feature in the game. The main problem that the players
continually face is one of limited resources. The subdivision of the each player’s
finite number of tokens among population on the board, money in his/her treasury, and
his/her stock (tokens currently not in play) is a brilliant design mechanism for creating
this shortage.

During the course of the game, there is a constant flow of tokens between a
player’s stock on one hand, and the board and his/her treasury on the other.
Furthermore, this flow is more or less under the player’s control. Nevertheless,
players will find themselves facing problems, and occasionally windfalls, depending upon
where their tokens are currently located. There are many subtle aspects to the management
of the token flow, and players should acquaint themselves with these.

COMMODITIES

There are seventy four trade cards in the game. Of these, sixty six represent
eleven commodities which have values from one to nine. The remaining eight cards
represent calamities (more commonly known as disasters), and these all have value zero.
The commodity cards are initially stacked, face downwards, in nine decks, each deck
corresponding to the value of the commodities in it, and the calamity card of the
appropriate type is placed at the bottom of each deck except the first.

The eleven commodities are Ochre, Hides, Papyrus, Iron, Salt, Grain, Cloth, Bronze,
Spice, Gems and Gold; the first two have value one, the second two have value two, and
the remaining seven have the values ranging from three to nine in order. When more than
one card of a given commodity is held the net value of the collection is greatly
increased. The formula for finding the total value of several cards of the same commodity
is to multiply the square of the number of cards held by the commodity value; for
example, five grain are worth (5×5) x 4 = 100.

During the course of the game, each player takes the top card from each trade deck for
each city he/she has, and uses these to construct packages for trade with the other
players. Through trade, the aim is to increase the net value of the commodities held in
hand, and to use these to purchase civilization cards. The trade system is one of barter
involving trade cards alone. Any number of trade deals may be made between the players,
two at a time. In each trade deal, each player must offer at least three trade cards,
correctly quote the total value of the package and correctly give the commodity of one of
them; outside of these restrictions, anything can be said about the package. This last is
important because trading does carry risks: some of the disaster cards can be passed on
in a trade deal.

DISASTERS

The eight disasters are Volcano/Earthquake, Famine, Civil War, Flood, Epidemic, Civil
Disorder, Iconoclasm & Heresy, and Piracy. The first four are so-called red-backed
disasters and affect the players who pick them up. The last four, on the other hand, are
so-called black-backed disasters and can be passed on to another player through a trade
deal; the disaster then affects that player!

As the names suggest, it does not help your aspiring civilisation to be affected by
one of these disasters. Players will find it essential to acquaint themselves with the
effects of the disasters, how to lessen their effect, how to direct them at their
opponents, and how to reduce the chances of receiving one. In practice, it is impossible
to avoid disasters completely. This is because an individual disaster does not affect
only the player who received the card; that player may also, depending upon the exact
nature of the disaster, ‘distribute’ its effects among the other players! This is
just another one of the wonderful balancing mechanisms in the game.

If trade cards constitute the major currency in Civilization, civilization cards must
be considered to be the raison d’etre of the game, and the focus of all
actions. There are seventy two civilization cards representing sixteen different aspects
of civilisation. They are divided into four colour groups representing broad areas of
human knowledge/endeavour. Most cards are members of only one group, but some are members
of two. The groups are Arts (blue), Crafts (orange), Sciences (green) and Civics (red).
The sixteen card types are Mysticism, Cloth Making, Pottery, Drama & Poetry, Music,
Architecture, Astronomy, Metalworking, Agriculture, Coinage, Literacy, Engineering,
Medicine, Law, Democracy, and Philosophy. They each have a value of between 30 and 240;
the purchase price is equal to the card value but, in practice, it may be decreased by
cards already held.

Each type also has an effect on play, usually by modifying some aspect of the normal
rules. They are obtainable by exchanging trade cards and treasury of at least the same
value. They can be relatively costly, and there may be a shortage of the various types
depending upon the number of players in the game. If the latter is the case, you will
find yourself competing with your opponents for a very limited resource, particularly so
in the case of the more expensive cards. This has a considerable effect upon long term
strategy, of which more anon.

RACE TRACK

The AST is the race track of the steeplechase alluded to earlier on. It is essentially
a non-linear timeline consisting of fifteen time steps, plus start and finish
positions, and covering the period from 8000 BC to 250 BC. The non-linear nature of the
timeline is evident from the fact that the first time step covers a period of three
thousand years while the last step covers less than one hundred years. The timeline is
further subdivided into nine independent tracks, each associated with a starting area on
the map board and named after the various ancient civilisations and/or regions. These
are, in the order ‘down’ the table: Africa, Italy, Illyria, Thrace, Crete, Asia,
Assyria, Babylon and Egypt.

The WXB map leaf adds an extra track for Iberia and a modified African track which is
only used if the WXB leaf is in play; in addition, Italy is not used when the WXB
leaf is in play. Each track is divided into five numbered epochs identified as New Stone
Age, Early Bronze Age, Late Bronze Age, Early Iron Age, and Late Iron Age. Furthermore,
the epochs are not of the same length on the different tracks; this can have an enormous
effect on the choice of strategy of the different countries.

At the end of every turn, the AST tokens are usually moved forward one step; therefore
the game is at least 16 turns long. However, entry to a new epoch requires the fulfilment
of a minimum condition which depends upon the new epoch. The second epoch requires two
cities, the third requires civilization cards representing three groups, the fourth
requires seven civilization cards, and the fifth requires civilization cards totalling at
least 1000 points. Once in the fifth epoch, the player needs a stated value on the AST to
move forward; this time the value of treasury and trade cards may be included in the
total. In addition, in any epoch except the first, the token is moved backwards if a
player has no cities! It should now be clear why the game can be likened to a
steeplechase. Nearly every decision which a player makes during the course of a game
should be geared towards keeping that token moving on the AST. One of the things which
make the game into a classic is the fact that some of your actions can also be directed
to affect the movement of your opponents’ tokens along the AST.

ORDER OF PLAY

Each game turn is subdivided into thirteen separate phases. These are Taxation and
Revolts, Population Expansion, Census, Ship Construction, Movement, Conflict, City
Building, Trade Card Acquisition, Trade, Civilization Card Acquisition, Calamity
Resolution, Excess Trade Card Surrender, and AST Movement. In many of these phases, the
order of play will often change from turn to turn, and it is vital to become thoroughly
familiar with all the ramifications of this. This variable order of play is a
self-balancing mechanism that has been deliberately built into the game’s structure.
It is well worth briefly discussing the eight cases in each game turn where an order of
play is important.

Taxation

In the Taxation phase, any players who have insufficient tokens in their stocks to pay
the taxation on their cities will lose to a revolt those cities which cannot pay. The
cities in revolt go over to the player with the most tokens in his/her stock after taxes
have been paid. The order in which revolts occur is in AST order, and if two players both
have the same maximum number of tokens in their stocks, the recipient is decided in AST
order.

Thus revolts generally occur to empires which have grown too big in some
uncontrollable manner, and the recipient of cities in revolt is invariably the smallest
empire on the board. However, it should be noted that revolts are, by and large, fairly
rare, and usually result from player incompetence. The one exception is that a revolt can
be engineered if the player concerned was nominated in a civil war in the previous rum,
and this resulted in him/her having too many cities and too few tokens in stock!

Ship construction

In the Ship Construction phase, players should build and/or maintain ships in AST
order. In practice, players tend to do this simultaneously as the rule is not explicit,
but is implied by Rule [62] on page 16 of the rule book. However, players further down
the AST are perfectly within their rights to insist upon strict AST order being observed.
There are occasions when a player’s decision of whether or not to build or maintain
ships will critically depend upon what other players have decided. If those players are
higher up the AST, just watch what they do and make your decision accordingly.

Movement

In the Movement phase, movement is sequential in the order of the largest to the
smallest populations, with ties being resolved in AST order. Since combat occurs more or
less simultaneously, it is a disadvantage (except in the early turns) to move first, and
the player moving last can possess an enormous strategic advantage. This is probably the
single most important balancing mechanism in the game. In practice, it makes it virtually
impossible to eliminate players, and gives small empires a defensive edge over their
larger neighbours.

Conflict

In the Conflict phase, the order of play is only important if a token shortage is
possible. Then, a player under attack may insist upon resolving first all conflicts
involving only tokens, before dealing with those involving tokens attacking cities.

This is particularly important because conflicts between tokens and cities require the
defending cities to convert into at least six tokens; if there are insufficient tokens in
the player’s treasury, the city will surrender. The rule governing the surrender
of cities implies that the best time to attack another player’s cities is when he/she
has few or no tokens in his/her stock, and then, the attack should be a limited one
directed only at cities.

City building

In the City Building phase, play is in AST order. As with ship construction, city
building is not simultaneous, and a player is perfectly entitled to insist upon players
higher up the AST making their decisions first, as to whether to build any more cities.
The reasons for insisting on this are subtle.

First, it should be pointed out that the rules do not compel a player to build a city
if the conditions for city construction are satisfied; the players have a choice as to
whether or not to add to their city numbers. The reason for the players having this
choice is to enable them to manipulate the order of play in the Trade Card Acquisition
phase so as, on the one hand, to maximise the number of trade cards they acquire, and on
the other, to avoid disasters. Only the very best players will be constantly aware of
this stratagem during the hurly-burly of play.

Trade card acquisition

In the Trade Card Acquisition phase, the order of play is from the smallest to the
largest (in terms of cities), with ties being resolved (yes, you guessed it) in AST
order. This is yet another of the wonderful subtleties of the game. It is deliberately
designed to ensure that the largest empires pick up their trade cards last and, in so
doing, increases the chances that they will end up getting fewer cards than their smaller
neighbours.

There is no point in having more cities than anyone else if this results in you
gaining fewer trade cards than anyone else simply because the trade decks were depleted
prior to your turn to pick up! The good players will be aware of this, and will carefully
adjust the size of their empires according to what the other players are doing.

When it comes time to exchange trade cards for civilization cards, the order of play
is in reverse AST order. This is the only instance in the game where this occurs. All
things being equal, the players at the bottom of the AST normally have a higher chance of
finding some of the trade card decks depleted when they pick up their cards. To offset
this, they are given the first opportunity to purchase the relatively rare civilization
cards.

Calamity resolution

In the Calamity Resolution phase, the order of play goes in ascending order of the
disaster number. This can be important for players affected by more than one disaster,
since it can mitigate the effect of the later disasters. For instance, if a player has
picked up both the Famine and Flood cards, he could lose tokens on his/her flood plain to
the famine and end up avoiding the flood completely.

STRATEGY

Now that you have some idea of how the game is played, and how its many components
interact with each other, how do you develop a winning strategy? One aspect of this game is that there is no one, single winning strategy.
There is, however, a winning approach to how the game should be played, which consists of
six maxims.

The first maxim is to achieve the maximum population growth in the first five or six
turns without affecting your progress on the AST. This involves delaying building your
first cities as long as possible, and spreading out to occupy as much territory as is
possible without becoming involved in fruitless border disputes. If you delay building
your first city until the fifth turn, you can have six cities by the sixth turn. In
contrast, building two cities in the fourth turn leaves you so short of population that
you will have only three cities in the sixth turn; this will leave you short of trade
cards in the early trading sessions.

The second maxim is to aim to have a medium number of cities throughout most of the
second to the fifth epochs; the ideal number is six or seven, depending upon
circumstances. Sticking to this should, on average, maximise the number of trade cards
picked up every turn. It should also make it easier to manipulate your place in the order
of play so as to avoid the worse disasters.

The third maxim is to maintain a healthy distribution of
your tokens between the stock, treasury and map, and to avoid where possible having too
many tokens in one of these three locations. This should ensure that you are in the best
position to avoid the problems associated with over-population and inflation. There are
four ways of controlling your token distribution: deliberately killing off population on
the board by over-stacking, maintaining four ships on the board, partly paying for
civilization cards with treasury tokens, and purchasing the Coinage card as soon as
practically possible.

The fourth maxim is to offer mutually profitable trade deals wherever possible. It is
not a good idea to squeeze the last drop out of a trade deal. It is also good policy to
be truthful about your trade packages (except, of course, when you are attempting to pass
on a disaster card). If you follow this maxim consistently, players will tend to want to
deal with you in the future because they will know they are going to get a square
deal.

The fifth maxim concerns the ideal policy on how to distribute disasters should you be
unfortunate enough to get landed with one. In the early stages up until the end of the
Bronze Age, the best policy is to distribute disasters evenly amongst the other players.
Even so, there are occasions when somebody will be particularly deserving of the maximum
permissible dose, and that is perfectly acceptable should it occur. However, later on,
from about the start of the Iron Age onwards, disasters should be directed exclusively at
the leaders wherever possible in an attempt to slow down, or even stop, their progress on
the AST.

The sixth, and final, maxim is to maintain a low profile on the map, and a high one in
the trading sessions. In particular, don’t make unnecessary waves such as launching
unprovoked attacks on your neighbours. If you have to attack somebody, make sure it is
for a good reason, and immediately apologise, explaining your reasons for the attack.
And, above all, maintain a flexible approach in your actions at all times.

CALAMITIES

Following on from the general considerations discussed above, I shall continue the
discussion of game strategy by considering the eight disasters and the ten starting
positions, and finish up with some observations about trading and the best mixes of
civilization cards to aim for.

As observed earlier in this article, the disasters are subdivided into two blocks,
those which affect the player who picked the card up, and those which affect the
player to whom the card was passed in a trade deal. The former consists of
Volcano/Earthquake, Famine, Civil War and Flood, while the latter consists of Epidemic,
Civil Disorder, Iconoclasm & Heresy and Piracy. Before we discuss each of them in
turn, an important point should be made concerning the black-backed disasters in general.
If you pick one up, and decide to pass it on to another player in a trade deal, the
victim should be chosen carefully. By the time these cards turn up, it should be fairly
obvious who is doing well and who is doing badly. Under no circumstances should one be
passed on to the players who are doing relatively badly. These disaster cards are potent
weapons to be aimed only at the leaders. They are the most active traders in the game,
and they always want valuable cards. As soon as it becomes obvious during a trade session
what commodity one of the leaders is after, make up a trade package consisting of that
commodity and the disaster card and offer it him. And you should make sure the disaster
is well disguised, throwing in another relatively high value commodity if necessary.

Volcano/Earthquake is the least damaging of all the disasters. There are only three volcano sites on the map: Vesuvius and Etna in Italy, and
Santorini in the Aegean Sea. If any of your tokens or cities are on one of these volcano
sites, the volcano erupts and all units are lost. If you do not occupy a volcano site,
one of your cities is struck by an earthquake and is reduced instead; this involves
replacing the city with a number of tokens equal to the carrying capacity of the
area.

The best means of mitigating the effect of this disaster depends upon whether you have
a volcano or an earthquake. If it is a volcano, place population tokens only in the
volcano sites. Although all the volcano sites are natural city locations, it is not a
good idea to set up a city in one of them because it relatively difficult to rebuild it.
If, on the other hand, it is an earthquake, it is best to choose a city located in a high
population carrying capacity area since this makes it easier to rebuild. The only
exception to this is if you have a city on a 3-site, and reduction will lead to a token
shortage in your stock and taxation problems in the next turn. If you have a city located
adjacent to another player’s city, you have the option of reducing that player’s
city as well; whether you do so will depend upon the game position at that time, and it
is best to follow a flexible policy on this. You might even be able to force some favour
out of that player in exchange for not doing it!

Famine is a mixed disaster. Although it forces you to lose nine units (cities
counting as five units equivalent), you can force other players to lose up to twenty
units, with a maximum of eleven from any one player. For this reason, it is one of the
‘best’ of the game-balancing disasters. The effect of the disaster can be
mitigated if you possess Pottery and at least one grain; in this case, for every grain
card held, you reduce the number of units lost by four. This is obviously the perfect
defence against famine, but it does have the double drawback that Pottery is one of the
cheapest civilization cards available and it ties up grain cards which might be better
used either in obtaining better trade deals or in purchasing another civilization
card.

Civil War is one of the most potentially crippling of the disasters. If
you have picked it up, you choose a nominee from among the other players. You and your
nominee then divide your civilisation into two parts; you choose one, and your nominee
gets the other! Usually, one of the parts must contain thirty five units (with cities
again counting as five units equivalent), provided you do not hold Philosophy and/or
Democracy. If you hold Philosophy, your nominee must be the player with the least number
of tokens in his/her stock, (this might be you!) and fifteen units secede to the nominee.
If you hold Democracy (and not Philosophy), one of the two parts must contain forty five
units.

The one certain way to avoid the effects of Civil War is to keep your civilisation to
thirty five units or less (or forty five if you hold Democracy). Another method is to
maintain a mental count of the number of grain cards in the grain deck, and thereby know
when the Civil War card will turn up. Then, by manipulating the number of cities you own,
it is possible to avoid picking the card up.

If, despite all your efforts, you do pick up Civil War,
there are two ways to mitigate its effect. If you have a very big civilisation, choose as
your nominee a player with an equally big civilisation. Careful calculation may ensure
that the nominee will lose most of the seceding units by revolt because of token and city
shortage, and you might get them back provided you have the most tokens in your
stock.

The second way is to choose as your nominee the player with the weakest position and
make him an offer. This will usually involve the nominee choosing those units whose loss
is least damaging to your overall position. Whatever way, Civil War is always vicious; do
everything you can to avoid it.

Flood is the last of the red-backed disasters, and the easiest to absorb. If you have
no flood plain in your civilisation, the only damage is missing out on picking up a
valuable cloth card. If you do have a flood plain, the best policy is to keep it lightly
populated, avoid building cities in it unless the site is elevated above the plain, and
get Engineering as quickly as possible.

If you have been counting the cloth cards, and suspect that you will pick up
flood, it might be worthwhile moving some tokens into someone else’s flood
plain; that player’s units will be affected by the disaster as well!

Epidemic is the first of the black-backed disasters. The recipient loses sixteen
units, and these losses must be taken with no area being completely depopulated; thus, a
city is replaced by one token and counts as a loss of four. The recipient may then spread
the epidemic among the other players, forcing them to lose up to twenty five units, with
no more than ten from any one player. However, the player who passed on the Epidemic card
is immune to this spread of the epidemic; the lack of side-effects makes this disaster a
good one to pass on. The effect of an epidemic can be mitigated to some effect if you
hold Medicine. Should the card be traded to you, you can at least affect your rivals for
the lead. Consequently, the Epidemic is probably the least terrifying of the tradable
disasters.

The effect of the Civil Disorder disaster increases with the civilisation
size. Provided the recipient has more than four cities, and does not hold Law or
Democracy, the excess are reduced. If the recipient holds Law, only cities in excess of
five are reduced, and if he/she holds Democracy, cities in excess of six are reduced.
Civil Disorder is a good card to trade to one of the leaders for two reasons. The first
is that the leaders usually have a large number of cities, and this disaster can chop
them down in size considerably. The second is that the recipient is the only player to
suffer, and the player who traded it suffers no side-effects apart from the victim’s
wrath.

Iconoclasm & Heresy is a terrible disaster, particularly for players who do not
hold Law or Philosophy. In this case, the recipient loses four cities by reduction.
Unlike Civil Disorder, he/she may also order the reduction of two cities owned by the
other players, including the player who traded the card! If the recipient holds Law, only
three cities are reduced, and if he/she holds Philosophy, only two cities are reduced.
Similar decreases apply to the recipient’s counterattack. However, the one to watch
out for is the combination of Civil Disorder with Iconoclasm & Heresy. This can be a
killer for anyone without Law: the former reduces the recipient to four cities, and the
latter knocks these out! This, in turn, forces the recipient backwards on the AST; this
combination should be exclusively aimed at the leader if at all possible.

Piracy is potentially the worse disaster of all. The recipient loses one coastal city
for every ship owned by the player who traded the card. Consequently, the recipient could
lose up to four cities. If this should happen, the effect is worse than Iconoclasm &
Heresy since, in that case, the cities are only reduced, whereas piracy removes the city
completely, and leaves nothing behind. An obvious motto comes immediately to mind: be
wary of ‘Greeks bearing gifts’ – especially in ships!

STARTING POSITIONS

The ten starting positions are not all equal; the ones with better potential usually have a combination of excellent terrain to expand into and a
relatively easy track on the AST. I shall now consider them in AST order.

Africa

Africa has one of the easiest tracks on the AST, as well as a low end-game target
total of 1200 points. Its position at the head of the AST also makes it relatively easy
to avoid disasters, but is a disadvantage when purchasing civilization cards. This
implies that you must look ahead when planning what to purchase.

The AST advantages are offset by Africa’s poor lebensraum, and this is made more
critical by the location of the natural city sites in the best population areas. Africa
should therefore build at least one of the famous ‘desert’ cities (twelve tokens
converted into a city in one of its 1-areas), claim as much of north Africa as possible,
and should be prepared to go to war over Sicily. Agriculture is an essential acquisition
given the lack of breathing room. These problems are reduced by the WXB leaf, and this
has been offset by the larger end-game target of 1300 points.

Iberia

Iberia has a relatively easy track on the AST, and a low end- game target of 1200
points. This is offset by a lack of natural city sites, one of which is in a flood plain.
Although Italy is not in play when the WXB leaf is used, most of the Italian peninsula
will have been claimed by the time you get there. Build a couple of ‘desert’
cities in Iberia, and try to get Agriculture.

Italy

Italy is one of the blue chip starting positions, possessing an easy track on the AST,
plenty of natural city sites, and a medium end-game target of 1300 points. Aim to occupy
all of the Italian peninsula, and the Balkan coast as far south as Corfu. It really is
too easy playing Italy and the other players should be aware of it.

Illyria

Illyria is a very difficult starting position. (‘What should I do in
Illyria?’) This is because its two neighbours Italy and Thrace have easier AST tracks
and consequently tend to be chosen first. If this happens there is nowhere to expand
into, and the position should not be chosen. However, if the WXB leaf is in use, Illyria
effectively takes up Italy’s position in the standard game. Its slightly more
difficult AST track and maximum end-game target of 1400 points balances this part of the
map out nicely. You can now have a viable game with it.

Thrace

Thrace has an AST track of about the same degree of difficulty as Italy’s.
However, it suffers from a lack of natural city sites, and the Danube Delta flood plain.
Consequently, it should insist upon a frontier with Italy located as far west as
possible, and a frontier with Asia/Assyria as far east in southern Ukraine as possible.
It would also be an advantage to acquire Agriculture.

Crete

Crete’s central starting location is a relatively difficult one, offset partly by
its low end-game target of 1200. Although there is no shortage of city sites in Greece
and Asia Minor, there is a lack of breathing space. This is accentuated by the necessity
to build ships to get off the island of Crete in the early stages. Once these ships have
been built, Crete always moves last in the race to occupy as much land as possible before
the first bout of city building. Consequently, you should concentrate upon creating a
constantly mobile population, and the acquisition of both Agriculture and Astronomy are
essential.

Asia

Asia has a relatively difficult AST track, which is not helped by the high end-game
target of 1400. It also tends to be crowded out by Assyria. Consequently, it is advisable
to choose Asia only if Babylon has not been chosen; in this case, Asia and Assyria have
plenty of room to expand into. If Assyria and Babylon have already been chosen, avoid
Asia like the plague.

Assyria

Assyria is another blue chip starting position to rank along side Italy. However, its
slightly harder AST track and higher end-game target of 1400 make it more of a challenge
to play. You should aim to expand into Asia Minor and to the Med coast at Antioch,
working out sensible frontiers with Crete and Babylon. If Asia is in play in place of
Babylon, it is probably best to let Asia have Asia Minor, and take over the normal Baby
Ionian position yourself. However, allowing Asia through into the Babylonian position is
equally viable.

Babylon

Babylon has an excellent area to expand into on the map, despite the huge Euphrates
flood plain. However, its AST track is extremely difficult because of the early first
barrier. Against good players, the best policy is probably to go for maximum city
expansion in the early stage and take a deliberate stop for one turn at the first
barrier. You will then have to attempt to ensure that all the other players make at least
one stop later in the game. If Egypt is also in the game, and follows the same policy, it
is advisable to cooperate closely with him/her on this. Apart from this, it is advisable
to avoid building more than one low lying city on the flood plain unless it is absolutely
necessary.

Egypt

Egypt has a similar problem to Babylon, and should follow a similar policy. It is
essential to expand into Palestine and claim as many of the city sites there as possible.
It is also advisable to agree to a sensible frontier with Africa and thereby avoid
trouble on that side. And whatever you do, avoid building cities in the Nile Delta if at
all possible.

TRADING

In the trading sessions, your primary aim should be to build up a set of trade cards
with a value as large as possible. This generally means concentrating on one commodity at
a time, and trying to corner the market in that commodity. The best commodities to
concentrate upon are Salt, Grain, Cloth, Bronze and Spice. The first four commodities
tend to be used as short change to fill up a trade package, but if you manage to make up
a full set they complement your hand very nicely. Although Gems and Gold can make up
substantial sets, there are not many of them, and the number of players with eight or
nine cities is usually low. Even if you do not have nine cities, it is useful to convert
eighteen tokens in your treasury whenever possible. It gains you a useful card to trade
with players who do have nine cities, and helps relieve your inflation problems. It is
also a good idea to offer trade packages of four or more cards every now and then; this
may make it easier to conceal a disaster card in the deal if that opportunity arises.

CARDS

There is no ideal set of civilization cards to collect. If
somebody maintained that such a set existed, the maximum limit of eleven cards per player
would make things very tight in the five, six and seven player games. However, some
general guidelines can be given. Any winning set must contain at least two of the three
civic cards Law, Philosophy and Democracy, and preferably all three. The easiest way to
acquire Law is to pick up Literacy and Architecture first; together, they knock forty
points off the price of Law. Philosophy can purchase very cheaply if you also acquire
Music and the five science cards: Mysticism, Astronomy, Coinage, Medicine, and
Engineering; this reduces the price of Philosophy to seventy. The purchase price of
Democracy can be reduced to one hundred and ten with the additional purchase of the four
craft cards Pottery, Cloth Making, Metal Working and Agriculture.

The order in which you purchase your cards should be partly decided by two criteria.
The first is to buy them in the sequence which makes the entire set you aim to collect as
cheap as possible. The second criterion should be based on whether the purchase advances
you past all barriers on the AST in the shortest number of turns. The problem here is
that getting past one barrier ‘easily’ may create problems at the next barrier.
The most critical example of this dilemma is evidenced by a decision to purchase lots of
cheap cards in order to obtain the seven cards required to pass the third barrier; this
may make it extremely difficult to acquire an additional four cards with the values
required to push your net total to the one thousand points required to pass the fourth
barrier. However, it is sometimes not possible to stick to these criteria. This is
usually caused by buying pressure on specific cards.

The trickiest decision to be made is usually connected with the order in which the
cards belonging to a particular colour group are bought. The natural order is to buy from
cheapest to dearest, largely because this makes it easier to pass the early barriers.
However, it can be advantageous to buy some of the expensive ones first in order to
create a shortage in them. This is a particularly important consideration in the five,
six and seven player games.

The mix of civilization cards to aim for is also critically determined by the number
of players in the game. If the number is four or less, there is no card shortage, and it
is generally best to aim for the high value cards unless this causes problems during the
approaches to the barriers on the AST. With larger numbers of players, it is worthwhile
going for some of the cheaper cards if only to ease your passage along the AST. However,
you must make sure, firstly, that you pick up a substantial proportion of the highest
value cards, and secondly, that your main rivals miss out on more of them.

In conclusion, Civilization is an excellent multi-player game for those who
like long games which require considerable thought, concentration and decision making. As
a final point, I’ll leave you with a recommendation not to use the Avalon Hill
expansion set. The additional trade cards mean that the disasters are less frequent, and
this upsets the entire play balance of the game.

Civilization is a game for two to seven players; designed by Francis Tresham
and originally published by Hartland Trefoil; it is now also marketed under licence by
Avalon Hill and Gibsons Games. Players should be aware of which set they are playing
with: there are slight differences, principally in the sequence of play, between the
Hartland rules and the Avalon Hill rules.

(This article was originally published in “Games
International”, issue #12 (January 1990) and is reproduced here with the permission of Brian Walker, the former editor of GI)

SHARP PRACTICES

SHARP PRACTICES

by Steve Jones

1830 is a game for two to six players, designed by Francis Tresham and published by Avalon Hill.
Like its classic predecessor 1829 (Hartland Trefoil), 1830 is a railroad business game.

For those familiar with 1829, there are two major differences in 1830. The first is the locale:
whereas 1829 covers the Railroad Era in 19th century Britain, 1830 covers the growth of the
railroads in the north-eastern United States and south-eastern Canada from the early part of the
19th century to the present day. The second difference is one of emphasis. 1829 concentrates more
on the mechanics of running the railroad companies for high profits and less on manipulating the
stock market. In contrast, 1830 concentrates more on manipulating share prices and less on running
the railroad companies; indeed, the opportunities for swindle and sharp practices are many and
various for the unscrupulous investor. It is not an easy game to play. While its mechanics are
fairly straightforward, there are many elements involved during play, and the interplay between
them is both complex and subtle. If one were searching for an appropriate single sentence to
describe 1830, it would be “This is a sharp game for sharp players”.

PORTFOLIOS

The game consists of a sturdy fold-up board of which about one-half depicts the north-eastern
United States and part of south-eastern Canada. This map has superimposed upon it a grid of 4cm
hexagonal spaces; hexagonal railroad track tiles are placed in these spaces during the course of
play, and a railroad network is gradually built up. Around the edge of the map are marked-out
spaces for the Stock Market (where the current corporation stock prices are indicated), the

Bank Pool (for sold stock and trains), the initial stock offerings, the Par Stock Price list, the
trains on offer, and various explanatory tables.

The object of the game is to make money; when the game ends, the player with the most money wins.
The players achieve this by buying and selling stock in an attempt to build up a stock portfolio
with a high revenue and profit potential. The value of the stock certificates in an individual
portfolio is determined by two things: the revenue per certificate, and the current Stock Market
price per certificate. The six private railroads pay a fixed revenue, and are not quoted on the
Stock Market; they have poor long term prospects, but have considerable short term value, of which
more anon. The eight railroad corporations, on the other hand, have both variable revenue and Stock
Market prices. There are many subtle undercurrents associated with the valuation of the available
stock certificates, which become more apparent with experience.

OPERATING ROUNDS

There are no player turns as such in the game. Instead, play proceeds in a sequence of stock rounds
and operating rounds until either the Bank runs out of money or a bankruptcy occurs.

In the stock rounds, the players buy and sell stock certificates; there is one certificate per
private railroad, and nine certificates per corporation (one president’s certificate worth two
shares, and eight single share certificates).

In the operating rounds, the private railroads earn revenue for their owners, and the president (or
the largest stock holder) of each corporation performs its operations. These consist of laying a
track tile, buying corporation tokens (or garrisons, as they are popularly called), conning train
services (and thereby earning revenue), buying (and sometimes selling) trains, and choosing whether
or not to pay a dividend to the stockholders. This last decision affects the stock price of the
corporation’s stock: the price rises upon payment of dividends, and falls otherwise.

A corporation earns revenue if it has at least one train and one route between two or more cities
(the revenue earned is equal to the sum of the city values of the city stops on the route); this
route must include at least one city occupied by the corporation’s token.

The number of operating rounds between stock rounds depends upon whether the game is in Stage One,
Two or Three, and is equal to the current stage number at the end of each stock round. The game
starts in Stage One, and proceeds to Stages Two and Three respectively when the first type 3 and
type 5 trains are purchased by any corporation.

CORPORATIONS

To those readers who have played 1829, this is all familiar stuff. However, five major rules
changes were introduced into 1830 which have touches of genius and fumed what would have been a
good game into a great game. The first rule change is that the eight corporations can be floated at
any time, and in any order. Furthermore, the player who buys the presidency certificate gets to set
the par value of the shares; the allowable par values lie between $67 and $100.

The second rule change concerns the corporation garrisons. In both 1829 and 1830, garrisons enable
corporations to diversify their routes. A garrison in 1829 prevents rival corporations from using
the station. However, a garrison in 1830 only prevents rival corporations from passing through the
station; they can still run services to the station. This difference introduces a whole new
dimension to the planning of routes in 1830. Basically, short routes are relatively secure, and it
is the longer routes which are in danger of being chopped.

The third rule change is connected to the dividend payments. Dividends are also paid to shares in
the Bank Pool, with the payments being made into the corporation’s treasury. This implies that
there are times when the corporation president will feel less pressure to plough back in order to
increase its treasury. This rule can be particularly helpful to the weaker companies. There are
subtle implications to this rule which will become more obvious after several playings.

The fourth rule change concerns the purchasing of trains by corporations: if a corporation has a
route and no trains, it must buy one. If it has not got sufficient funds in its treasury, the
president must make up the shortfall out of his own resources. This requirement can easily break a
player’s financial resources, and will give any aspiring corporation president nightmares in
the later stages of the game. These nightmares are partly due to the technological obsolescence
built into the trains, and partly due to the fact that there is no official receiver, as in 1829.

TRAINS

There are six classes of trains available in the game: types 2, 3, 4, 5 and 6, and the diesels. The
type N trains run between N consecutive city stops along a specified route; the diesel is unique in
that there is no upper limit to the number of stops along its specified route. Initially, there are
only type 2 trains available. Each successive class becomes available when the previous class runs
out. The catch is that when the first type 4 is sold, the type 2 Trains are removed from the game.
The type 3 trains are removed when the first type 6 is sold, and the type 4 trains are removed when
the first diesel is sold.

Consequently, a corporation might look healthy, with several trains and good revenue earnings, only
to find itself foundering with no trains when another corporation buys a new type of train that has
just become available. And if you should be so unfortunate as to find yourself running a
corporation possessing no trains, you cannot just sell out. To sell out of a corporation, there
must be another player with at least two shares to whom the presidency can be passed;
unfortunately, this ‘easy’ route out is not always available. Clearly, these corporations
are not limited liability companies! The good player will be aware of this, and should plan his
long term strategy accordingly.

This awareness should include becoming thoroughly familiar with what happens when each new type of
train comes into play, and the implications of this on long term strategy. The solution of the
problems associated with this unlimited liability rule tends to dominate play in the middle and end
game. Particularly critical periods requiring great care and attention occur when there is one type
3 left, and when only one type 4 remains; the former event signals the imminent demise of the type
2 trains, and the latter event signals the imminence of Stage 3 and the consequent maneuvering
which occurs when the players attempt to secure the limited number of permanent trains in the end
game.

STOCK MARKET

The fifth rule change affects the Stock Market and its operation, which is where the game is won
and lost, so it is well to discuss the Stock Market in some detail. The Stock Market, unlike the
linear track found in 1829, is a two dimensional matrix of stock price slots printed on the game
board. Low prices are found in the bottom left hand comer, and high prices are found in the top
right hand comer. Within it both vertical and horizontal movements representing stock price changes
are possible; the price increases if the movement is vertically upwards or a horizontal shift to
the right, and decreases if the movement is vertically downwards or a horizontal shift to the left.
The change in price associated with each movement is variable, with relatively high changes
occurring at the extreme ends, and relatively small ones in the middle.

Vertical share price movement takes place during the stock rounds. Every time a player sells a
share, the price marker of that corporation moves down one slot. At the end of each stock round,
the share price of every fully subscribed corporation moves up one slot. Horizontal movement takes
place during each operating round. When the president of a corporation declares a dividend, the
share price marker of that corporation shifts one slot to the right; if he/she ploughs the money
back into the company, the share price marker shifts one slot to the left.

FINANCIAL KILLING

The positions of the corporations on the Stock Market also serve one very important function: they
determine the order of play in each operating round, from highest to lowest. This use of the Stock
Market to determine the order of play in the operating rounds is of particularly vital importance
in the middle game just before the first type 5 train comes out. The good player will deliberately
buy and sell specific stock in an attempt to manipulate the order of play to his advantage; if he
gets it right, he can ensure that corporations in which he has a good holding will be in the best
positions to acquire the limited number of types 5 and 6 trains available.

Another important feature associated with the Stock Market is the priority deal: the possessor of
this gets the first option to buy and sell in the next stock round. This can be very important,
particularly when a player president has asset stripped his corporation and has somebody to dump it
on. It is also important early on when the first corporations to be floated have increased their
market values by a healthy amount. The player who can ditch his shares first has a double
advantage: he will make a financial killing at the expense of his fellow shareholders by selling
out just before the share price crashes, and he can choose which corporation to float next.

There are many other subtle features associated with the Stock Market, but there is no room to
include them all in this article; players new to the game should look upon it as a challenge to
pick them up in as few playings of the game as possible.

STRATEGY

Now that you have an idea of how the game is played, how do you develop a winning strategy? One of
the beauties of 1830 is that there is no single winning strategy as such. The closest thing to one
is to gain control of two corporations, but the hitch is that they both need to be good, strong
corporations; if you achieve that, you will be well on the way to winning. However, there are
plenty of things that your opponents can do to upset your plans. Another useful strategy is gaining
control of a corporation with a potentially good diesel route, and get a diesel train into it; if
you can achieve this without excessive expenditure, you could be on to a winner.

One of the tricks to playing 1830 is anticipating problems before they arise and taking the
appropriate evasive actions; equally useful is knowing what to do to limit the damage if you find
yourself in trouble. The most useful overall advice is to be flexible, and ruthless. Don’t form
any fond attachment to your corporations. Many players invite disaster because they let themselves
become emotionally attached to the corporations) they founded. They should be viewed as a means to
an end, and nothing more. If you have a corporation that is headed for the rocks and you have a
chance to get out, do so. Don’t stay around because you think you can rescue it; leave that
dubious distinction to someone else.

There are a number of useful rules of thumb to be aware of in general play. Always be aware of who
is sitting where, and take the appropriate action. For instance, don’t buy more than one share
of any corporation whose president is sitting to your immediate right unless it has a
‘safe’ train, and even then, think hard about it. The reason for this is that, in a later
stock round, your chances of getting rid of the excess ‘dangerous’ shares before he dumps
the corporation on you are virtually non-existent. Contrariwise, it is much ‘safer’ to
purchase more than one share in a corporation if its president is sitting to your immediate left.
In this case, he can only dump the corporation on you if you let him have the priority deal.

Another useful dictum is to avoid being excessively ‘greedy’. The number of times are
legion when players have bought that extra second share on the expectation of a quick short-term
profit, only to find the corporation dumped on them later, the risk is usually not worth it.

DIVIDENDS

On the question of declaring dividends, the best policy is almost invariably to declare. This
applies even in the case where your corporation has a vulnerable train and a low treasury. The
reason is that declarations will generally increase the values of your portfolio, and this will
improve your chances of weathering a bankruptcy crisis. In addition, if your corporation is that
weak, it will probably have shares in the Bank Pool, in which case the treasury will increase in
value even when you declare; this reduces the pressing need to plough back. The only time in which
it is cost effective to plough back is when this will gain your corporation an additional train in
the end game, or will ensure that it obtains a ‘safe’ train. For example, you may have a
type 5 train, and a plough-back will give you enough money in the treasury to purchase a type 6
train; if your corporation has the routes on which to run both trains, it can be a winning move.
Equally, a plough-back which gives you enough money to trade in a type 4 train for a diesel is
always worth doing.

One other general consideration worth mentioning is to try to build up as large a portfolio as
possible; if you have more shares than anyone else, your chances of winning are that much better.
One way of achieving this is to get one of your corporations into the yellow, orange or brown
sections of the Stock Market where its shares do not count towards the share limit for each player;
if you do manage to achieve this, you will have to keep the extra Shares in the yellow at least,
and that is as good an excuse to go for a diesel train as any.

The good player will also become thoroughly familiar with the different types of track tiles
available, and the attacking and defensive options associated with upgrades. In particular, get to
know the different types of station tiles and how they can be placed to build up highly profitable
routes.

One tactic with which you should become familiar is the laying of certain strategically important
tiles in order to deny another player their use. Included in this category are the yellow type #57
and the green type #59 station tiles. There are only four of the former and two of the latter in
the game. They are particularly important when corporations are attempting to build their first
routes; removing these tiles from play can delay that first route and cripple the affected
corporation.

THE PRIVATES

Following on from the general considerations discussed above, I shall continue the discussion of
game strategy by considering the six private railroads and the eight corporations, and finish up
with some observations about the beginning, middle and end games.

Although the private railroads have a limited lifetime, they are vital because of their potential
to provide a large influx of cash to the players later on in the game. This potential exists
because of the rule which allows the players to sell the private railroads to the corporations for
between half and double their face value; the only exception to this is the B&O private. This
rule effectively allows the president of a corporation to embezzle funds from the corporation’s
treasury.

If he times his move correctly, a player can strip the corporation of its cash and dump it on
another player possessing at least two shares in it; often, when this ploy is pulled off, the
corporation possesses plenty of trains which are in danger of being made obsolete in the near
future. In addition to throwing a potentially disastrous problem into someone else’s lap, the
large infusion into the player’s cash reserves puts him in a good position to float another
corporation which will be in a better position to obtain the new trains.

Let us now consider the six private companies in ascending order of price.

Schuylkill Valley Railroad & Navigation Co.

The Schuylkill Valley Railroad & Navigation Co. is a bit of a joke. Its low face value and
revenue make it of little value to anyone. Even its location in a mountain hex (G15) to the west of
New York possesses little strategic value apart from being an obstacle. Its one asset is a
relatively high revenue for little outlet in the early stages. Don’t break your neck in the
lush to pick it up.

Champlain & St. Lawrence Railway

The Champlain & St Lawrence Railway is a slightly better prospect. Its main asset arises after
it has been sold to a corporation: the owning corporation can then lay two tiles in one turn, its
normal lay and one in the C&StL hex located at B20. This can be of particular value to the
CanPac in its efforts to break through to the lucrative routes near New York; but it should be
pointed out that this is a long shot, and if it is to be played at all, it should be early.

Delaware & Hudson Railroad

The Delaware & Hudson Railroad is starting to hit the big money. In addition to its trade in
value being as high as $140, it has a potentially high strategic value in its location near to New
York in hex F16. The owning corporation can lay a station tile and garrison in F16 even if this
does not connect into its network. This gives corporations like the C & O, the Erie, and the
CanPac the potential to set up lucrative routes to New York. This one should be watched.

Mohawk & Hudson Railroad

The Mohawk and Hudson has a potential double value. In addition to its relatively high revenue of
$20 and trade in value of up to $220, it can be traded at any time for a NYC certificate. This last
capability means that even if you never get the chance to use it to asset-strip a corporation, you
will never lose its capital value since it can be traded in for an NYC share at any time before the
first type 5 train is brought in. But don’t hold on to it too long, particularly if the NYC
comes out fairly early on.

Camden & Amboy Railroad

The Camden & Amboy Railroad is a potential gold mine. Worth up to $320 cash in an asset-strip,
it also has attached to it a free Penn certificate. This latter feature makes it easier to float
the Penn early on, and makes an asset-strip even more likely. Even if you don’t get to use it
to asset-strip a corporation, its location in H18 is potentially valuable in the struggle to
control the approaches to south New York. Its high potential value will mean that there will be a
lot of competition in the rush to acquire it; whoever gets it should be made to pay well above the
asking price for it.

Baltimore & Ohio Railroad

The Baltimore & Ohio Railroad is a bit of a mixture. On the plus side is its high revenue of
$30 and the automatic acquisition of the B&O corporation presidency. On the negative side is
the fact that it automatically closes down when the B&O corporation buys its first train.
Therefore, it is not as valuable as the Camden & Amboy, and as such, it is rarely worth paying
more than $S over the odds to purchase it. The most critical decision which the purchaser has to
make is the par value of the B&O corporation. In most cases, it is best to set it to the
maximum possible value of $100; this value ensures that the capital loss from the relatively fast
disappearance of the B&O private is a minimum. The par value should only be set at a lower
value if you have a partner who is willing to help buy out all the shares in the first stock round,
thereby ensuring that the price rises steadily in the early stock rounds; even then the decision is
marginal, and better terms might need to be set.

The eight railroad corporations are not all equal; some have better potential than others.

Pennsylvania Railroad

The Pennsylvania Railroad (PRR) is potentially one of the best long term corporations, partly
because of its relatively close starting position near New York, and partly because of its five
tokens. The latter also implies that the PRR is a good corporation to put a diesel train into, if
only because all those tokens give it the capability to defend the long routes which a diesel
requires to be cost effective.

The PRR is usually one of the first corporations to be floated, because only five shares need to be
bought instead of the usual six; the sixth share is already owned by the owner of the C&A. The
one drawback of the PRR is its low revenue growth rate; even with two trains in it, it rarely gets
above $6 a share early on.

New York Central Railroad

The New York Central (NYC) is potentially the best long term corporation, better even than the PRR.
This is because its home base has a better revenue and track switching potential than the
PRR’s. However, it also suffers from poor initial revenue growth rates, and because of this it
rarely comes out early on. It usually comes out in the middle period of the game. Like the PRR, it
has excellent potential as a diesel corporation, particularly if it can get through to south New
York via G 17, and into the PRR network. However, its one weakness is that it needs a yellow type
#57 tile to build its home base; therefore, any prospective president should make sure that there
are plenty of these about when he floats the corporation.

Canadian Pacific Railroad

The Canadian Pacific (CPR) has a poor long-term potential despite its five tokens. Its starting
position in Canada is isolated by river and mountain barriers from the lucrative routes in the
centre of the board If we add to this the relatively poor revenue growth rate, it is not difficult
to conclude that it is probably a lame duck corporation. The only chance it can have to become a
good long term prospect is either through early access to New York via a garrison in the D&H
hex in F16, or through outside help in route building.

Baltimore & Ohio Railroad

The Baltimore & Ohio Corporation (B&O) is another potential diesel corporation. This is
particularly so if it gets

staved early, and gets to H16 before the PRR; in this case, the world is its oyster. Even if it
cannot break out of its comer to become a diesel corporation, it still has a good potential to be
one of the strongest of the medium corporations. But its president must be prepared to make things
happen. And there is no harm done if it is not floated early in the game; just sit back and rake in
the revenue from the B&O private. Another advantage associated with a late flotation is that
the par value of $100 ensures that there is plenty of cash in its treasury with which to buy a good
Train.

Chesapeake & Ohio Railroad

The Chesapeake & Ohio (C&O) is another good medium corporation with an outside chance of
gaining good diesel routes. It has excellent revenue growth potential because of its close
proximity to Chicago. Consequently, it is a popular choice for flotation in the first stock round
Its one drawback is its relative isolation at the western edge of the board This can be partly
overcome by its early flotation, which can give it the time to build up its routes.

Erie Railroad

The Erie (‘Erie’) is one of the poorer corporations. It should never be floated early on
because its home base can never be built until Stage 2; the only legal tile that can be placed in
E11 is a green type #59 tile. Great care should also be exercised in laying its home base tile and
token; it is dangerous to locate its home base on the north-west edge of E11 facing D10 because
there are only two green type #59 tiles in the game, and if the second one goes into H18, the Erie
will be crippled until Stage 3. These disadvantages usually lead to the Erie being one of the last
corporations to be floated. It is strongest as the second corporation in a player’s portfolio.

New York, New Haven & Hartford Railroad

The New York, New Haven & Hartford (NYNH) is an excellent New York based corporation which
possesses good revenue growth potential. While it is not common to see it floated early on, it can
do well when it is. The one drawback to the corporation is its three tokens; this low number of
tokens means that it is a poor choice to put a diesel train into. As one player observed, ‘If
the Hartford had an extra token it would be a cracking company!’

Boston & Maine Railroad

The Boston & Maine (B&M) is a corporation with mixed potential. If it is floated early on,
it can do very well. It suffers from two drawbacks. The first is its geographical isolation from
the bulk of the map by the Appalachian mountains and the river in F22. The second is its three
tokens, which give it very little route flexibility. It is therefore hardly surprising to see it
usually doing well only when it is floated early on. If it is one of the last to be floated, it
will need friends if it is to do better than moderately well.

There is no ideal strategy to be pursued at the beginning of the game apart from being flexible.
The one thing to keep in mind is that it is not vital to buy a presidency and float a corporation
in the first stock round. However, if you are going to do so, the vital figure to keep in mind is
$402; this is the amount of cash you need to float a corporation on your own. The only exception is
the PRR for which you need only $335 in order to float it by yourself, because of the free share
that goes with the C&A private. If you do have this amount available after all the private
railroads have been sold, well and good; pick the corporation you want and get going. If you
don’t have the cash, you will need to strike a deal with another player in order to get his
help to float a corporation The one thing to keep in mind when striking such a deal is not to be
dogmatic. Certainly, try to strike the best deal that you can, but remember that the other guy
should be offered something to entice him into the deal in the first place. And when you make such
a deal, stick to it; as a general policy, it is counter-productive to welsh on agreed deals.

The only other thing to keep in mind in the first stock round is to make sure that the other
players don’t get their private railroads too cheaply. This applies particularly in the case of
the C&A; it is criminal to let a player get this for $165. A useful rule of thumb to keep in
mind is whether the price reduces the player’s cash reserves to less than $402, or in the case
of the bidder for the C&A, to less than $335.

It is difficult to pinpoint exactly when the beginning game ends, and the middle game starts.
Probably the best definition is when the second set of corporations is floated. Generally speaking,
the players who are floating these corporations are doing so out of their own resources, and so it
is probably a good bet that they are doing well. If a player is floating his second corporation, it
is invariably a sign that he is doing very well indeed, and the other players should be thinking of
ways of tripping him up. There are many ways of doing this, but the most common means involves
hitting his share prices, and attempting to remove from circulation specific tiles which he may
require.

Once into the middle game, you should be devoting all your efforts to ensuring that your
corporation gets at least one of those valuable type 5 trains. This will usually involve keeping a
close watch on the share price trends on the Stock Market, and attempting to predict which
corporation is likely to be able to buy the first type 5 train. This includes taking whatever steps
are required to manipulate the share prices so that the trends go the way you want them to go. The
trick then is to ensure that your corporation buys the first type 5 train, or failing that, has its
operating round immediately afterwards. In the former instance, you should be trying to ensure that
your closest rivals do not get the good trains.

The middle game usually ends and the end game begins when the first type 5 train is brought. This
usually triggers a mad rush for the type 5 and type 6 trains, and more often than not the game
settles down to an uneasy period during which someone is usually saving up for a diesel train. If
your corporations are ‘safe’ with their type 5 or type 6 train, and your prospects for a
diesel are poor, you should be thinking about closing up the game, and making sure that any diesel
routes are not very lucrative. On the other hand, if you are saving up for a diesel, you should be
building, or have already built, your diesel route, and be taking whatever steps are required to
protect it. The question of going for a diesel can be critical, especially since it will usually
cost you something to get it. If you think you are already in front, it is probably not worth going
for it. On the other hand, if you are coming second it is certainly worthwhile going for it; the
only consideration that you might need to take into account is whether there will be enough time
left once you have the diesel for its extra revenue to wear down the lead. The only other reason to
go for a diesel is to force a bankruptcy, and in the ensuing share price chaos, to come out in
front.

In conclusion, 1830 is an excellent business game which requires considerable thought and quickness
of mind, and provides endless hours of enjoyment. I’ll leave you with a final recommendation:
do not play with the optional extra type 6 train; that version is for wimps!

(This article was originally published in “Games International”, issue #9 (September 1989) and is reproduced here with the permission of the author)
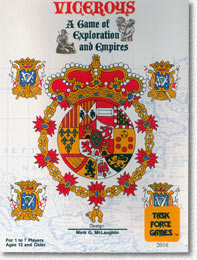
Britannia

Britannia

Graham Staplehurst gives one man’s angle on a popular
historical game that is already regarded as a classic.

Britannia

Britannia is a game for three to five players (but four is the most suitable) designed
by Lewis Pulsipher. It is based on the known history of Britain between 45AD and 1085AD,
but enables the players, together with a little help from the luck of the dice, to
recreate that history in their own manner.

Lew Pulsipher is well known for his scholarly devotion to history and, though an
American, evidently knows a good deal more about the origin of the ‘English’ and
other people of Britain than most people who live here (like me!). However, I’ll
leave the purely historical aspect of Britannia for now and describe the game in a little
more detail.

The game consists of a board depicting the island of Britain (including the Hebrides
and Orkneys) divided into 37 areas and surrounded by six seas. Lurking off the board are
the lands of Gaul, Scandinavia and Erin. Initially, the island is peaceful, with a
scattering of British Celtic tribes portrayed in confederations such as the Belgae, the
Welsh and the Brigantes. Suddenly, from Gaul, comes the fleet bearing four Roman legions
with their auxiliaries on the command of Emperor Claudius. Fifteen units land on the
southern shores of Britain…

The Destiny Of An Island

This is just the first of many invasions inflicted upon Britannia by successive
nations. Some are massive and sudden, like the Romans and Danes; some are slow and
insidious like the Irish. All affect the game to a greater or lesser degree as existing
inhabitants attempt to stave off the invaders or channel their lust for territory in
another direction. For this is a game of territory, and the trick of winning is holding
just enough to achieve your individual objectives. Stretch too far and you’re
vulnerable – pile your units up and watch them die from lack of supplies.

Each player controls four nations, a nation being a more or less coherent group of
people with a unified aim. The Belgae, for example (a quarter of the Blue faction),
represent the Celts of lowland England: the Trinovantes, Catuvellauni, Dobunni and Iceni
among others. The game notes delineate the aims of the nation in strict terms, awarding
victory points for achieving different aims. The Belgae must hold areas after the fourth
turn to score points, and also get points for destroying either Roman armies as they
advance north or Roman forts left behind. Meanwhile the Roman nation (the first of the
Purples, appropriately enough) gets points for invading all English, Welsh and southern
Scottish areas and for holding on to its forts, so the Belgae do well to make it through
the first turn in games I’ve played. Thus Blue is set against Purple and command of
territory crucial, for no matter how many battles you win, if you haven’t held enough
areas, you won’t win the game.

This aspect of the victory criteria is essential for balance and to ensure that
players must mix outright warfare with judicious diplomacy. The Brigantes, Welsh and
Picts can all choose to submit to the Romans rather than be wiped out, safe in the
knowledge that the collapse of Rome will call all the legions home after Turn Five,
leaving behind only the weakened civil population to defend against the waves of Germanic
invaders.

In addition to the simple equation of areas held = support and victory points, there
are two other basic rules. The first is that only one nation can occupy an area: if
another enters they must fight until one withdraws or is eliminated – even if the units
belong to different nations of the same player. The second is the way that combat is
dealt with. Each side rolls one die for each army present and kills an opposing army on a
5 or 6 – modified for terrain and special ‘enhanced’ armies such as cavalry and
Roman legions.

Thus far the game is simple – so what makes it exciting? The re-creation of the
history of the land we live in is a lively subject and one which continues to enthral me
after many games. It’s the eternal ‘What if?’ historians like to ask: what if
Harold was defeated at Stamford Bridge or won at Hastings? What if Arthur drove back the
Saxons for good? What if the Great Army of the Danes pressed its attacks on Wessex? All
these points are elegantly handled in the game through three mechanics (none of which
detract from its essential simplicity). There are the specially designed victory
objectives mentioned earlier; there are leaders to gather great armies and enhance their
fighting power; and there are special rules for particular situations.

The victory point objectives can be great motivators. Take the Welsh, for example.
They score 8 points for holding all of Wales (and this includes Devon and Cornwall) in
Turn Seven; they can also score a massive 6 points for taking York at any point in the
next two turns. Consequently, the Welsh always make a big effort to sack York and end up
dividing the Angles. But then what do they do with their army in York – send it home to
defend against menacing Irish and Saxon armies, or maintain it as a field army to keep
the nations in England from getting overly powerful? And how should the Angles plan – to
defend York heavily and deny the Welsh the points, at the risk of losing perhaps 30%-40%
of their population, or concentrate elsewhere and let the Welsh take it easily?

Leaders can be very useful. Allowing nations to stack up armies for invasions, giving
50% extra movement and adding one to the die roll in battle, they are scattered thinly
for the most part and must be used carefully, particularly by smaller nations. King
Arthur, for example, will lead the Romano-British against the Saxons, Angles and Jutes,
gaining points for every enemy killed. But if he leaves himself exposed and gets killed,
the victor wins 3 points for themselves. At the end of the game, 5 points are at stake
between Harold, William and Harald Hardrada the Norwegian for being King of England.

Finally there are the additional rules. These cover everything from raids, when armies
can attack and then return safely from whence they came, to the election of Bretwalda or
overlord of England before the strong Kings arose. Trying to remember all the rules,
together with all your own victory point objectives, and your opponents’, and
thinking ahead to where the next invader is going to appear all make for a game where
you’re never really sure what’s going to happen next.

An Anvil Of Blood And Terror

So, now you have an idea of how the game is played, let us progress to your first
game. How do you win? I hope that the general maxim given above will be a start, but
there are four different factions in the game all requiring a slightly different
approach. Here are some hints which might just help you do a bit better.

THE PURPLE FACTION
  • Romans
  • Romano-British
  • Scots
  • Dubliners
  • Norwegians

The Romans have perhaps more decisions to make than any other nation in the game. They
get the most points-per-area for penetrating to the heart of Albion (that’s Scotland,
except the Scots haven’t got there yet) but this will generally mean they have to
by-pass Wales and it can also leave them with too few defences down south. Despite the
fact that Romans move further each turn than other armies, their mobility is not
unlimited and to get additional points when the legions withdraw the Roman player must
protect southern England, Cheshire and York.

If you plan on going north, you must reach York in the first turn while eliminating as
many Belgae as possible. Try to take out the Brigantes in March and Cheshire as well, and
defend the western flank against an early Welsh raid. Don’t despair if you lose two
or three armies early on through others’ lucky die rolls. An alternative strategy is
to go for Welsh submission, since getting all of Wales will net you 3 points anyway –
more than risking going against the Highlands in Scotland. Welsh mountains are a good
defensive base for the Romano-British to take over.

If you go north, this should weaken the Picts and assist your Scots somewhat,
especially if you can wear the Brigantes down to a token presence. It sometimes pays to
make a deal with the Welsh regarding the latter. The Scots’ invasion with King Fergus
must push the Picts back after their raiding. Skye is the hinge of Scotland since it
borders both western seas, but Dalriada remains the centre of the kingdom. If the Scots
look doomed through ill luck, use them to try to eliminate the Brigantes completely.

The second two Purple factions can also help each other. The Dubliners’ big
advantage is moving after the Norsemen, so they stand every chance of getting both York
and Cumbria on their big invasion turn. It is often advantageous for both Scots and
Dubliners to bide time at sea when small numbers of invaders are introduced, landing them
only in the major invasion. Obviously, empty spaces are often worth taking to get a
foothold and start to build population.

After their invasion, the Dubliners should attack Angles and Danes in the area to
weaken the north for Harald’s forces, and aim to retreat into Lindsey and Pennines.
They can emerge in the last turn to retake York and Cumbria while keeping out of
Harald’s way when he needs to score points. The Angles are a problem since they will
try to eliminate or weaken Harald at any cost, in order to assist Duke William’s
chances of becoming King.

The Norwegians should be able to score most of their initial invasion points with
Dubliner help. Try to push well south on the first stage of the invasion so that Harald
can retreat further north and stay out of others’ reach. His only real hope for King
is that Harold and William kill each other, but a small force in North Mercia sometimes
has a chance of catching one or other off guard.

Avoiding putting more than one man in areas the Dubliners want; there’s a good
chance he’ll be able to retreat out. However, the areas are worth holding to get
reinforcements. If you do plan to let the Dubliners take York, remember the
reinforcements can’t land south of it, so ensure your armies aren’t concentrated
in the north.

THE BLUE FACTION
  • Belgae
  • Picts
  • Angles
  • Normans

The Blue faction is hard to play well, but don’t despair! It can win, and does so
more often than you might imagine. It starts by watching the Belgae being annihilated by
merciless waves of Roman invaders. All you can do is pray to roll some sixes and slow the
Romans down. Always retreat immediately you get the opportunity, preferably to hiland
(Downlands or Lindsey). Then attack any undefended fort or, failing that and if you are
caught in open terrain, forts with single armies. Always attack the forts of greatest
worth to the Roman, even if this leaves you in a worse defensive position (as the Belgae,
you couldn’t have a worse defensive position). Just go for kill points.

The Picts however should do everything possible to survive as widely spread as
possible. Don’t retreat from Dunedin until you have to and build in the north, ready
to squeeze the Caledonians before they start to double up their armies in areas.
Don’t hold back against the Caledonians if you can put three or preferably four onto
one. Turns Four and Five are especially useful and you can often eliminate the
Caledonians by sending in every single piece to raid and leaving just one behind. The
Picts and Angles can often help each other across Dunedin/Lothian/Strathclyde. If the
Picts do get control of the islands, remember to garrison them later against the
Norsemen. Do remember, it’s better to stay alive and make a deal with the Brigantes
or Scots than to be reduced down to a miserable couple of units; and also ensure you get
the most points in the last turn.

The Angles have a hard time. Lacking a leader with which to invade, their only
advantage is moving last, and even this means they tend to have their breeding cut down
by others, especially Saxons. However, it is still possible to score lots of points and
survive, despite being assailed by Romano-British, Welsh, Saxons, Irish, Danes, Dubliners
and Norwegians. Try to hold the balance of power in England and deprive the Saxons of
Bretwalda and Kingship as often as possible. Strike at weak Saxon points to deprive him
of victory points as well, for example Essex in Turn Seven. Take any hiland areas as soon
as you get the chance and don’t risk big attacks except perhaps to take out Arthur
with an army or two -that’s four or five points’ worth.

Finally, the Angles have a good points-per-area score late in the game, so they are
worth preserving rather than throwing away. They can also help Duke William (the
traitors!).

The Normans get the chance to move and act last of all in the game. Be prepared to
face Saxons, Danes, perhaps even some Welsh or Irish in the west, all intent on murder.
It is absolutely essential to get maximum points from the first invasion turn and to
protect William, for reinforcements will be worthless without him alive. The best points
come from an east-side attack but except in very unusual circumstances you should always
endeavour to kill Harold as soon as you land. Don’t bother to spread out after Turn
15; stay compact and harder to attack. Encourage everyone else to harry the Norwegians!
Mix your cavalry and ordinary armies to give the latter best protection and leave William
behind at least one rank of defenders.

THE RED FACTION
  • Brigantes
  • Irish
  • Saxons
  • Norsemen

The Red faction is big, bad and thoroughly mean. At least, that’s my unbiased
opinion. To be honest, any of the factions can be played as ‘spoilers’ to some
extent; it’s just that often the Red faction seem to be better at it than others.

As enduring as the Picts (with luck) are the Brigantes. By the time the Roman reaches
the Brigantes’ real heartland of Galloway and Strathclyde, he should be struggling a
bit, and the Red player should certainly encourage the Roman to go for the big points in
Dunedin, Alban and Dalriada.

If necessary, submit to the Romans. Fighting it out is usually not worth it: although
you gain perhaps 6 points for luckily killing a couple of armies, it would be much better
to preserve your integrity and pick up more points later on. Try to submit with maximum
population (6 armies in three areas) and remember that you move after the Roman so when
he counts Limes on Turn Five, you can try to vacate point-scoring areas. With five or six
armies, you should be able to hold the heartland and progress from there, especially with
the early leaders. Do any deal to stay alive and help the Saxons and Norsemen later:
Saxons by voting for them in Bretwalda elections; Norsemen by clearing Cumbria.

The Irish have a hard time of it. As suggested for the Scots and Dubliners, don’t
always land armies the turn they arrive at sea. Wait until you have a couple to be more
use, unless you want to risk the odd Roman fort in Avalon or Hwicce, for example, or
occupy an empty area. With a few armies on the board and the Welsh busy elsewhere, a
useful attack is one focusing on Devon then Cornwall. Although harder to penetrate, they
also offer better long-term security and will be hard for the Welsh to retake. Even
better, it could well distract the Welsh from attacking Norsemen or Saxons elsewhere, and
strengthen your faction as a whole. An alternative Irish kingdom to aim for stretches
from Cumbria to Gwynedd; again this is quite hard for the Welsh to attack, however it is
more vulnerable to later attacks from Danes and Dubliners.

The Saxons are quite simply the biggest nation (potentially) on the board. Only the
Danes with 18 armies approach the Saxon total of 20, and the Danes are unlikely to grow
like the Saxons do. The initial Saxon advantage is the early invasion against a
relatively empty southern England, with Hengist as leader. This should enable you, with
luck, to score a good few points killing Romano-British as well as wiping out the Jutes
(this is highly recommended). Then spread out and maintain a few two-army stacks in the
midlands, gradually swelling in size -you should quickly get two, then three builds a
turn – and taking out Angles in the Midlands and East Anglia, pushing back stray Welsh
and even making room for the odd Irishman if it scores more points. Use boats to catch
the Angles off guard. If Hengist is unopposed in landing, an early foray to secure Devon
is also useful, but follow up in Cornwall sooner rather than later. With Irish and
Brigante help, the Red faction should make the Saxons Bretwalda and King more often than
not. Once you gain momentum, you will roll on until the Danes strike. The answer is to
secure your back (the West) so that you can fall back in good order and keep punching
back in any weak spot. Tell the Danes if they weaken you too much, it’ll be a
walkover for William later. Do deals on non-aggression to get Bretwalda votes. Most of
all, bulk up your front line to make it sufficiently unattractive to attackers, even if
you don’t want to attack anywhere yourself.

At the end of the game comes the hardest part – defending against Duke William and
Harald. With any luck, the Angles and Danes should be Harald’s main opponents and may
well prevent him from reaching Harold. Keep Harold as well defended as possible, such as
with the maximum four armies in hiland, and scatter troops around to give you the best
chance of survival and a retributive strike against the Norman invaders.

The Norsemen present a task of flowing where it is easiest. The initial strike must be
against Hebrides and Orkneys and holding them in Turn 13 for the best points opportunity.
If you can end up with the ideal of two or three armies in Hebrides after Turn 12, these
can join with the fresh invaders next turn to go for Skye and a solid base for reaching
all of Britain’s west coast; otherwise get points in Cumbria and annoy the Welsh or
Dubliners, whoever looks the stronger. Don’t be too worried about getting every last
half point for visiting – the Norse are one example of where the armies are best used
preventing others from reaching juicy objectives, such as the Picts on the last turn with
their three 3-point areas.

THE BLACK FACTION
  • Welsh
  • Caledonians
  • Jutes
  • Danes

At first glimpse, you might be forgiven for thinking you’d been dealt a dud hand.
The Caledonians can only get six armies on the board and stand fair to be wiped out by
Picts and Norsemen, but this seems an easy life compared with the Jutes’ five armies
and not even hilands to defend them.

The Caledonians have little to do except sit there and try to resist the inevitable.
Just try to exist; honey the Pict with kind words and hope you get a build soon. As for
the Jutes, their best chance for points lie in destroying Roman forts and stealing Kent
on Turn Four. If Kent is defended by a Roman army and fort, go for any open Roman fort
you can reach and raid it, then try for another on Turn Five with all units. If possible,
delay landing the final Jute until after Hengist’s invasion; that way you might just
get Kent or somewhere adjacent on Turn Seven. Remember, if you land in a coastal space
you can probably reach Kent by boats later, so stay out of the way of the Saxons.

The Welsh are more complicated and offer a good possibility for long term strategy. As
with the Brigantes, submission to the Romans is, in the final analysis, better than being
smashed to (practically) nothing. Don’t let that stop you taking any chance to raid
Cheshire, York or Essex, should the chance arise: by building your first armies in Powys
and Clwyd this is often easy to accomplish. When the Romans withdraw, Romano-British
forays may leave areas to York open. Seize these early (especially Pennines) to make it
easier to get your 6 points in Turn Eight or Nine.

Your main opponents are the Red faction, so ruthlessly quash any Irish settlers and
take the opportunity to nibble at the Saxon kingdom and slow its expansion. Devon and
Gwent are worth defending. In the mid game, occupying one or two English areas can make
all the difference in Bretwalda elections. However, the main concentration must be on
maintaining the integrity of Welsh territory and reaping maximum victory points every
three turns.

Finally, the Danes also call for careful consideration. In the initial raid, look for
open areas you won’t have to fight over and be careful to preserve maximum numbers of
units for the Turn 12 invasion. Raid Angles or Saxons depending on who holds the stronger
hand and then follow this up with a good invasion (at least 16 points worth). Try to end
the invasion concentrated either north or south of York – if north, aim to eliminate the
Angles entirely – so that you can hold a sensible kingdom.

Use the Welsh to soften opponents and take the odd area so the Danes get a chance to
be King, but don’t let them get in the way of scoring points during the invasion.
Later hang on as well as possible and press the advantage wherever you can. You should
make deals with the Saxons and Angles if necessary at the end of the game in order to
stand off the Normans and Norwegians wherever possible.

Step Back Into Those Dark Ages

One of the attractions of Britannia is that it does not exactly simulate the history
of Britain. After all, this would be very tedious and unrewarding, and we would all know
who was going to win. (Actually, portraying history with the game is impossible in places
– for example, Harold cannot defeat Harald Hardrada at Stamford Bridge (in York) and then
reach William in Sussex next turn.) However, the game must of necessity simplify things
somewhat and leave out some rather interesting bits of British history.

Generally speaking, the only units in the game are armies, and only armies are deemed
to control areas. There are no civil populations to hold an area peaceably (although a
leader can control an area on his own) and thus every part of the realm must be
garrisoned – and this is not an accurate reflection of the settlement of Britain other
than in Roman and late Saxon times. Additionally, it means that the Normans, with their
relatively small band of men, cannot win control of the land by placing a few men in
command over a subject population.

Additionally, a dimension of historical realism is lost by the amalgamation of many
peoples into different nations. The many tribes constituting the Belgae, for example,
were belligerent towards each other – often more than the Romans, and some actively
submitted to the Romans (whom they knew from Julius Caesar’s invasion and withdrawal
ninety years earlier) and attacked their ‘fellows’. The Welsh were related Celtic
tribes: Ordovices, Silures and Deceangli for example, who were led by the fleeing Belgae
leader and hero Caractacus (or Caradoc) in defiance of the Romans.

Throughout the rest of history, nations were split by internal strife on a regular
basis as successions were disputed and lesser nobles tried to seize power. There were
also rebellions by peoples who had been subjugated and effectively ‘wiped out’
but who nevertheless regained a national identity and rose up. The first example of this
was Boudicca and the Iceni who had been semi-Romanised; they took up arms when greedy
administrators raped their lands and daughters and drove a path of destruction to
Colchester, St Albans and beyond before being utterly defeated by Suetonius.

There are a few historical inaccuracies which are easy to correct. Two of these
concern the provision of boats – a very useful commodity in the game. I would certainly
allow the Saxons boats under Alfred, who was the constructor of the first English navy
(one might even think about rules for naval combat).

I would also give boats to the Norwegians in Turn 16, enabling them to land forces
further south than York. Turn 16 could be further enlivened by the addition of a Danish
leader King Swein (also with boats and a few boatloads of troops) who raided the east
coast of Britain and, assisted by Hereward the Wake, laid up in the Wash during 1070-1. I
am also tempted to add other leaders, such as Caractacus, Boudicca, Hereward, other Welsh
and Scottish princes down to Macbeth and so on, but this side of the game is more
dangerous to tamper with, as one might upset the game’s innate balance.

There are some nations I feel have been treated a little harshly – the Jutes for
instance, unable ever to score any points except for areas in the south-east of England
when, given the opportunity, they might have settled in any convenient spot and survived
with a greater cultural identity. I believe there is also room for more rules covering
submission, a Scottish King and so on.

The Wider World

Britannia is a good game, destined to become a popular favourite with boardgamers and
wargamers alike. However, as a games designer, I’m not content to let it stop there,
and neither are other busy inventors I know.

Already existing as a prototype are Britannia variants covering the whole of Europe,
from Persia to Britain (a six player, 36-faction game taking about 12 hours to play) and
also a Middle-earth variant of my own design. This latter has some 20 factions and a
rather longer time span than Britannia – it starts with the war of the Elves and Sauron
in the Second Age and ends with the War of the Ring over 5000 years later!

In addition I have devised some alternative historical scenarios to add to the
original game. These start with the Huns under Attila reversing their defeat by the
Franks at Chalons and sending a raid against England. The Huns are followed by a possible
resurgence in Roman fortunes, then later by Arabs spurred on by victories in France and
Magyars raiding beyond their battles in the Low Countries. Finally there are ex-Danish
Vikings who can choose either to settle in France and become the Normans, or land early
in England – but this will indubitably let in the Franks, now French, under Philip
I…

I also have plans for introducing some fantasy elements to the game, with Merlin,
giants, dragons, faeries, goblins and all the other traditions rife across so many parts
of the country that to leave them out would do serious injustice to the tale of Britain
that Britannia tries to tell. But in the meantime, I hope you enjoy playing Britannia,
one of the best new games for a long time. There are thrills enough in just getting to
grips with a game where hidden danger or success can be revealed with every new turn,
every surprise move, and every roll of the dice.

A Final Note

The first edition rules published by Gibsons were atrocious. Most of the ambiguities
were cleared up in the second edition, though there are still some anomalies.

A copy of the second edition rules can be obtained by sending an SAE to Gibsons.
Avalon Hill, who licensed the game from Gibsons for the American market, corrected all
the errors in their set of rules.

If you’re using the second edition rules you may find some eventualities which are
not covered, or which seem confusing. As with any game, these are not difficult to come
to agreement over after careful assessment of all applicable rules. There are some
suggestions in this article which may seem contrary to the rules, and the latter should
be always be taken as relevant to your games, until or unless you agree otherwise.
Unfortunately, the author cannot let well alone and will always tamper with things…

(This article was originally published in “Games International”, issue #5 and is reproduced here with the permission of Brian Walker, the former GI editor)

"Was lag auf den Tisch?"