Archiv der Kategorie: Spieleabende

JATI Game Designer Discovered!

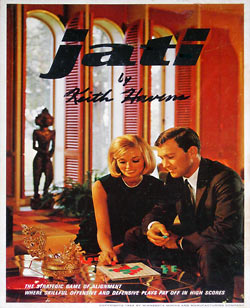
cover
designer Keith Havens
publisher 3M
released 1966
players 2-4
playing time 20 minutes
rating

JATI Game Designer Discovered!

by Aaron Haag

I am surprised to find in all the research I have done on the 3M Bookshelf Game JATI
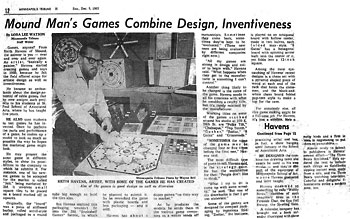
that no one credits the author/designer of the game. I have a Minneapolis Tribune newspaper article
published December 5, 1965 about the designer, Keith Havens of Mound, Minnesota.

Keith Havens
Keith Havens
1965

These are the first two sentences of an email I received from Sheri McNally on 6 April 2008.
Taking the fact that I had researched on the JATI in the internet when we published Moritz’
article on the game and couldn’t find any information on the author I first took this as a
belated April Fools Day joke.

Luckily, we have Günther in our gaming group, one of the experts on 3M games and I forwarded the
email to him asking for his opinion. His first reaction: “Looks like a joke but let’s
check.” So he got in touch with Sheri via email and Sheri was so kind to scan the newspaper
article and send it to him as a proof. She had found the newspaper clipping in the bottom of the
box of her JATI game that she had bought at a garage sale.

The article is a piece on Keith Havens, an artist and game designer, describing how he works on
game designs and his attempts to get them published. Asked what games are most difficult to sell
his answer was: strategy games, because people don’t like to think. Quite an interesting
statement and I wonder if that was just his personal opinion about what people liked to play or if
it was typical for the time…

JATI newspaper clip
click on above picture to download

an OCR’ed version of the newspaper article

Very little can be found in the internet about Keith Havens, in fact there is only one reference
about his style of painting in an article about an exhibition at
the James J. Hill
House
in St. Paul, Minnesota and a quote of him on the Dick Maw online gallery website. His work as a game designer is not referenced
at all.

The JATI game Sheri owns has “Keith Havens” printed on the label just under the name
of the game (and it looks like it is actually part of the label, not written on), and she is
wondering if there are any other copies of JATI out there with his name on the front label. This
might have been an original prototype label or perhaps a special label done for Keith Havens,
though none of the other 3M Bookshelf Games include the designer on the label. If somebody knows
more about this please give Sheri a feedback (sheri_mc (at) hotmail.com) or leave a comment here
using the feedback option below.

The news about the now discovered designer of JATI has already spread fast in the 3M game
collectors community and game collectors’ catalogues are being updated already with this piece
of information. Thanks again to Sheri for informing us and sending us the article.

Find out more about the Jati game on the pages of the pages of the
European Game Collectors Guild.

08.04.2008: Metropolys im Stone Age

“Lästern” kommt zweifellos von “Lust” und nicht von “Last”, das können wir am Westpark an jedem Spielabend bestätigen. Episoden aus dem richtigen Leben oder Ungereimtheiten innerhalb von Spielregeln sind allemal eine Portion erfrischenden Spotts wert, der wie beim Triumpfgeschrei der Wildgänse die Truppe in Lust und Laune zusammenschweißt. Schon vor 200 Jahren sagte ein Spötterfreund: “Jede Lobhudelei ist langweilig, jede Spötterei dagegen kurzweilig…”.
Wenn Walter in seinen nächtlichen Session-Reports unsere Spielstimmung wiedergeben will, dann möchte er unserer Lästerei natürlich einen erheblichen Stellenwert einräumen. Doch muß er dabei scharf aufpassen: was im Allerheiligsten unserer Spielhölle durchaus noch erlaubt ist, hat auf der öffentlichen Bühne einer Internetseite oft nichts zu suchen hat. Manchmal sticht ihn allerdings der Hafer und er galoppiert über die wohlberatenen Grenzen hinaus.
Wie urteilt darüber der Volksmund: “Wer lacht, zündet ein Feuer im Ofen an; wer spottet, zündet das Haus des Nachbarn an.” Glücklicherweise gibt es unter uns mindestens einen verantwortlichen Feuerwehrmann, der dann Alarm schlägt und aus Walters Bericht die schärfsten Pointen herauslöscht. Deutlich sichtbar in unserem letzten Session Report. Und er sah, daß es gut war. Heißt es doch schon beim Chronisten: “Treibe den Spötter hinaus, so gehen Zank und Hader weg, und es kehren ein eitel Freude und Wohlgefallen.”
1. “Stone Age”
Tummelhofer – ihr wißt schon, der von “Sankt Petersburg” – hat wieder zugeschlagen. Mit “Stone Age” geht er dieses Jahr wieder ins Rennen um den Deutschen Spielepreis, und die Vorkritiken sind alle sehr gut.
Günther wurde am Montag bei Hans-im-Glück vom Sohn des Autors persönlich in das Regelwerk eingeweiht und konnte es noch ganz brühwarm an uns weitergeben. Jeder Spieler verfügt über eine Reihe von Manschgerln, mit denen er seine Spielzüge ausführt. Wie bei “Agricola” kann man sie vermehren und muß regelmäßig für ihre Ernährung sorgen. Ihre Hauptaufgabe ist das Sammeln von Rohstoffen, die über Bauwerke und über Sonderkarten in Siegpunkte verwandelt werden. Die Erträge werden ausgewürfelt. Je mehr Manschgel man z.B. in den Wald schickt, mit desto mehr Würfeln darf man auswürfeln, wieviele Bäume gefällt werden. Legt man sich rechtzeitig Werkzeug zu, kann man am Würfelergebnis noch etwas drehen. Wer sich einen Kartoffelacker zulegt, braucht weniger Energie in die Ernährung zu investieren.
Es gibt eine ganze Menge ganz einfacher Dinge zu tun, viele haben einen kumulativen Effekt, aber alle sind sehr leicht überschaubar. Ein Spieler, der die Augen von 7 Würfeln zusammenzählen kann, kann vollwertig mitspielen, dazu braucht er gewiß keine 10 Jahre alt zu sein, wie es auf der Schachtel empfohlen ist.
Peter durchbrach unser traditionelles Ritual zum Bestimmen des Startspielers: er saß auf Moritz’ Platz, machte aber Walter zum Moritz und würfelte ihn mit einer Eins zum Startspieler.
Günther mußte uns (sitzplatzmäßig) den Aaron machen und reklamierte auch sofort dessen sprichwörtliches Würfel(un)glück für sich. Bei den ersten schlechten Würfen meinte er noch großmütig: “Ich würfele heute wie ein Weltmeister”. Als es später nicht besser wurde, hätte er gerne wieder seinen Stammplatz eingenommen. Doch beim genauen Hinschauen gab es fast nur Aarons am Tisch. Peter beschwerte sich, daß er mit 4 Würfeln keine einzige Sechs geworfen hatte. Dann griff er zum Taschenrechner und beruhigte sich mit dem Ergebnis, daß die Wahrscheinlichkeit für eine Sechs deutlich unter 50% liegt: 1-(5/6) hoch 4 = 0,42.
Bald ging uns das hölzerne Baumaterial aus. Nach Moritz’ (des anderen) Aussage darf man sich hier mit Ersatzmaterial behelfen. Im Zeitalter der Nichtraucher gibt es keine Streichhölzer mehr, die sehr gut gepaßt hätten. Als Aushilfe standen die Baugleise aus “Trans Europa” oder schöne gläserne Go-Steine zur Auswahl. Das kaiserliche Spiel hat gewonnen, auch wenn es in der Form unterlegen war. Es lag halt griffbereit im Regal.
Wie schon gesagt, reicht für eine normale Spielbeherrschung die erste Klasse Grundschule. Nur um gezielt miesnickelig zu spielen, braucht man etwas mehr mentale Reife. Loredana vermasselte Walter einen Zug, bei dem er das letzte Bauwerk eines Stapel gebaut und damit das Spiel als Sieger beendet hätte. Bösartig blockierte sie mit allen ihren Manschgerln das Goldbergwerk und Walter konnte sich das noch benötigte Gold nicht besorgen. Als Vergeltung hätte ihr Walter im Gegenzug ein Bauwerk vermasselt, das mit 7 mal Gold 42 Siegpunkte wert gewesen wäre, wenn das nicht bereits Günther für ihn getan hätte.
Wenn sich zwei streiten, freut sich der Dritte. Und der Vierte. In der Schlußwertung zogen Günther und Peter weit an Walter und Loredana vorbei. Hier werden nochmals nach unterschiedlichen Kriterien Sondernprämien ausgeschüttet. Allein durch konsequentes Sammeln von Zivilisationkarten (analog der Adeligen-Strategie in Sankt-Petersburg) kann man hier zusätzliche 64 Siegpunkte ergattern. Diese Karten sind der Knüller, zumindest solange die Konkurrenz das noch nicht weiß.
Das Spiel funktioniert, zeigt in Aufbau und Reife die Handschrift eines Meisters, war vom Anfang bis Ende recht kurzweilig, dauert für die einfachen sich wiederholenden Grundmechanismen aber vielleicht ein weniges zu lang: Publikum zwei Stunden lang, spielte ohne Bumerang.
WPG-Wertung: Günther: 7, Loredana: 6, Peter: 6, Walter: 7.
Walter schreibt eine Rezension.
2. “Metropolys”
Ein Stadtplan mit Stadtteilen, Häuserzeilen, Straßen und Flüssen. Jeder Spieler hat 13 Holzklötzchen (Häuser) mit den Werten 1 bis 13. Die Spieler setzen reihum ein Holzklötzchen auf das Spielbrett. Jedes Klötzchen muß benachbart zum Vorgänger sein und einen höheren Wert aufweisen. Wer das letzte (höchst-wertige) Klötzchen gesetzt hat, hat eine Zugfolge gewonnen. Er darf dieses letzte Klötzchen stehen lassen und die nächste Zufolge in einer beliebigen Häuserzeile starten. Alle anderen Klötzchen werden abgeräumt.
Die Werte, die den Spielern noch übrig bleiben, werden immer niedriger. Durch die auf dem Spielplan stehenbleibenden Klötzchen entstehen schnell Sackgassen, auf denen ein Spieler seine niedrig-wertigen Klötchen loswerden kann und immer noch am Zug bleibt.
Sobald ein Spieler alle seine Holzklötzchen verbaut hat, ist Schluß und die Belegung des Stadtplans wird bewertet.
Das Spiel zeigt neue, elegante Zugmechanismen, die Bebauung der Stadt öffnet überraschende topologische Winkelzüge. Es geht alles ganz flott über die Bühne und ist doch ein dankbares Feld für strategische Überlegungen.
WPG-Wertung: Günther: 8, Loredana: 8, Peter: 8, Walter: 8.
Das Spiel ist eine Rezension wert.
3. “Bluff”
Günther ging mit 3:1 Würfeln ins Endspiel gegen Walter. Für ihn gibt es hier nur eine wahre Vorgabe: 1 mal die Fünf. Walter hob auf 1 mal Stern. Das war eine Suggestiv-Antwort, aber was versucht man nicht alles, wenn man mit dem Rücken zur Wand steht.
Günther hob auf 3 mal die Vier. Was kann man daraus schließen? Hat er Walter den Stern geglaubt oder nicht?
Post Mortem ist es klar, daß Günther selber einen Stern und mindestens eine Vier haben sollte. Walter hätte mit dem Stern, den er tatsächlich unter seinem Becher hatte, auf 2 mal Stern heben müssen. Doch auch dafür hätte Günther noch einen Konter parat gehabt: Er hatte neben dem Stern nämlich gleich zwei Vierer; mit 4 mal die Vier hätte er den Sack zugemacht.
Er wurde allerdings schon im Prae-mortem angezweifelt und durfte seinen letzten Pfeil im Köcher behalten.
Keine neue WPG-Wertung für ein Super-Spiel.

Trans Europa

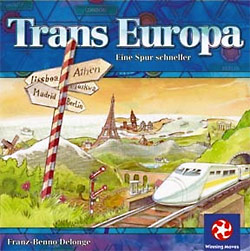
cover
Autor Franz-Benno Delonge
Verlag Winning Moves
erschienen 2005
Spielerzahl 2-6
Spieldauer 30 Minuten
Wertung red starred starred starred starred starred starred starred stargray stargray star

Trans Europa

rezensiert von Walter Sorger

Das Spielfeld zeigt die Landkarte von Europa mit Städten vom Atlantik bis zum Ural. Die Fläche
ist mit einem Netz aus regelmäßigen Dreiecken überzogen, die ein zukünftiges Eisenbahnnetz
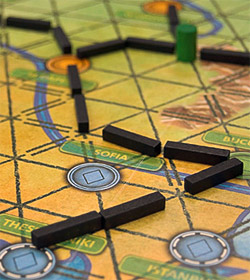
markieren. Auf die Dreckeckslinien legen die Spieler reihum schwarze, streichholzlange Gleisstücke
und erzeugen so ein immer weiter verzweigtes Schienennetz von einer Ecke Europas zur anderen.

Das Schienennetz gehört allen, unabhängig davon, wer welches Gleisstück gelegt hat. Ziel eines
jeden Spielers ist es, fünf Städte, die ihm zu Beginn des Spiels zufällig zugeteilt wurden, an das
gemeinsame Schienennetz anzuschließen. Sobald der erste Spieler das geschafft hat, endet eine
Runde. Die anderen Spieler bekommen Minuspunkte für jedes Streckenteil, das zur Komplettierung
ihrer vorgegebenen Städteverbindungen noch fehlt. Wer nach ein paar Runden die wenigsten
Minuspunkte auf seinem Konto hat, ist Sieger.

Jeder Spieler erhält eine eigene Auswahl von fünf Städten zugewiesen, die es zu verbinden gilt.
Natürlich hat die geographische Verteilung der Städte auf der Landkarte einen entscheidenden
Einfluss auf den Schwierigkeitsgrad der zu bewältigenden Aufgabe. Wer Glück hat, muss nur wenige
kurze Stichstrecken von der unvermeidlichen gemeinsamen Mitte aus bauen; wer Pech hat, muss ganz
alleine eine weit abgelegene Verbindung herstellen, während die Spieler im Zentrum ihre
Synergieeffekte ausnützen können.

Um den Zufall bei der Städteausteilung etwas einzuschränken, ist das Spielbrett in fünf
verschiedene Regionen geteilt, und jeder Spieler bekommt genau aus jeder Region eine Stadt
zugewiesen. So muss in seinem Lösungsnetz in jedem Fall eine Ost-West-Verbindung von der iberischen
Halbinsel bis nach Russland enthalten sein und ebenso eine Nord-Süd-Verbindung vom Mittelmeerraum
bis nach Skandinavien.

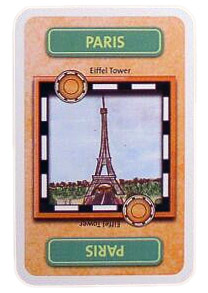
card

Zu Beginn wählt jeder Spieler einen Startpunkt aus, von dem aus er seinen Streckenbau beginnt.
Beim späteren Gleisanlegen darf er an beliebigen Stellen des Gesamtnetzes weiterbauen oder
abzweigen, sofern nur die gelegten Teile mit seinem Startpunkt durch einen ununterbrochenen
Schienenstrang verbunden sind.

Hier zeigen sich gleich die ersten strategischen Fragestellungen: Positioniere ich meinen
Startpunkt in ein einsames Randgebiet auf der Landkarte und baue von dort aus meine Strecke in
Richtung Zentrum oder fange ich irgendwo im Zentrum an, vereinige recht früh meinen Bauabschnitt
mit dem einiger Mitspieler, und kann dann in einem wesentlich größeren Gesamtnetz die günstigste
Abzweigung zu meinen verbleibenden Reststädten auswählen?

Im ersten Fall verrate ich vielleicht sofort meine Zielrichtung, und die Mitspieler werden sich
hüten, ihr Zugpotential unnötig in meiner Richtung zu verplempern. Dafür kann ich aber abseitige
Strecken, die ich vermutlich ohnehin alleine bauen muss, sofort in Angriff nehmen, und brauche mich
erst später um den kürzesten Anschluss an das in der Mitte entstehende Gesamtnetz kümmern.

Diese Problematik macht einen großen Teil des Spielreizes aus. Die benötigten groben
Verbindungslinien in Angriff zu nehmen, ohne dabei allzu sehr die Details der Linienplanung
preiszugeben, das ist eines der Geheimnisse für erfolgreiches Spielen. Ich will nicht behaupten,
dass ich hierzu schon tiefere Erkenntnisse geschürft habe, nur eine kleine Überlegung: Wenn ich als
letzte Stadt Madrid anschließen muss und ein Mitspieler Barcelona, dann bin ich ihm gegenüber im
Nachteil, denn beim Bauen zu meinem entfernten Endziel gewinnt zwangsläufig der Konkurrent mit
einem kurzen Abstecher nach Barcelona. Ähnliches gilt für Moskau gegenüber Stockholm und für
Istanbul gegenüber Sofia. Abseitige Randstädte muss ich also zuerst entwickeln, vorausgesetzt, dass
kein anderer hier in unmittelbarer Nachbarschaft zu tun hat.

Habe ich mich für den Start in einer Randlage entschieden, so sollte ich von dort aus einen Weg
in Richtung Mitte wählen, der von anderen Städten der Region möglichst weit wegbleibt. Damit sich
nach der unvermeidlichen Vereinigung von Bauabschnitten keiner meiner Konkurrenten ins gemachte
Bett legen kann. Sie sollen alle selber noch ein paar Gleise legen müssen, um ihre Hausaufgaben zu
erfüllen.

board

Die Spielregel gibt den Tipp: “Die Verbindung mit anderen Netzen sollte nicht zu früh
erfolgen.” Diesen Tipp kann ich aus Symmetrie-Erwägungen nicht nachvollziehen! Die Verbindung
mit anderen Netzen schafft ein für alle Beteiligte gleichberechtigtes Konstrukt. Dementsprechend
müssen alle Beteiligten den gleichen Profit oder den gleichen Verlust davon haben, nicht wahr?
(Ich bin gerne bereit, mich hier eines Besseren belehren zu lassen. Natürlich ist es eine
Selbstverständlichkeit, dass ich mit Vorrang diejenigen Strecken ausbaue, an denen ich mit hoher
Wahrscheinlichkeit ganz alleine interessiert bin und erst in zweiter Linie die Strecken, die früher
oder später auch von den Mitspielern gebaut werden müssen.)

Die “Spielbox” hat ihnen
Lesern zu “Trans Europa” eine simple aber pfiffige Erweiterung mit dem zutreffenden Namen
“Schikane” zukommen lassen. Jeder Spieler erhält zu Beginn drei Gleisteile in seiner
eigenen Farbe, die er irgendwann anstelle der schwarzen, gemeinsamen Gleise einsetzen kann. Die
farbigen Gleise dürfen nur vom jeweiligen Eigentümer genutzt werden, für die anderen Spieler gelten
sie als nicht gelegt. Damit wird ein neues breites Feld taktischer Raffinessen ins Spiel gebracht.
Mit meinen eigenen Gleisstücken kann ich jetzt problemlos die Verbindung mit anderen Bauabschnitten
herstellen, ohne den Gegnern die Gegenrichtung zu eröffnen. Überwiegend wird man die farbigen
Gleisteile im umkämpften Raum in der Mitte einsetzen, seltener in den Randgebieten.

Das Absperren der Mitspieler vom eigenen Bauabschnitt ist allerdings eine zweischneidige Sache.
Es könnte ja durchaus sein, dass ein Mitspieler von meinem Bauabschnitt aus nichtsahnend in einer
Richtung weiterbaut, die auch mir nutzt. Schon öfters hat ein Spieler sein gewolltes Abschotten
hinterher als Nachteil verbuchen müssen.

Doch all dieser Überlegungen zum Trotz ist “Trans Europa” kein Spiel zum lange Denken
und Rechnen. Für den jeweils nächsten Zug gibt es nur eine überschaubare Anzahl sinnvoller
Alternativen. Man darf auch rein mit Gefühl das nächste Gleisstück legen, ohne damit die Chancen
auf den Sieg zu verspielen.

Überhaupt ist das Legen von Gleisstücken schon von der Physiologie her ein angenehmer Vorgang.
Das feste Baumaterial, das man in seinen Händen drehen und bewegen kann, übt gewiss schon im
therapeutischen Sinn eine beruhigende Wirkung aus. Bei aller Spannung gegen Spielende –
“Verbindet mein Vorgänger schon seine letzte Stadt oder habe ich noch eine Runde Zeit?” –
ist jedes Spiel ist locker, kurzweilig, interaktiv und absolut spielerisch. Die kurze Spieldauer
einer Runde fordert zu einer sofortigen Revanche heraus. Ein neues Spiel, ein neues Glück! Und eine
neue Hoffnung auf eine bessere Städtezuteilung, auf einen geschickteren Startpunkt und auf
ahnungslos-kooperative Mitspieler.

“Trans Europa” ist ein perfektes Spiel. Für das Minimum an Spielregeln, die es zu
verstehen gibt, bietet es ein Maximum an intelligentem lockerem Spielspaß.

02.04.2008: Riesen-Bluff nach dem “Zeitalter der Entdeckungen”

“Vollbeschäftigung” ist ein Zauberwort aus alten Tagen, von dem heutige Wirtschaftspolitiker nur noch träumen können. Früher – zu meiner Zeit! – fand vom Aakademiker bis zum Zzuschneider jeder nach seiner Ausbildung unverzüglich eine Stelle. Heute ist das oft genug ein mehr als mühsames Glücksspiel!
Loredana hat jetzt ihr Mathematikstudium beendet, und zunächst mal stand das allgemeine große Fragezeichen über ihrer Zukunft: Kriegt sie einen Job? Am Können sollte es nicht liegen, am Charme auch nicht, aber vielleicht an dem Phänomen, das wir seit einer ganzen Generation nicht mehr haben: Vollbeschäftigung!
— der nächste Abschnitt wurde von unserem Zensor gestrichen —
Hallo, ihr dreieinhalbmillionen Arbeitslose auf Deutschlands Straßen: Spielt mehr Brettspiele, und ihr kriegt im Nu alle einen Job!
1. “Zeitalter der Entdeckungen”
Walter brütet schon über seiner Rezension zum “Zeitalter der Entdeckungen”, aber er traute sich nicht, vor den kritischen Zuhörern die Regeln vorzutragen. Diese Rolle durfte Aaron übernehmen. In konstruktiver Atmosphäre kämpften wir uns durch die Schiffskarten, die Handelsaufträge, die Entdeckungsreisen und die Sonderaufträge. Ein Sonderauftrag lautet, man muß “die einfache Mehrheit erringen, also mehr Schiffe als alle anderen zusammen”. Peter bemerkte hier: “Wir Politiker nennen das die absolute Mehrheit.” Wo er recht hat, hat er Recht!
Die Schlußwertung ist ziemlich undurchsichtig. Die Zusatzpunkte aus den Sonderaufträgen werden nach einer Tabelle in einen Faktor umgerechnet, mit dem die Anzahl der Entdeckungsreisen multipliziert wird. Oder ist es umgekehrt. Zumindest konnte Peter konstatieren: “Die haben das deshalb so gelöst, damit keiner die Schlußwertung überblicken kann, und somit keine Kingmaker-Effekte auftreten können!” War das etwa eine verschleierte Kritik?
Aaron würfelte mit unserem Arpad den Moritz aus! Diesen Satz verstehen nur Insider. Doch die Lösung verstehen nicht mal diese alle, sondern nur die Anwesenden. Jedenfalls wurde Walter Startspieler und machte sich sofort ans Geldverdienen. Er erinnerte sich noch gut an seine Fehlinvestitionen aus der ersten Begegnung mit dem Spiel.
Loredana fragte: “Lohnt es ich, Schiffe von möglichst allen Farben zu sammeln?” Peter hielt ihr vor, bei der Erklärung der Spielregeln nicht aufgepaßt zu haben, doch sie konterte: “Du kapierst gar nichts, und dann machst Du Dich noch lustig über alle!” Hier komme ich leicht ins Zweifeln, ob meine Notizen stimmen, aber so ähnlich sollte es gewesen sein.
Das Spiel lief etwas an Peter vorbei. Für sein taktisches Genie eine absolut ungewohnte Tatsache. Mühsam mußte er mehrfach die zwei Aktionsgulden in seinen Sparstrumpf legen und auf die zweite Aktion gänzlich verzichten. Als letzter erfüllte er seinen ersten Handelsauftrag. Hallo Peter, hast Du Dir etwas dabei gedacht?
Tropfen auf Tropfen fing er den Unmut in seinem Gemütskelch auf, bis der überlief. “Falangisch” nannte er das Spiel. Bevor Walter bei Wikipedia nachschauen konnte, was das heißt, erläuterte Peter, das heißt “Spielmechanik nicht bis ins Letzte verfeinert”. Aaron fügte erklärend hinzu: “Phalanx heißt der Spielverlag”. Dann wird “falangisch” wohl die falsche Schreibweise sein. Doch gewiß leitet sich die spanische “Movimiento Nacional” von der altgriechische Kampfformation ab!
Unmittelbar vor dem Einläuten des Spielendes konnte Loredana mit zwei Handelschiffen 24 Gulden einstreichen. Dann zog sie die Karte für die Schlußwertung, legte ihr ganzes Geld in Schiffen an und belegte damit fast alle noch freien Plätze auf den Entdeckungsreisen. Der Sieg war ihr nicht mehr zu nehmen. Auf die Frage, warum Loredana gewonnen hat, gab Peter die sarkastische Antwort: “Weil sie die Spielregeln nicht verstanden hat!”
Als Alternative zu Peters Räsonieren wollen wir Aaron zu Wort kommen lassen: “Das Spiel funktioniert, aber mit dem Stinkstiefel (P.) kann man es nicht spielen.” Walter fügte – an seine Rezension denkend – noch beschwichtigend hinzu: “Das Spiel ist doch ein netter Zeitvertreib”.
Die bisherige gute WPG-Wertung von 4 mal die 7 wurde total versaut: Peter vergab 4 Punkte und Loredana zunächst 6 – weil das Spiel zweifellos funktioniert. Doch als ihr Peter klarmachte, warum sie gewonnen hatte, reduzierte sie ihre Note um einen Punkt.
Walter brütet immer noch über seiner Rezension.
2. “Bluff”
— auch hier hat unser Zensor eingegriffen und einen Teil weggeschnitten —
Im ersten Spiel hatte sich Aaron nach drei Runden selber herausgeblufft, Walter konnte sich in einem harten 4:4 Endkampf gegen Loredana durchsetzen.
Im zweiten Spiel war Walter als erster draußen, gefolgt von Loredana. Aaron entschied das Endspiel gegen Peter für sich. Ihm blieben alle 5 Würfel auf der Hand. Die Einlauf-Reihenfolge war genau umgekehrt zum ersten Spiel! Also ist “Bluff” schlußendlich doch nur/auch ein Glücksspiel!
Im dritten Spiel mußte Aaron gegen Walter und Loredana auf drei Sterne heben und dann mit einem einzigen Würfel einen Stern nachwürfeln! Es gelang ihm und mit der daraus resultierenden Euphorie konnte er auch das Endspiel für sich entscheiden.
Im vierten Spiel war er wieder als erster draußen. Peter konnte 10 Einser sehen und hob Walters Durchschnitts-Vorgabe sehr gefühlvoll auf 6 mal die Eins. Als er wieder dran war, stand der Pegel bei 9 mal die Eins. Natürlich konnte er noch auf gefahrlos auf 10 heben. Er wurde angezweifelt, doch weil Loredana auch noch eine Eins unter dem Becher hatte, war sein Gewinn (d.h. der Verlust der Konkurrenten) nur minimal. Mit dieser Enttäuschung konnte er im Endspiel nicht bestehen.
Dafür konnte er das fünfte Spiel für sich entscheiden. Er verließ die heute sehr oft erfolgreich praktizierte Immer-4-Strategie und fing im 1:1 Endspiel gegen Aaron mit 1 mal die Fünf an. Mit einer Fünf unter dem Becher sollte das wohl auch eine gute Wahl sein! Hallo Günther, bitte keine falschen Schlüsse daraus ziehen!
Im sechsten Spiel schied Peter als erster aus. Wer gewonnen hat, habe ich vergessen.
Im siebten Spiel fing Aaron mit einem Würfel gegen 5 Würfel in Summe bei Loredana und Walter mit der Immer-4-Strategie an. Loredana zweifelte eiskalt an. Das war sein Ende. Loredana konnte anschließend auch das Endspiel gegen Walter für sich entscheiden.
Und es gab noch ein achtes Spiel.
Keine neue WPG-Wertung für ein Super-Spiel.
3. “Restroom”
Nein, das ist kein Spiel, sondern nur eine von den vielen Flieger-Anekdoten, mit denen Peter heute aufwartete:
In der alten Version der Boeing 747 gab es noch keinen Schlafraum für das Kabinenpersonal. Eine ältere Dame wendet sich an die junge, mit dem amerikanischen Englisch noch nicht vertraute Flugbegleiterin: “Where is the restroom”! Antwort “This aircraft has no restroom!”
Nachdem die Passagierin aber doch beharrlich auf eine Lösung ihrer dringlichen Problematik drängte, klärte die Flugbegleiterin sie auf, wie das Personal damit umgeht: “Wir setzen uns auf einen normalen Sitz, legen eine Decke über uns und entspannen uns dann …”. – Erst jetzt soll der Purser eingegriffen haben.

01.04.2008: Nostalgie am Westpark

Um seiner dahinsiechenden Rubrik “Juwel des Monats” neue Impulse zu verleihen, hatte Moritz am Dienstag zu einem zusätzlichen Spielabend in den Herkulessaal der Maxvorstadt eingeladen. Ausnahmsweise gab es diesmal keinerlei Teilnahmebeschränkungen. Jeder durfte mitmachen und war zudem aufgefordert, “the one game”, sein Leib- und Magenspiel aus Kindheit und Jugend vorzustellen.
Moritz fing den Abend sogleich mit “Schwerter statt Pflugscharen” an, einem taktischen Hieb- und Stichspiel aus dem Bellum-Verlag, mit dem schon zu Sions Zeiten sich die Völker die Köpfe eingeschlagen haben. Aber Moritz wäre nicht Moritz, wenn er nicht noch einen zweiten Pfeil im Köcher gehabt hätte. Die “Venus von Milo” ist ein traditionelles Gesellschaftsspiel, dessen Hauptreiz darin besteht, durch eine gelungene Kombination von fest vorgegebenen Regeln mit frei erfundenem Beiwerk ein Maximum an Lustgewinn zu erzielen.
Andrea’s Augen glänzten, als sie ihren Favoriten “Before the Pampers” auf den Tisch legen durfte. In dem spannenden Zwei-Personenspiel muß einer die Gedanken des anderen erraten, um mit ihm im Endspiel das zu machen, was der andere ohnehin schon immer gewollt hatte.
Hans trat mit “Schlaraffenland” an, einem von McDonalds gesponsorten Partyspiel, bei dem es darum geht, in möglichst kurzer Zeit möglichst viele Chicken and Wings zu vernichten. Früher hatte er im Freundeskreis Tag und Nacht damit verbringen können. Heute sind seine Mitspieler meist schon nach der Haribo Vorspeise abgeschlafft.
Günther schwelgte in Erinnerungen an “Zeppelin“, einem Reisespiel aus dem Ravenshafener Aero Verlag. Was waren das doch für herrliche Zeiten – lange vor 1830 -, als man noch unabhängig von den engstirnigen schwarzen Linien auf gelben Hexagons, unbehindert von gegnerischen Tokens, quer durch den Äther seine Reise von Baltimore nach Ohio antreten durfte!
Loredana brachte eine alte Schuhschachtel mit, in der sie die Reste vom “Haus des Volkes” aufbewahrte, einem Wirtschafts- und Aufbauspiel aus dem längst vergessenen Conducator-Verlag. Dieses Spiel hatte einst in ihrer Heimat sogar zum Pflichtunterricht gehört; jeden Morgen wurde damit die euphorische Weichenstellung für eine unerreichbare Zukunft gelegt.
Peter träumt immer noch von “Weiß-blaue Bananenrepublik“, einer Realutopie des präpotenten Selbstverlages “Tiger-und-Trapez” aus Wildpark-Kreuz. Hier spielen die Ananaszüchter aus Alaska gegen die Globalplayer aus Wittelsbach um die Weltherrschaft in der Lazarettstraße. Schon früh hatte er sich hier regelmäßig die begehrte Rolle des Megaphonogogen unter den Nagel reißen können. Unerwarteterweise hat sich die Erde inzwischen schon so viele Male weitergedreht, daß schon allein mit der Lokaltopologie heute keiner mehr zurechtkommt.
Walter hatte in seiner Mördergrube noch ein gut erhaltenes “Mit Gift und Galle” entdecken können. In seiner Jungzellenzeit hatte er sich mit gleichgesinnten Freunden nächtelang daran aufgeilen können. Auch heute noch versucht er zuweilen, ein paar Prinzipien dieses Spiels in den Abenden am Westpark zur Geltung zu bringen, doch nimmt ihn damit keiner mehr ernst.
Aaron packte sein “Robin Hood und die 40 Räuber” aus. Mit diesem vorzüglichen Feld-Wald-und-Wiesen-Spiel hatte er vor ca. 50 Jahren die Westpark-Gamers begründet. Das Spiel enthält ungezählte individuell geformte Zinnfiguren, die in der Originalausstattung leider alle unbemalt sind. Schon vor Jahren hatte Aaron begonnen, die Hauptfiguren eigenhändig zu bemalen. Jetzt hoffte er, das Werk mit den vereinten Kräften der Teilnehmer aus dem Herkulessaal vollenden zu können.
Er hatte sich nicht getäuscht. Wir steckten mental alle noch ganz tief in unserer gerade erst bewunderten Ostereierkunst und vertauschten mit Feuereifer die Würfel gegen den Pinsel. In Fließbandtechnik machten wir uns über Sherwood-Ali, Maid Marian und Tricky-Morgane her, und als das kreisende Rad der Sonne den Rappen der Nacht mit goldenem Huf beschlagen hatte, waren wir alle genauso blau wie die englischen Araber von Nottingham.

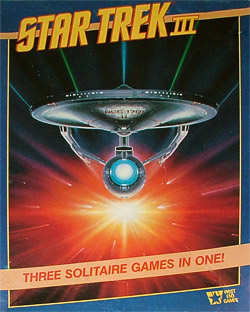
Star Trek III

Transcript of our podcast from 29 Mar 2008

 subscribe with iTunes

Pod Icon play now

Star Trek
III

by Moritz Eggert

cover
designer Greg Costikyan
Doug Kaufmann
John M. Ford
publisher West End Games
released 1985
players 1
playing time 60 Minuten
rating none

Hi, my friends – this time I’m going to explore the Science Fiction side of wargaming again,
with a little known game by West End Games…or should I say 3 games?

I’m talking about Star Trek III, a collection of 3 solitaire games that was published in
1985, when “Star Trek III: The Search for Spock” came out in the cinemas.

This was a good time for Star Trek fandom and probably also the height of Star Trek related
boardgames. West End Games, which doesn’t exist anymore but which was in the upper league of
boardgame and roleplaying publishers at the time, had just acquired the license and published quite
a lot of Star Trek related games in these years, among them a role playing game, a paragraph-based
adventure game, a family game, and this little gem, which you can just still get for reasonable
prices on eBay.

For some reason the high concept was apparently: it’s called Star Trek III, so let’s
have three games. And Spock was left alone in the coffin on that planet, so let’s just imagine
these would have been games he could have played by himself.

Ok, I was making up the latter, but solitaire games they are. The authors involved were Greg
Costikyan, John M. Ford and Douglas Kaufman. Greg Costikyan was probably the author most
experienced in both solitaire games and wargames by that point – he had worked for SPI as a
youngster and then moved on to bigger projects, many of them wargamish. He would later design
“Dark Emperor” for Avalon Hill, a game about which I might talk at some later point.

John M. Ford was a noted SF author and had also – together with Costikyan – heavily contributed
to the very successful roleplaying game “Paranoia”. Doug Kaufman had only designed one
boardgame so far, which was “Web and Starship”, a today little known space combat
game.

I won’t go on at length about two of the games of that collection – they are neither
wargames nor are they good games at all (which is not necessarily connected).

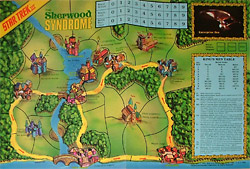
The first is called “The Sherwood Syndrome” and has Captain Kirk help out an oppressed
medieval planet as some kind of Robin Hood with his merry men in red shirts about to be killed.
This is some kind of paragraph driven/boardgame hybrid by Greg Costikyan that simply does not work
and feels like a hack job. Once you get the hang of it, the game is ridiculously easy to beat. The
game is only notable for giving Lieutenant Uhura a higher money extortion rating than both Sulu and
Chekov, which probably means she is some mean piece of…ok, this is a family friendly article, I
guess.

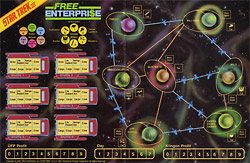
The second game is the endlessly boring “Free Enterprise”, designed by John M. Ford
and again Costikyan, which has you move some shuttles around a tiny planet system, hoping that the
wares you try to sell are in fashion on this and that planet, which is – as you would expect in a
bad game – decided in a totally random fashion. So nothing to write home about, forget these 2
games.

But the reason I actually talk about Star Trek III is its main game, The “Kobayashi
Maru”, designed by Doug Kaufman, which is an absolute gem of a game and one of the best
solitaire wargames ever designed, period. Only for this game you should scrounge eBay for a copy,
believe me, it is worth it.

“The Kobayashi Maru” is the name of the famous supposedly unbeatable Starfleet Academy
simulation for aspiring fleet officers. It was only beaten by one person in the history of the
academy, and that is Captain James Tiberius Kirk. And he cheated because he hacked into the
computer.

This training simulation features at the beginning of the best ever Star Trek film, “The
Wrath of Khan”, and it would probably have been better to release this game alone under the
name of the second film, as it would have had a much bigger audience.

In this game which accurately tries to portray the simulation from the film you try to lead a
rescue mission in a Klingon neutral sector of space. You will be confronted with the hard task of
surviving this test with your wits and combat ability alone. You are outnumbered and badly armed
compared to the Klingons which were probably pretty angry at the time because they suddenly grew
strange ridges on their foreheads.

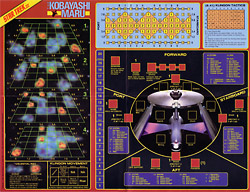
The Neutral sector is depicted as a 3-dimensional map board in three layers, so you can move up,
forward and down. At the beginning of the game some unknown counters called readings are placed on
the map and the Enterprise somewhere randomly. During the game you try to explore the sector and
complete your rescue mission without getting into fights with Klingons, which is of course pretty
impossible.

The readings, which are blips on your space radar, move around in a randomized fashion on the
main board, once they hit your space they are revealed as what they are, and this is where the fun
begins.

The biggest part of the board is a large scale depiction of the Enterprise fully crewed with our
heroes, each at their usual position. So you will find Sulu at the helm, Uhura at the
communications desk and Spock at the computer. You even have some kind of view screen – this is
where the enemy ships appear and move around in a fashion that is determined by a complex Klingon
tactics chart.

Once combat begins it becomes very similar to the also excellent solitaire game
“Patton’s Best”, which depicts tank warfare in the Second World War. You try to bring
your weapons to bear against an opponent which constantly changes tactics and moves around pretty
intelligently. The enemy will fire at your ship as well – if you turn to the right all enemies on
the screen will move to the left, and vice versa. You will always have to judge where the opponent
most possibly moves and stake your odds while using the best possible weapons. At the same time the
Enterprise’s shields get more and more damaged, and you should try to avoid showing the weak
side to your enemy.

All in all, this works pretty ingeniously – there are some tables and not too complex mechanics,
but they never distract you from actually feeling yourself right in the command chair of the
Enterprise. Later computer games have successfully attempted to convey this feeling, but it was
never realized as intelligently and elegantly in a boardgame as here.

Once you have your first engagement behind you, you will start to pray not being caught by a
Klingon patrol again, but of course it will happen, and like a submarine in World War II you will
be confronted with mines and torpedoes and other evil gadgets of the Klingons, as well as space
clouds and asteroids.

There are several levels of play which range from fairly easy to absolutely impossible – the
latter is the closest to the film Kobayashi Maru test, and it can only be beaten if you fudge your
dice. The game doesn’t take that long and can be played again and again.

All in all this really is a great game, and if you have any interest in the subject you should
give yourself a treat and buy it, it really is a wargamer’s science fiction game.

I hope I have wetted your appetite, see you next time when Scott talks Jason into a 24-hour
marathon session of Advanced Squad Leader… without reading the rules first… .

26.03.2008: Fünf oder Sechs Städte in Trans-Europa

Wir spielen mit Eifer soviele verschiedene Spiele, daß wir gar nicht dazukommen, unsere Lieblingsspiele immer wieder auf den Tisch zu bringen. Was waren das doch für schöne Zeiten, als wir noch Woche für Woche das gleiche “1830” gespielt haben. Oder – noch früher – Monopoly, Risiko, oder gar “Mensch-ärgere-Dich nicht”.
Doch wir wollen den vergangenen Zeiten nicht nachtrauern. In “Bluff” haben wir heute noch alle gemeinsam ein konstantes Element, und in privaten Non-Westpark-Gamers-Zirkeln kann jeder auch noch seinem Lieblingsspiel frönen. Für den einen ist es “Age of Empire”, für den anderen Bridge.
Und was ist es für den Dritten?
1. “Sechsstädtebund”
Endlich durfte auch Günther dieses für ihn als einzigem noch unbekannte Spiel kennenlernen. Hans frohlockte: “Da haben wir endlich eine Chance!”
Schnell hatte Aaron die Regeln erklärt und sogleich erkundigte sich Günther: “Gibt es auch eine Kutschenverlängerung”? Er dachte wohl an die “Schwanzverlängerung” von “Evo”, doch im Sechsstädtebund geht es recht bürgerlich zu. Die Spieler kämpfen untereinander um die lukrativsten Städte mit dem besten Warenangebot, den schnellsten Pferden und den meisten Knappen als Hilfstruppen. Mit den Waren kann man am Zielort brave, solide Punkte machen, mit den schnellen Pferden kann man die Waren der Konkurrenten zum eigenen Vorteil ausnutzen und mit den Knappen kann man sich im Kampf um die besten Plätze besser durchsetzen. Jeder entscheidet frei, auf welcher Schiene er fahren will. Alles zusammen bekommt man nicht unter einen Hut, die richtige Prioritätensetzung entscheidet über den Sieg.
Günther grübelte bei seinen Zügen recht lange darüber, was er wählen sollte. Er litt unter der Nicht-Beherrschbarkeit der vielen unbekannten Einflußgrößen, und tat das auch lautstark kund. Dann entschied er sich für das bewährte Prinzip aus hundertausend Jahren Menschheitsgeschichte: “Der erste hat immer den größten biologischen Vorteil!”.
Erst spät entdeckten alle ihre Knappenliebe, nachdem Walter ihr schon von der ersten Runde an gehuldigt hatte. Doch die Lustknaben müssen sinnvoll eingesetzt werden, in der letzten Runde sind spielen sie nur noch eine lendenlahme Rolle als Tiebreaker. Wenn überhaupt.
Die Wartezeit auf die Züge der anderen kann erheblich sein, doch normalerweise werden die Entscheidungen der Mitspieler immer mit Spannung verfolgt. Bei uns wird dieses Element natürlich weit übertrieben. In der letzten Runde mußte Walter geschlagene 30 Minuten warten, ehe die vier Vorspieler den Verdrängungswettbewerb um die Städte ausgefochten hatten. Am Ende waren die Städte dreimal für zwölf, und einmal für neun Knappen ersteigert worden. Walter konnte da nicht mehr mithalten und mußte sich für Null Knappen mit der schäbigsten Stadt begnügen.
Moritz hatte auf die Ständekarten gesetzt und war damit von Runde zu Runde weit zurückgefallen. Doch in der Schlußabrechnung durfte er sich mit seinen Ständemehrheiten noch dreimal neun Prämienpunkte hinzuzählen und kam auf den zweiten Platz. Günther hatte mit seiner Schnelle-Pferde-Strategie von Anfang an in Führung gelegen und konnte den Vorsprung bis ins Ziel retten. Hans hatte zu früh frohlockt.
WPG-Wertung: Günther blieb mit seinen 7 Punkten genau im Durchschnitt der Westparkgamers. Er hätte noch mehr Punkte vergeben, wenn ihm das Spiel nicht so viel Gelegenheit zum Grübeln gegeben hätte.
Aaron hat schon zwei Rezensionen geschrieben.
2. “Trans Europa”
Jeder bekommt fünf zufällige Städte aus einer Landkarte von Europa zugeteilt und muß sie durch eine Eisenbahnlinie verbinden. Das entstehende Schienennetz gehört allen gemeinsam. Wer als erster seine Städte verbunden hat, ist Sieger.
Mit dem hübschen Spiel zum Denken und Spielen kann man seinen Enkelkindern auch noch die Geographie Europas näherbringen. In der europäischen Variante gegenüber der amerikanischen fand Moritz zusätzlich den Vorteil, daß man die Städte leichter findet. Bei Moskau oder Madrid weiß doch ein jeder, in welcher Ecke er sie zu suchen hat. Bei Dallas oder Dulluth gilt das nicht gleichermaßen.
Keine neue WPG-Wertung.
Walter schreibt eine Rezension.
3. “Bluff”
Aaron erwies sich als Goliath. In nur zwei Runden hatte er Moritz aus dem Rennen geworfen und Hans war in die gefährdete Vordermann-Position gerückt. Doch mit einem Anzweifeln bei Pari-Stand büßte er seinen Angstgegner-Nimbus ein und Hans konnte wieder “normal” aufspielen.
Walter gelangte mit 4:1 Würfeln in ein Katz- und Maus-Endspiel gegen Günther. Jetzt hatte er noch dazu einen Bombenwurf mit zweimal Stern und zweimal Eins unter seinem Becher. Für ihn war es eine Selbstverständlichkeit, mit einer Einmal-die-Vier-Vorgabe ins Rennen zu gehen.
Günther wollte mit Zweimal-die-Fünf die Katze beim Schwanz packen. Doch damit hatte er alles über sich verraten. Er hatte ganz sicher keinen Stern und auch keine Eins geworfen! Warum? – Mit einem Stern hätte er aus der Position der Stärke und mit einer Eins aus der Position der Schwäche heraus langsamer gehoben? Diese Spiel-Psychologie ist doch schlüssig, oder?!
Walter konnte mit Viermal-die-Eins den Sack zumachen.
Keine neue WPG-Wertung für ein Super-Spiel.

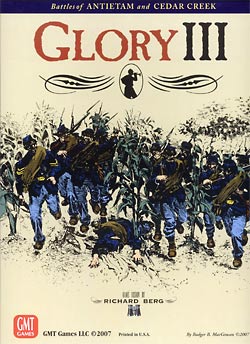
Session Report for Glory III – Antietam

cover
Autor Richard H. Berg
Verlag GMT Games
erschienen 2007
Spielerzahl 1-2
Spieldauer 240 Minuten
Wertung none

Session Report for Glory III – Antietam

The Full Battle Scenario

by Moritz Eggert

As there are no detailed session reports for this interesting “little” game, I’ve
decided to do a detailed write-up of a full (solitaire) play-through of the long Antietam
scenario.

I will use the historical McClellan rules and the “Story Board Replay”, but not the
additional IX Corps hinderment (seems too harsh to me). This should give both sides a shot at
victory.

The Antietam battle poses an interesting problem for both sides. The Union army has masses of
units but can barely deploy them in an aggressive way because of the limitations of AM activation.
The Confederate Army is well organized and can react quickly, but lacks the force of reacting to
the Union push if it ever happens in full force.

This is a turn-by-turn description with some pictures.

0545

The Union selects Hooker as their first AM, along with 2 artillery AM.2 Hooker chits are placed
in the cup (note: the Confederates always put 2 Jackson, 2 Stuart cavalry and 2 Longstreet chits
into the cup, so I will only mention that here).

Union strategy: Well, it’s pretty obvious that the game system forces them to use the
big push against the well defended northern front of the Rebels, while the rest of the army sits
idly across the Antietam Creek and twiddles thumbs. I plan to hit as a hard as I can, hitting the
weakly defended hill at hex 1917 as my first target. I will try to swing around the enemy line
there and then hit hard in the middle, while Williams rushes up to reinforce the Union line.

Confederate Strategy: Of course rushing to protect the bridges and fords is first
priority here. I will also try to bring the not unformidable but mostly short-firing Rebel
artillery into good positions to shoot at the Union should they try to cross. Of course I know that
is not going to happen any soon. Defending the north will be touch-and-go, it is obvious that I
have to react to the successes of the Union and keep a stable front.
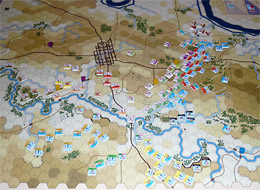
Beginning of the scenario seen from the Union side

What happened:

Drawing the 2 Hooker chits practically after each other enabled the Union to close the gap to
the Northern front quickly, which will make it more difficult for the Rebels as full battle contact
was established early on. JA Walker Brigade (Lawton) was the first casualty. The attack on the weak
Confederate left flank defended by the cavalry units was successful, but the Confederates decided
to withdraw instead of counterattacking, so no breakthrough was achieved. The Rebels decided to
launch a counterattack under DH Hill – not with any real intent to exploit but to make it more
difficult for the Union.

Some artillery was fired, but with little effect. The Rebels manage to blockade all bridges and
fords, as was to be expected. Both sides manage to bring artillery to advantageous high positions
with hopes of more effective combined fire. The single Munford Brigade (Stuart) rushes along
Harper’s Ferry Road to join its comrades under attack in the north.

Casualties:

Confederates: JA Walker (Lawton) Infantry

0630

The Union wins initiative and selects 2 Hooker and 1 Mansfield AM +2 artillery AM

Union strategy: We will try to again utilize the full force of Hooker’s men with the
hope of breaking through the Confederate lines somehow. Mansfield will come closer to the action
with his XII corps. Not very imaginative, but it might just work.

Confederate strategy: Something has to be done about the endangered Stuart’s cavalry
to my left flank, which will force me to shift my forces a little to the left. I’ve brought my
artillery in position now, so I will give the Union some explosive action. Also defending the 3007
bridge with just independent Evans (a “1” strength unit) was perhaps a bad idea, so I
will reinforce that.
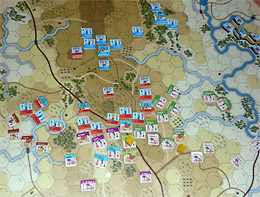
the first attack by the Union

What happened:

The dice were hot for the Confederate artillery, which really spelled doom for the Union
offense, which is basically forced to a halt. No major objectives were reached b the Union this
turn, instead they lost 2 artillery and 2 infantry brigades. Also the hopes of overrunning
Stuart’s cavalry have been trashed; instead disaster is looming at the Union’s right flank
offensive!

This is going to be more difficult than originally thought for the Union, especially with all
the Confederate reinforcements rushing up to strengthen their buddies’ lines. The Rebels have
had no losses to speak about this turn, so they’re fine and dandy.

Casualties:

Union: 2 I brigades, 1 I artillery, 1 IX artillery

Confederates: 1 Stuart cavalry

Recovered: JA Walker Infantry (Confederate)

0715

The Confederates win initiative and select Stuarts Cavalry AM The Union gains no new AM’s
The Union selects 1 Mansfield and 2 Pleasanton AM (+2 Hays artillery)

Union strategy: Something has to be done -there will be no advance with I brigade this
turn, so we have to bring in new units. The Confederates right flank is weakly defended, so I hope
to be able to strike quickly and gain ground with 2 Pleasanton AM’s, if I’m lucky I might
also be able to take out one of those pesky artilleries, helped by the proximity of Mansfield’s
units.

Confederate strategy: Of course the opportunity to get another of Hooker’s infantry
brigades is there, so I will of course choose Stuart as my first man of action. Apart of that I
will do what I did best last turn – harass the Union lines with my new found artillery advantage
and bring up those reinforcements where they’re needed.

What happened:

Another ineffective turn for the Union. The killer bombardment of the Rebels continues, leaving
the Union in doubt about the effectiveness of their artillery advantage. Even though Pleasanton
could exploit his attack twice in a row the result was basically nil, as Mansfield could only move
after the Confederate units had retreated orderly to no effect. Stuart’s cavalry attack was a
disaster for the Rebels, though, and left most of his units disordered. If Mansfield moves first
next turn this could be disastrous.

Casualties:

Union: 2 I brigades permanently killed, 1 I artillery and 1 I brigade withdrawn

Confederates: 1 Stuart cavalry permanently killed, 1 Jackson brigade withdrawn

Recovered: 1 IX artillery, 1 I artillery (Union)

0800

The Union doesn’t gain a new AM.

The Confederates win initiative and select Stuart as their first AM again (trying to bring those
cavalry into safety before Mansfield strikes).

Seeing this, the Union decides to bring yet another corps into play, putting the Sumner AM
together with Mansfield and Pleasanton cavalry AM into the cup.

Union strategy: Even though I have little hope of capturing the bridge at 3007 I might at
least bring some more artillery up to the front and prevent those Confederate reinforcements from
going where they might possible hurt. Apart of that I’ll have to play it by ear – there is no
real good opportunity to strike on the map except one single exposed brigade at the
Confederates’ left flank.

Confederate strategy: The last turn went relatively well, with those new reinforcements I
might even try some kind of counterattack, although I will certainly not try to cross the Antietam
river!
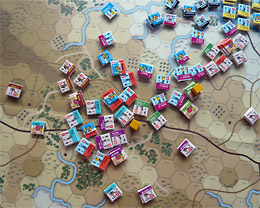
The Union lines disintegrate during the attack

What happened:

And here we go with yet another glorious turn for the rebels. The Confederate artillery again
creates many casualties in the Union lines. Sumner’s attack on the 3007 bridge failed (of
course) and the AM might have better been used elsewhere. No advances where made anywhere for the
Union, which is desperately in need of some luck (or some more AM’s).

Casualties:

Union: 1 I and 1 XII brigade withdrawn, 1 brigade permanently killed.

Confederates: 1 Jackson brigade and 1 Stuart cavalry withdrawn.

Recovered: 1 I artillery (Union), 1 Jackson brigade (Confederates).

0845

The Union doesn’t gain a new AM.

The Union wins initiative and selects Pleasanton’s cavalry as an action marker (some damage
can be done there, as DH Hill’s brigades have advanced far. Into the cup come Franklin and
Mansfield along with the Hays artillery.

Union strategy: Franklin seems a must, his artillery is desperately needed. I will move
him along the Antietam river to at least threaten the fords. My only hope is to build up a unified
front and just keep on attacking at low odds. At some point I just have to break through!

Confederate Strategy: I have probably advanced too far with DH Hill’s men, which
might cost me a unit or so. But I don’t feel in danger anywhere on the map, really, and so far
the recovery dice have been kind to me, so there are no losses to speak of.

What happened:

I’d love to report Union successes, but apart of bringing VI corps up to the fray nothing
spectacular happened except some botched attacks leaving many exposed disrupted units to be picked
off by Confederate artillery. The confederate lines hold like a stone wall.

Casualties:

Union: 1 I brigade, 1 XII brigade, 1 IX artillery withdrawn, 1 XII brigade permanently
killed.

Confederates: 1 Jackson brigade withdrawn.

Recovered: 1 Jackson brigade and 1 Stuart cavalry (Confederate).

0930

The Union doesn’t gain a new AM.

The Confederates get the initiative and selects Jackson as starting AM.

The Union selects Franklin, Burnside and Porter.

Union strategy: The Northern offensive pretty much has last all it’s steam. My only
hope is now to bring my fresh reinforcements to where they hurt the rebels the most. Perhaps I get
lucky, but my hopes are down.

Confederate strategy: I still feel very much in control – I will try attack the many
disrupted units at the Northern front and do as much damage as possible.

What happened:

The Union are in dire straits now – their right flank has all but disintegrated by fierce
attacks from Stuart’s cavalry and the possibility of a huge Confederate offensive is actually
there. Most of the turn was spent slowly moving Union troops south along the river and they’re
not even close to the enemy yet. The Confederate artillery is a killer in this game!

Casualties:

Union: 4 Mansfield infantry brigades, 2 Pleasanton cavalry, 1 Mansfield brigade permanently
killed.

Confederates: 1 Jackson brigade.

Recovered: 1 Jackson Brigade (Confederates) 1 Burnside artillery, 1 Hooker brigade (Union).

1015

Even though it’s not yet noon the Union is already quite battle wary. But with a sudden jolt
of energy, McClellan decides to commit new forces to attack the bridges – the Union gets a 4th
AM!

The Rebels win initiative though, and the newly rallied Stuart’s cavalry is sitting in a
very damaging position to gobble up the exposed right flank of the Union.

The Union selects Porter, Burnside, Sumner and Franklin AM’s, along with 2 artillery
AM’s.

Union strategy: Mansfield’s XII corps has taken so much damage that there is little
hope in ever rallying it, so activating it makes little sense. Instead we will bring the 3 still
strong East corps to the bridges and fords to attack position, while Franklin will try to save
what’s left of the completely botched Northern attack.

Confederate strategy: The Northern Union front is so weak and exposed that it actually
makes sense to attack it full strength, at least for this round. If I’m really lucky I can be
so devastating that part of my forces positioned there can be moved to defend Sharpsburg when
necessary, even though my defensive positions there are still pretty safe for now.
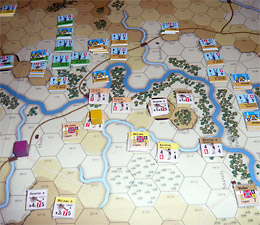
Burnside sneaks up on the fords

What happened:

The Union offensive turned out to have no effect, but at least now their forces are able to
attack again and again at some neuralgic spots. Die rolls were awful again for the Union, it seems
like they could storm the bridges forever and ever. The Confederates seem to dominate the
battlefield more and more.

Casualties:

Union: 2 Mansfield brigades, 1 Burnside brigade, 1 Porter artillery withdrawn, 3 Mansfield
brigades and 1 Pleasanton cavalry permanently eliminated.

Confederates: 1 Longstreet brigade.

Recovered: 1 Jackson brigade (Confederates), 1 Mansfield brigade and 1 Pleasanton cavalry
(Union).

1100

The Union stays at 4 AM. The Union wins initiative and selects Franklin AM, and puts another
Franklin, Burnside, Porter ands 2 Hays artillery AM into the cup.

Union strategy: My best chance seems to activate Franklin’s strong corps twice with
the slight hope of capturing the terrain behind bridge 3007 so as to make it easier for Sumner, who
is at a stalemate there. Porter and Burnside will simply attack the bridges and fords again, as
best as they can. What else can they do?

Confederate strategy: What can I say – The Union will look slightly silly once Franklin
is in a corner and my forces come up the hill behind him!

What happened:

Wow, wow, wow. A turn in which a lot happened very suddenly. The sheer doggedness of the Union
FINALLY pays off. The Union tactic to activate Franklin twice was a full success as his last
activation was the last of the turn, enabling him to take the important sunken road hex 2711
without danger of retaliation. There was also, lo and behold, a breakthrough at Myer’s Ford
(the game system makes it easier to attack major river fords – for some reason they are more
difficult to defend than small stream fords, probably because they are wider). There was also a
record of 5 withdrawn Confederate units, for the first time the Union is ahead in damage for a
turn. If the Union goes first next round it might spell disaster for the Rebels, who were standing
so proud until now. The Rebels have managed to get Stuart’s cavalry behind the Union lines and
send one single unit to threaten the Union bridge at 1904, so they also pose some threat.

Casualties:

Union: 1 Mansfield brigade, 1 Franklin brigade, 1 Hooker brigade withdrawn, 2 Mansfield
artillery overrun, 1 Bunrside brigade permanently eliminated.

Confederates: 4 Jackson brigades, 1 Longstreet artillery withdrawn.

Recovered: 2 Mansfield brigades, 1 Porter artillery (Union), 1 Longstreet brigade
(Confederates).

1145

Lo and behold – the Union not only gets another AM, it also wins the initiative. This might be a
decisive turn for the Union.

The “bridgehead” at 4613 has to be exploited before the Rebels can retaliate. So the
Union selects Burnside as the starting AM. Into the cup go another Burnside, 2 Franklins and 1
Sumner, along with 2 Hays artilleries.

Union strategy: Get in there as fast as possible with as many as possible.

Confederate strategy: Somehow prevent this….

What happened:

The game now really picks up pace after some slow rounds. The Union plans mostly paid off this
turn, IX Division achieved a major breakthrough at Myer’s Ford, and also Sumner managed to get
across 3007 bridge as well. Some suicidal attacks on the undefended artillery of the Confederates
did a lot of damage at the cost of many disruptions. The Rebels managed to cause some damage to the
still exposed right flank of the Union, but now that their back lines are threatened they can’t
really dare to exploit it any further. In fact the next round will probably see a huge retreat by
the Confederates to protect Sharpsburg and the entrance of the upcoming reserves at 5020.

The northern front situation looks really complicated now, with facing all over the place and
units constantly attacking each other’s back in the fray, but that’s how it probably would
be in real life.

Casualties:

Union: 2 Mansfield, 1 Hooker, 1 Franklin, 1 Porter brigade withdrawn, 2 Hooker artillery
withdrawn, 1 Mansfield brigade and 2 Hooker artillery permanently destroyed.

Confederates: 4 Longstreet brigades and 1 Stuart cavalry withdrawn, 3 Jackson brigades, 3
Jackson artillery and 1 Longstreet artillery permanently destroyed.

Recovered: 1 Hooker and 1 Franklin brigade (Union), 1 Jackson brigade and 1 Longstreet artillery
(Confederates).

1230

Disaster strikes and the Union actually LOSES an AM (back to 4). At least they win initiative,
selecting Sumner as first AM, then putting 2 Burnsides and one Franklin into the cup.

Union strategy: Exploiting the stormed bridge with the still strong Sumner at 3007 seems
to be first priority as that part of the Confederate line is now the most weakly defended. I have
basically given up Hooker and Franklin, which now serve as cannon fodder – as long as the keep the
Rebels busy I don’t care about them that much (Remark: How cruel wargames think in such
situations – would we be the same if we were commanding real men?).

Confederates: Regardless of how much damage I still could do to the Union front which is
a complete mess I think I should now bring my forces together in a circle around Sharpsburg.
Strangely enough my strong points (that give the Union a higher shot at AM marker increase) are
still in my hands, and I will be able to keep it that way this round, I think. Most importantly I
have to avoid getting as much damage as I did last round, the Union can afford it, I can’t.

What happened:

The Rebels are mostly withdrawing, but managed to annoy the Union here and there. Stuart’s
cavalry is racing back from the left flank to defend Sharpsburg. Jackson’s brigades try to
retreat slowly in an orderly fashion. Longstreet is mostly busy defending the South and
Boteler’s ford.

Sumner managed a good breakthrough (overrunning 2 artillery brigades on the way) and is amassing
his forces at bridge 3007. Franklin held the line and puts on some pressure. Burnside’s
breakthrough wasn’t as successful as hoped; there is

little hope of delaying Jackson’s reinforcements.

The Union is doing more damage each turn now, which will make it difficult for the Rebs.

Casualties:

Union: 1 Franklin brigade, 1 Porter artillery withdrawn.

Confederates: Evans brigade, 1 Walke brigade withdrawn, 2 Longstreet brigades and 2 Longstreet
artillery permanently destroyed.

Recovered: 2 Mansfield, 1 Hooker, 1 Franklin brigade, Sharpshooters, 2 Hooker artillery (in a
bout of luck the Union managed to rally all forces lost last round), 1 Stuart cavalry, 2 Lonstreet
brigades.

1315

The Union doesn’t gain a new AM and the Confederates get the initiative. The Union puts 2
Sumner and 2 Burnside + 2 Hays artillery into the cup.

Union strategy: Exploiting the two “bridgeheads” (Sumner and Burnside) is top
priority, we will keep swarms of men pounding on the Rebels!

Confederate strategy: If I’m lucky I can bring Stuart’s cavalry “home”
before Sumner comes to close to Sharpsburg. Sumner is my only worry right now, the other lines hold
well for now.

What happened:

A surprisingly bloodless round, because the Confederates are mostly on the defense. Sumner’s
and Burnside’s pushes didn’t work particularly well because the Rebels could use most of
their markers before the Union. Still, the reinforcements could be delayed next round if Burnside
goes first. Stuart’s cavalry has managed to reach Sharpsburg city limits and will probably
change into infantry to defend it. Porter is standing motionlessly before the middle bridge.

Casualties:

Union: 1 Porter artillery permanently destroyed.

Confederates: 3 Longstreet brigades withdrawn.

Recovered: 1 Franklin brigade (Union), 1 Evans and 1 Longstreet brigade (Confederates).

1400

The Union gets back to 5 AM again! No one wins initiative. The Union selects 2 Burnside, 1
Franklin and 2 Sumner as AM’s.

Union strategy: Push the Rebels where it hurts them the most: in the middle. Sumner! And
Franklin has recovered most of his troops by now, so it doesn’t hurt to try to rally them. And
I just hope my moves come before the Confederates this turn.

Confederate Strategy: Withdrawal on all sides, I guess. It’s a race against time, and
without the held bridges my lines suddenly become very thin!

What happened:

Again this was a far from decisive turn for both sides. Stuart’s cavalry has raced back to
protect Sharpsburg dismounted, but took some betting from misfired artillery and Sumner’s
attacks. Sumner has pushed forward heavily, and is still at nearly optimum strength with no losses.
Burnside wasn’t successful in preventing the AP Hill reinforcements, but has managed to keep a
steady attack line going, forcing the Confederates to commit heavily. The middle of the Confederate
lines is weakly defended and seems the most likely place where the Union will strike again. On the
plus side for the Confederates no +1AM roll strongpoints have yet been taken by the Union, so the
activation markers are still at risk if the Union rolls a “0”.

Casualties:

Union: Rest of Doubleday command was completely destroyed (all withdrawn).

Confederates: 1 Longstreet artillery, 3 Longstreet brigades permanently destroyed.

1445

No AM is gained or lost for the Union. The Confederates win initiative and select Longstreet as
first AM. The Union puts 2 Hays artillery, 2 Sumner, 2 Burnside and one Franklin AM into the
cup.

Union strategy: Push with Sumner, hold with Burnside.

Confederate Strategy: Break Burnside, keep Sumner at bay.

What happened:

This might have been the decision for the Union. An extremely bloody turn had the Rebels
frantically scramble to Sharpsburg while taking a heavy beating through Sumner’s relentless
forces. As AP Hill had to be withdrawn to defend Sharpsburg, the essentially weak Burnside division
could wreak havoc at the back lines. And the middle bridge has been taken, which means that all
three bridges are now owned by the Union. Porter is just waiting to bring his fresh and eager units
into the fray as well.

This was also a record casualty turn for the Rebels – forces they won’t be able to
recuperate. It seems impossible to survive the next 5 turns with these diminished forces.

Casualties:

Union: 2 Sumner, 2 Burnside brigades withdrawn, 1 Franklin brigade permanently destroyed.

Confederates: Anderson command completely destroyed, 3 reserve artillery, 1 Jackson brigade, 1
independent brigade permanently destroyed, 3 Longstreet, 1 Jackson brigade, 3 Stuart cavalry
withdrawn.

Recovered: 1 Hooker, 1 Franklin, 1 Porter brigade (Union), 1 Longstreet artillery, 1 Jackson
brigade (Confederates).

1530

The Union gets a new AM (conquering the entrance to the sunken road helped). Nobody wins
initiative, and the Union puts 2 Burnside, 2 Sumner,1 Franklin, 1 Porter and 2 Hays artillery AM
into the cup.

Union strategy: Attack on all sides -victory is near!

Confederate Strategy: Pray.

What happened:

A turn not as disastrous for the Confederates as feared. Many botched attacks by a too careless
Union result in many disrupted units, and Sumner’s yellow juggernaut has finally reached its
nadir. Still, Porter’s fist attack was successful and now he is entering the fray full
strength. Burnside has pretty much disintegrated, the Rebels hope to vanquish his forces and use
the brigades somewhere else.

The Union now owns the maximum +3 spaces for the AM increase roll.

Casualties:

Union: 2 Sumner, 1 Burnside, 1 Franklin brigade permanently destroyed, 2 Sumner and 3 Burnside
brigades withdrawn.

Confederates: 2 Longstreet artillery, 1 Stuart cavalry, 1 Jackson, 2 Longstreet brigades
permanently destroyed, 2 Longstreet, 1 Jackson brigade withdrawn.

Recovered: 1Burnside brigade (Union), 2 Stuart cavalry and 1 Longstreet brigade
(Confederates).

1615

No new action markers for the Union. The Union wins initiative and selects a Porter AM. Another
Porter, 1 Burnside, 1 Sumner, 1 Hooker (haven’t used him for ages!) and 1 Franklin AM come into
the cup, along with the usual 2 Hays artillery AM’s.

Union strategy: Victory is not as close as I hoped, but my new plan is to swing Hooker
around the back of the Confederate lines and cause more trouble. Porter seems my best bet for the
main attack drive this round.

Confederate Strategy: Sharpsburg is now heavily defended, but I don’t really have any
backup contingencies for my exposed outer lines. Right now I wish for no new AM’s for the Union
and a less than major victory at the end o the game. I don’t think I can manage more right
now.
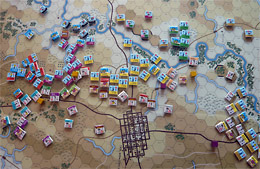
The Union's nearly unified front against Sharpsburg

What happened:

A Confederate nightmare come true – the Union now has a wide, unified front that is threatening
to engulf Sharpsburg. And the defensive lines are dwindling – this turn DR. Jones command is gone,
and many more commands are close to extinction. This is the endgame now, if things go bad the
Rebels might be completely eradicated!

Casualties:

Union: 1 Porter brigade withdrawn, 1 Sumner brigade permanently eliminated.

Confederates: DR Jones command permanently eliminated, 4 Jackson artillery permanently
eliminated, 2 Longstreet and 1 Stuart cavalry brigade withdrawn.

Note to self: once the enemy approaches separate your combined artillery and stack them with
infantry to protect them! Even a disrupted infantry can permanently kill infantry…

Recovered: nothing.

1700

Oh well, another AM for the Union (now 7, one more than the Confederates). The Confederates win
initiative though and start with Longstret.

The Union selects 2 Porter, 1 Burnside, 2 Franklin and 2 Sumner AM’s.

Union strategy: Automatic victory can probably not be achieved anymore, as the distance
to the back roads of the Confederates is still too big. Right now I have 11 VP, I just need one
more to achieve a major victory, so I feel safe.

Confederate strategy: Declining the last VP to the Union will be difficult, but defending
Sharpsburg should be possible for a little more time.

What happened:

A relatively bloodless round, but the Union gained a lot of ground. Sumner has recovered a
little and is pounding at the center again. The Rebels can do little but patch the holes in their
lines, as attacking is too risky. The end is nigh, I think…

Casualties:

Union: 1 Porter brigade permanently destroyed, 1 Porter and 1 Burnside brigade withdrawn.

Confederates: 1 Longstreet brigade and 1 Stuart Cavalry permanently destroyed, 1 Stuart Cav. And
1 Jackson brigade withdrawn.

Recovered: 2 Longstreet brigades (Confederates).

1745

The Union doesn’t gain a new AM. The Confederates win initiative and select Longstreet. The
Union selects against 2 Porter, 1 Burnside, 2 Franklin and 2 Sumner AM’s.

Union strategy: Keep doing what I’m doing.

Confederate strategy: Keep doing what I’m doing.

What happened:

The turn whizzes by with the Rebels not able to do much and the Union causing lots of damage –
without conquering the decisive space though that will bring major victory. But that will happen
next turn.

Casualties:

Union: 1 Porter and 1 Burnside brigade permanently destroyed, 1 Porter and 1 Burnside brigade
withdrawn.

Confederates: 2 Jackson and 2 Longstreet arty permanently destroyed, 5 Jackson brigades
withdrawn, 1 Stuart cavalry withdrawn.

Recovered: 1 Stuart cavalry.

1830

The final turn of the game and the Union gets another AM and also win initiative, selecting
Porter. They will put 2 Porter, 2 Burnside, 2 Franklin and 2 Sumner Ams into the cup, and also 2
Hays artillery (the last two turns were spent bringing the Hays arty to the front, which meant they
had to be moved under Porter’s command).

Union/Confederate Strategy: Nuff said.

What happened:

The Union proves too much for the weakened defenses of Sharpsburg – after they conquer half of
the city the Confederate high command decides to spare lives and give up completely. The end came
quick, but the losses for the Union were not small. With 16 VP’s it is more than a major
victory, though – all three bridges over the Antietam creek were conquered, the canal blocked and
Sharpsburg fell under Union control. McClellan couldn’t have hoped for more success and will
live on as one of the great commanders of his day – in hindsight his withholding of important
commands during the battle will be seen as the sparing of lives and good caution. He has become a
hero.

Final thoughts

When I started playing the game I liked it more then when I ended it. All in all Antietam is a
difficult battle to simulate in an enjoyable way. The restrictions for the Union make for a very
frustrating beginning of the game. The rules are slightly underexaggerating when they say that the
“Union player has to be satisfied with small gains” at the beginning of the scenario. You
can tell by my frustrated comments that the first turns were very boring for the Union side, as
they basically achieve nothing until they conquer one of the bridges or fords. Once they do so it
becomes boring for the Confederate player, as he doesn’t stand a chance against the Union
onslaught. My game showed that many turns go by until something happens, but once it does it favors
the Union, who can always throw pieces into the fray.

There are also not a lot of strategic options. The Confederates’ best strategy is to play
very carefully and not risk any units in attacks. As long as the Union cannot attack in full force
this works perfectly, but is also slightly boring.

If there is an exciting “race for victory” at the end of the game depends very much on
when exactly the Union comes over one of the bridges, but once they do the Confederates can do
little but retreat slowly and hope for the best, which is also frustrating.

This means that a game won by the Confederates mostly means a boring game for the Union player
(he will not have achieved much) and a game won by the Union is boring for the Confederates.
I’m simplifying slightly, but this is my feeling.

Also, Antietam takes the Glory system to its limit regarding counter density. I feel that the
system is interesting and rewarding, but more apt for simulating smaller battles. Once you got a
big unified front attacking is usually too risky and little stuff happens, in smaller battles the
maneuvering becomes more important, and this is where facing and attacking from behind really
become important factors.

Of course this is realistic, but drawing AM’s for forces that basically pile in very fiddly
stacks in different orientations becomes very tiresome, especially as you activate command after
command (not once did I use the combined command option in this game, it always seemed too risky.
Actually the non-combined command activation gave a strong force the advantage as it can advance in
waves instead of using one single all-out attack).

The immense amount of artillery firing over varying terrain with difficult to spot LOS was also
tiresome, as most of the time the artillery doesn’t actually hit anything. Again: realistic,
but not so much fun when you have endless artillery counters to check and roll for on both sides,
most of them only hitting something on very high rolls.

The recovery rules became very annoying after a while, as some units with high morale (like the
Sharpshooters of the Union) become practically invincible and regenerate several times. Artillery
is the worst offender here – it rarely makes sense to deploy artillery against artillery, as
withdrawn artillery will simply regenerate quickly (average disrupted morale is 7, which gives you
a 80% chance of regenerating it), and most of the time in the same space where you killed it! Also
a realistic idea, but it can’t be realistic that units can be disrupted again and again and not
suffer from it. Also it seems strange that only units of activated commands recover (even though it
makes the game more playable), even if units don’t get orders they could theoretically recover
by not doing anything.

The leader system also has some fiddliness involved – if you play carefully your leader will
almost always be positioned in a way to command all your units. I had only very few instances where
suddenly the leader was cut off, but even then the units that were out of command where in a ZOC,
which meant that they could still fight and do stuff. The leader counters are small and fiddly and
tend to obstruct spaces, I wonder if they couldn’t have been left away and replaced with some
kind of simple rule, as they don’t really have any effect on individual battles anyway.

Gripes aside – I enjoy the “Glory” system basically, I just would recommend using more
small-scale scenarios, like for example the “small” Antietam scenarios. And regarding
playability, “Across 5 Aprils” is perhaps the quicker and more accessible game, even
though it also has some quirks.

12.03.2008: Im Märzen der Bauer

Mensch ärgere dich!
Kindliches Spiel besteht vor allem in der Realitätsbewältigung. Kinder steigen in ihren imaginären Welten zum allmächtigen Schöpfer auf, der Spielfiguren sterben und wiederauferstehen läßt. Sie lernen, gemeinsam mit anderen fiktive Welten zu verwirklichen. Das wiederum erlaubt ihnen als Erwachsene kreativ Handlungsoptionen zu durchdringen.
Für Volljährige ist es allerdings zu spät, die Nevenbahnen im Gehirn noch neu zu verlegen. Wer als Hänschen keine große Vorstellungskraft entwickelt hat, erwirbt sie als Hans wohl nimmermehr. Es ist deshalb noch unklar, welchen evolutionären Vorteil das spielerische Treiben im Erwachsenenalter besitzt. Steigern Scrabble und Monopoly möglicherweise den Fortpflanzungserfolg?
Immerhin ist erforscht, daß erwachsene Affen mit körperlichen Spielen gezielt ihre Konflikte eindämmen. Ratten liefern sich Scheinkämpfe, um die soziale Hackordnung zu etablieren. Beim Menschen dient die selbstgenügsame Beschäftigung der körperlicher Ertüchtigung und dem sozialem Zusammenhalt, sie vertreibt Langeweile und kompensiert den Alltagsfrust. Für Künstler ist es gar der Motor ihres Schaffens.

Nach einem Artikel von Hubertus Breuer in der Süddeutschen Zeitung. Dabei könnte der letzte Satz direkt aus einem Fernseh-Report über Moritz stammen.
1. “Agricola”
“Agricola” und “Sechsstädtebund” standen zur Auswahl: Das eine hatte Moritz, das andere Günther noch nicht gespielt. In der Entscheidung Künstler gegen Naturwissenschaftler setzte sich selbstverständlich der Künster durch. Vielleicht gab auch der Titelgewinn als unser nächstes “Spiel des Monats” den Ausschlag.
Günther durfte aus dem Gedächtnis und anhand des umfangreichen Spielmaterial die Regeln erklären. Die Spieler bilden sich fort, machen Anschaffungen, Renovierungen, erwerben Knecht, Magd und Vieh und alles was zu einer Bauerei dazugehört. Moritz war über die Komplexität der Regeln vorgewarnt. Deshalb konnte er gleich erleichtert kommentieren “Eigentlich ganz einfach”! In bezug auf Agricola-Spielen hat er absolut recht, aber in bezug auf Agricola-Gewinnen absolut unrecht!
Die ganze Spielgestaltung muß stimmen. Sowohl in der Schwerpunkt-Bildung bei der landwirtschaftlichen Produktion als auch in der Diversifizierung in Acker und Weiden, Gemüse und Getreide, Schafe und Rinder muß die richtige Dosis vorhanden sein. Mir wurde zum ersten Mal der gewaltige Unterschied bewußt zwischen “Man plant vor sich hin” und unserem Westpark-Gamers-Motto “to have a plan”.
Günther wollte die “Bettlerkarte”, die ein Spieler nehmen muß, wenn er seine Familie nicht mehr ernähren kann, gleich als “unsinnig” aus dem Spiel nehmen, doch Walter widersprach heftig. Rosenberg hat sein Spiel so ohne Fehl und Tadel durchkonstruiert, daß sicherlich auch die Bettlerkarte einen Sinn haben mußte. Wie demonstrativ vernachlässigte Walter die Nahrungsbeschaffung und handelte sich dafür gleich in der ersten Ernährungsphase eine Bettlerkarte ein. Die Demonstration ging schief, am Ende wurde er Letzter. Aber auch ohne Bettlerkarte hätte er diesen Platz eingenommen. Spricht das jetzt für oder gegen die Bettlerstrategie?
Moritz schockte seine Mitspieler mit einer kleinen Anschaffung: Er erwarb einen Forst, auf den pro Runde zwei Holz gelegt wurden, und der zusätzlich die Eigenschaft besaß: “Wer diesen Forst betritt, muß an dich 2 Nährwerte bezahlen.” Sogleich erhob sich die Frage: Darf Moritz als Forst-Eigentümer selber diesen Forst betreten? In der Spielregel ist dazu nichts beschrieben, per Abstimmung wurde Moritz dieses Recht zugestanden, doch Walter ging die Wette ein, daß dies falsch sei (um eine Schokolade). Rosenberg muß hierzu wohl noch mal persönlich seinen Senf dazugeben. Oder steht das schon im Internet unter FAQ?
Moritz’ Forst besaß am Ende doch nicht die befürchtete Wunderkraft. Er bekam zwei- oder dreimal die 2 Nährwerte von seinen Mitspielern und strich selber auch massig Holzklötzchen ein, doch was soll ein Mann mit soviel eigenem Holz vor der Hütte?
Aaron machte in Steinbau und wurde Dritter. Moritz leistete sich die umfassendste Ausbildung und hatte die prächtigsten Gemüse- und Getreideäcker; damit wurde er Zweiter. Günther ging zielstrebig auf Familienzuwachs los und hatte als einziger sein kompettes Spielfeld mit allen möglichen Utensilien zugebaut. Das reichte zum Sieg. Wo Walter mit seiner Schafzucht geblieben ist, habe ich oben schon erwähnt.
WPG-Wertung: Moritz vergab 8 Punkte und war damit um 2 Punkte besser als der bisherige WPG-Durschnitt.
Walter hat schon eine Rezension geschrieben.
2. “Flaschenteufel”
Der Teufelsstich stand nach dem zweiten Stich auf der roten 14, da spielte Moritz die gelbe Zwei aus. Eine Verzweiflungstat, aber nicht gut genug getimed. Aaron gab die 18, Günther die 22 und Walter die Eins. Ab sofort zählten nur noch die hohen Karten! Aber nicht mehr für Moritz.
Walter spielte im ersten Stich die blaue Vier aus. Das war im Gegensatz zu Moritz’ Harakiri kein Nervenkitzel, egal ob er diesen Stich bekommt oder nicht. Hat der Flaschenteufel etwa etwas mit Bridge zu tun?
Keine neue WPG-Wertung für ein vorzügliches Spiel.

26.02.2008: “Verspielt”

Lang Lang spielte Liebestod und Liebestraum in der Philharmonie. Das war am Sonntag. Moritz spielt sein eigenes Klavierkonzert in der Hochschule für Musik. Heute. Aaron läßt seine Siemens-Muskeln in Helsinki spielen, und Günther spielt Eisenbahn in unbekannten 18xx-Gefilden. Sie alle fanden heute nicht den Weg zum Westpark.
Loredana und Peter spielen auf dem politischen Parkett noch keine entscheidende Rolle, es reicht ihnen am kommenden Sonntag zwei zweite Geigen zu spielen. Schaut mal nach, wo sie auf dem BAMSZ zur Maxvorstadt Verstecken spielen! Am Westpark wollten sie diesmal den Vorreiter spielen, doch dann wurde Hans vom seinem Kreislauf ein böser Streich gespielt. Er wollte nicht mit seinem Leben spielen und sagte kurzfristig den Spielabend ab.
Walter hatte noch mit dem Gedanken gespielt, Moritz zuzusehen, wie er bei Klavierspielen das Orchester an die Wand spielt. Doch dazu war bereits zuviel Zeit verspielt. Es reichte nur noch zu einem Wortspiel.